iPod Touch 3rd Generation Screen Repair Take Apart Guide
June 4, 2018 | 0 Comments
View the downloadable version of our how to fix your iPod Touch 3G screen guide.
The RepairsUniverse team has put together a video repair guide for replacing a damaged or cracked touch screen digitizer for the iPod Touch 3rd Gen. In this guide, you will learn the steps to properly remove and replace a digitizer on your iPod Touch 3rd Gen easily and safely.
This guide will help you install the following iPod Touch 3rd Generation parts:
- iPod Touch 3rd Generation Touch Screen Digitizer Assembly + Frame + Home Button
- iPod Touch 3rd Generation Touch Screen Digitizer Replacement
- iPod Touch 3rd Generation LCD Screen Replacement
- iPod Touch 3rd Generation Battery Replacement
- Other Internal Parts, Buttons, Flex Cables, and Housing
Tools Required:
- Open Safe Pry Tool
- Small Phillips Screwdriver
- Hot Air Gun/Hair Dryer
iPod Touch 3rd Generation Touch Screen Glass Digitizer and LCD Screen Repair Take Apart Guide:
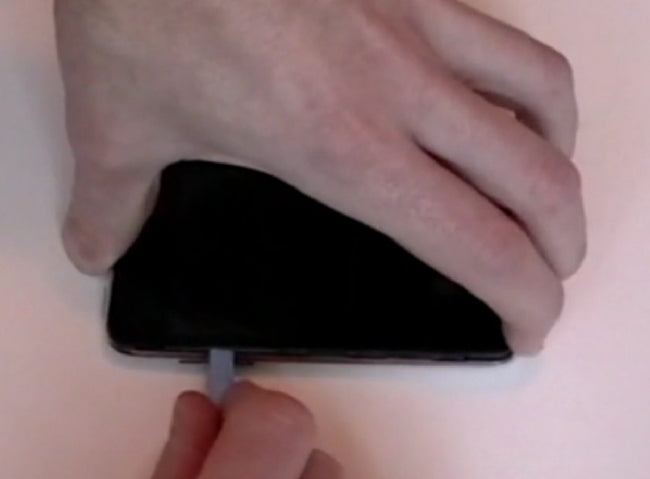
- To begin taking apart your iPod Touch 3rd Generation, you will need to remove the glass digitizer from the chrome backing. Using your open safe pry tool, gently slide it between the glass and the chrome, prying slightly as you go around the edges, as shown in Figure 1.
Figure 1
- There are clips between the two that will need to be pried and released as you go. You will want to start at the bottom of the iPod Touch 3rd Generation so you don?t damage the ribbon cable that is connected within at the top.
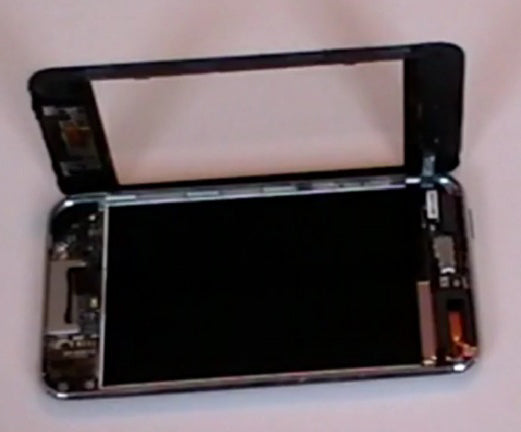
- Once the clips have all been released, you can lift up the digitizer that is now separate from the chrome backing, as shown in Figure 2. Be careful while doing this, as the ribbon cable is still attached.
Figure 2
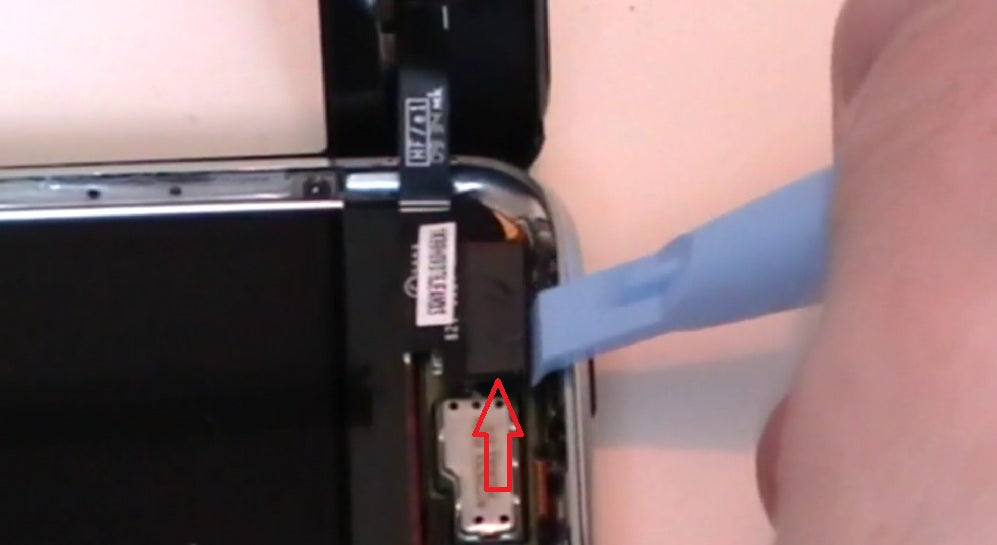
- You will need to gently remove the ribbon by using the open safe pry tool to pop the ribbon up, as shown in Figure 3. Once you have removed this ribbon safely, you can gently separate the digitizer from the backing.
Figure 3
- You will need to separate the midsection from the glass digitizer by using your open safe pry tool to gently pry them apart. You will need to work along the edges to slowly separate the two parts without doing any damage to the iPod. If you have a hard time getting the two pieces separated, you can use a hair dryer or other heating tool to warm the glue holding the midsection and digitizer together, and it will release slightly, making the prying process a little easier.
- After prying apart with the open safe pry tool, you may need to continue using your fingers to gently pry them apart. Work slowly, gently separating slightly as you go around. If you are replacing a cracked digitizer, be careful to watch for small pieces of glass that may be sharp.
- Once the two parts begin to separate, you can gently remove them from one another. Once separated, thee home button will come off, so you should have three separate parts. There may be excess glue left on the midsection. Remove this with your hands by gently pulling it off.
- Once all the glue is removed, you can replace the home button by snapping it into place, and then attach the new digitizer. Reverse the steps above to install the new digitizer and put the IPod Touch 3rd Gen. back together to enjoy a like-new iPod Touch.
The iPod Touch 3rd Generation is now disassembled and you can replace the damaged part(s) with new ones. Reverse the instructions above to reassemble your phone.
Notice:
Repairs Universe's guides are for informational purposes only. Please click here for details.
Learn about restrictions on reproduction and re-use of Repairs Universe's repair/take-apart/installation guides, and about creating hyperlinks to our guides.