LG G2 D800 Take Apart Repair Guide
June 4, 2018 | 0 Comments
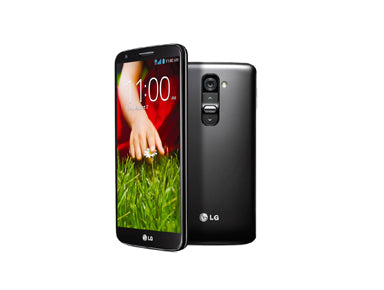
In this repair guide we show you how to replace the screen on a LG G2 smartphone. If you have dropped your LG G2 it is likely that the glass digitizer has become shattered and the touch sensitivity and LCD has stopped working. The LG G2 has a bonded LCD and glass touch screen - meaning you will need to replace the entire screen assembly in order to repair a broken digitizer and/or LCD. Visit our LG G2 parts page for all your repair needs.
Recommended Tools:
- Small Phillips Screwdriver
- Safe Open Pry Tool
- Spudger Opening Tool
- Fine Point Tweezers
- Precision Knife Set
- Heat Gun or Hair Dryer
- Adhesive Strips
LG G2 D800 Take Apart Repair Guide
LG G2 D800 Teardown Guide (AT&T)
RepairsUniverse shows you how to disassemble your AT&T LG G2 D800 smartphone with this Official LG G2 D800 Teardown Repair Guide. The instructions we have provided will show you step by step how to teardown and disassemble your LG smartphone to replace or repair a damaged display assembly or internal component. Visit RepairsUniverse.com to learn about the different repair options we offer, all which will help get your Samsung device working like new again quickly, and affordably!

Back Cover Removal
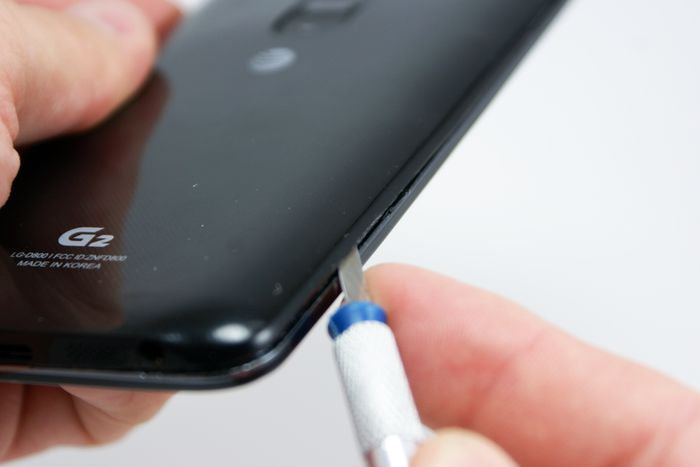
- The seam between the back battery cover and the frame/front housing is relatively tight. To safely begin separation use the precision knife to release the first clip.

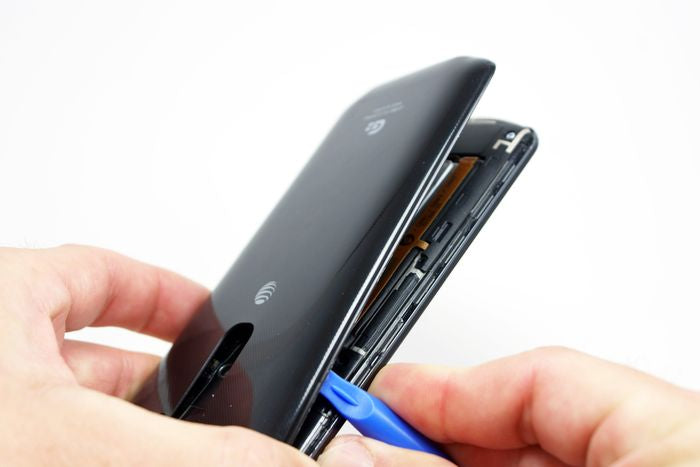
- Now, utilize the plastic opening tool and continue working your way around the entire G2 back battery cover, gently freeing all of the clips.

Ear-piece Speaker
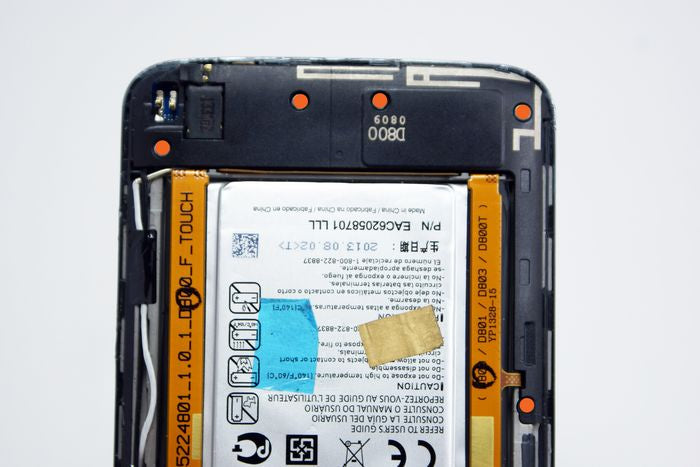
- Locate and remove the five small Phillips screws (#00) that secure the loudspeaker in place (marked with orange circles).

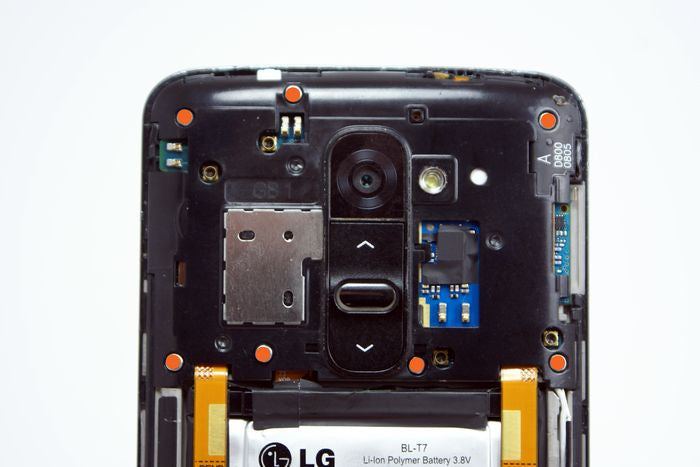
- Next, locate and remove the seven small Phillips screws (#00) that secure the protective cover/rear housing to the motherboard (marked with orange circles).
- Once the screws are removed you can use the plastic opening tool or spudger to pry up the protective cover/rear housing and remove it from the LG G2 D800.

Front Facing Camera
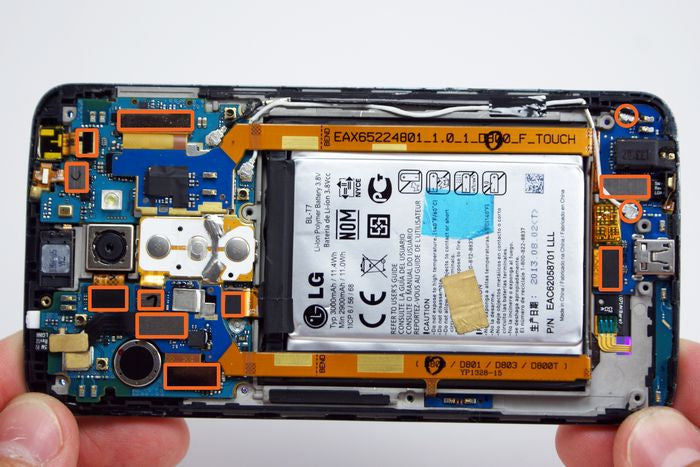
- Locate the two coaxial cable plugs; use your fine tip curved tweezers or spudger to disconnect them (marked with orange circles).
- Next, locate the ten wafer plug connectors; again use your fine tipped curved tweezers or spudger to disconnect them (marked with orange rectangles).

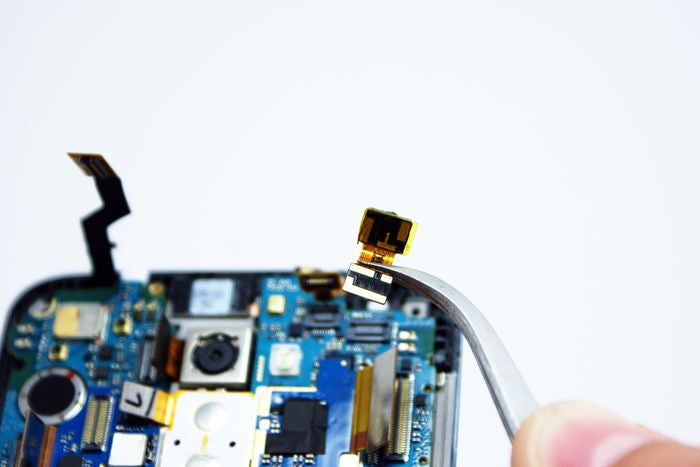
- The front-facing camera should now be free for removal. Use the fine tip curved tweezers to carefully lift it from its housing and out of the LG G2.

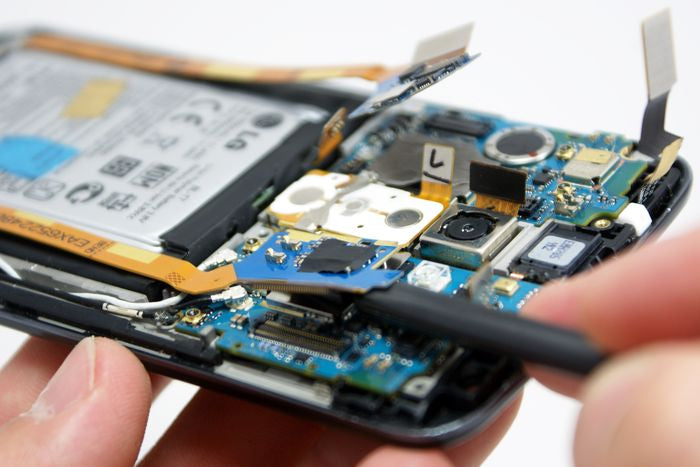
- The small logic boards on both sides of the power & volume button assembly are secured with a small amount of adhesive, use the flat end of your spudger to pry these up from their location (use of a heat gun or blow dryer may help).

Battery
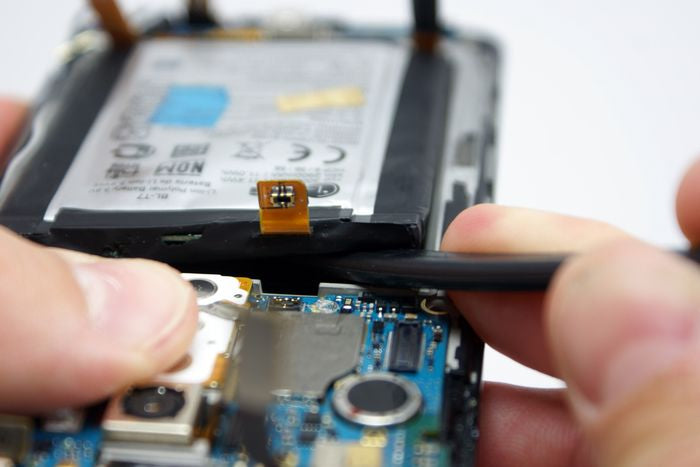
- The battery can now be removed from the G2 smartphone. Use the flat end of the spudger to gently pry it up and out of its location. Since it is secured by a small amount of adhesive, the use of a heat gun or blow dryer may help.

Dock Connector and Headphone Jack Assembly
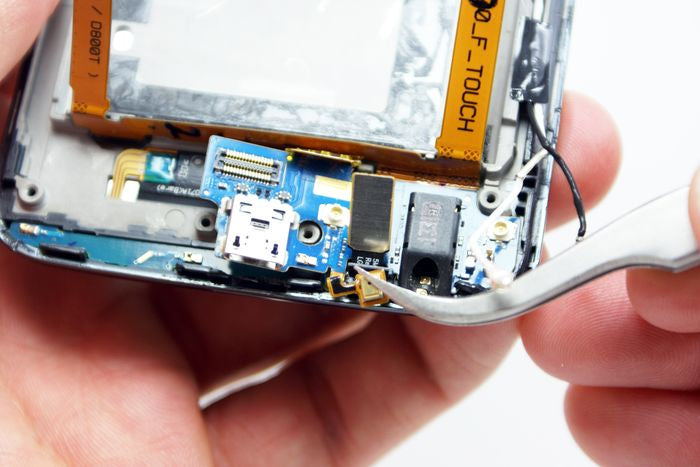
- The dock connector and headphone jack assembly is secured into the bottom of the LG G2 with adhesive. Use a little heat, and the flat side of your spudger, to carefully pry it up and out of its location.
- Be mindful of the small microphone when removing the dock port and headphone jack assembly.

Motherboard
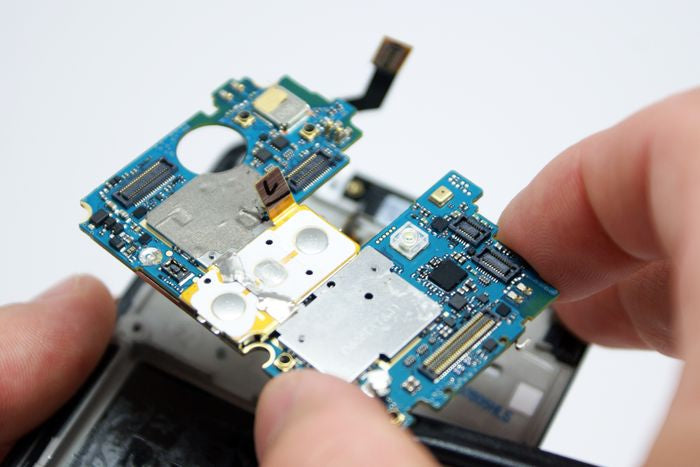
- The motherboard can now be removed from the LG G2. Gently maneuver it up and away from the LG smartphone.

Power and Volume Button Assembly
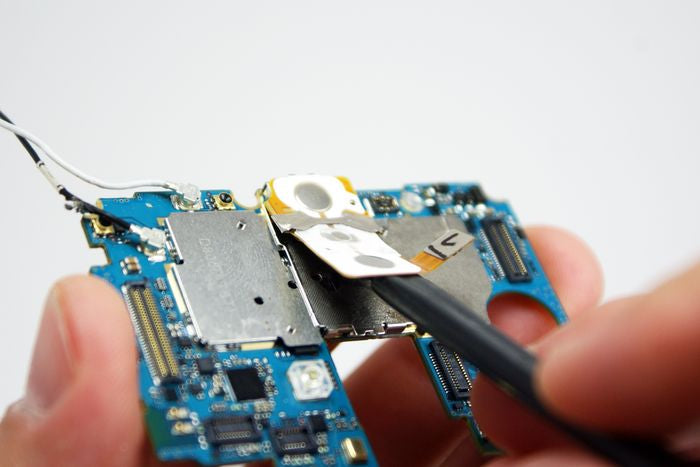
- Next you can remove the power and volume button assembly. Use a little heat, and the flat end of the spudger, to gently pry it up and out of the LG G2.

Sensor Flex Cable
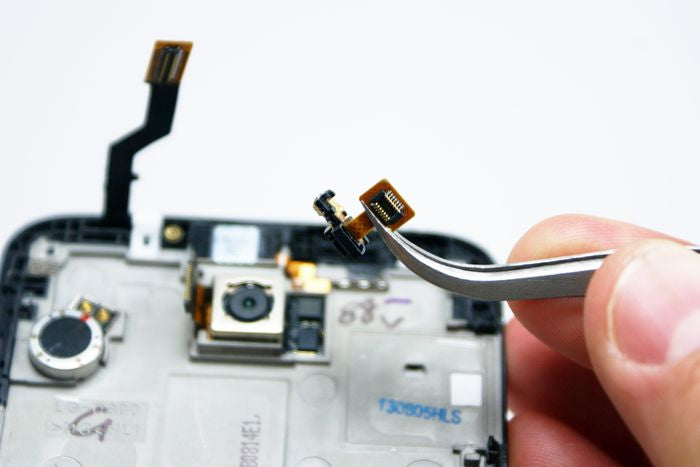
- The sensor flex cable should now be free for removal, use the fine tip curved tweezers or spudger to gently lift it up and out of its location..

Rear Facing Camera
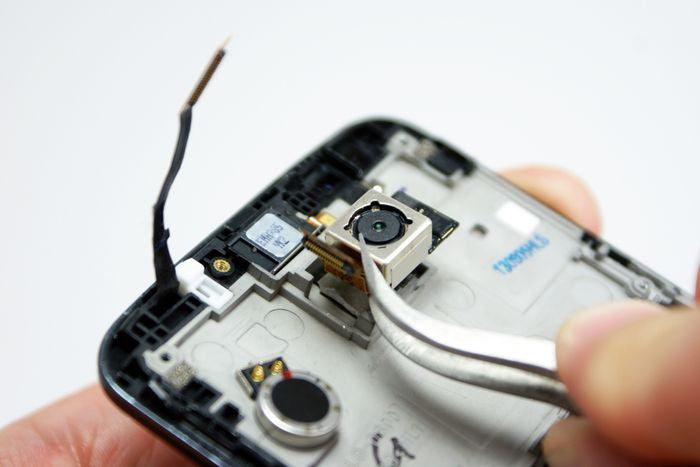
- Now, use the fine tip curved tweezers to remove the rear-facing camera from its housing. It is secured with a small amount of adhesive, so the use of a heat gun or blow dryer may be helpful.

Earpiece Speaker
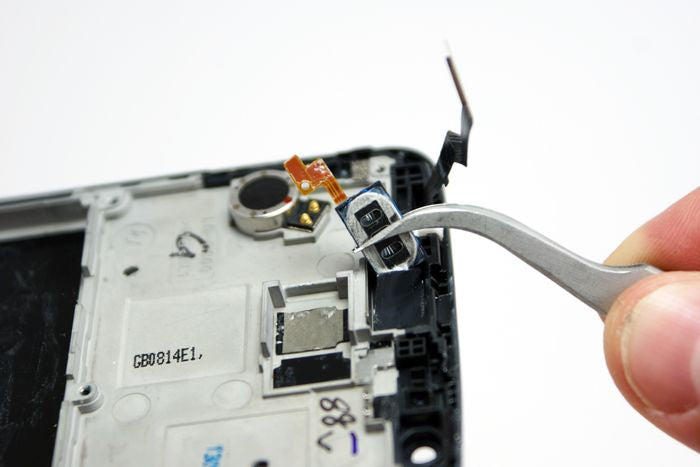
- Next, the earpiece speaker should be free for removal. Use a small amount of heat to warm up the adhesive securing the ribbon flex cable in place, and then the fine tip curved tweezers to lift the earpiece speaker up and out of the G2.

Display Assembly (LCD and Touch Screen Digitizer)
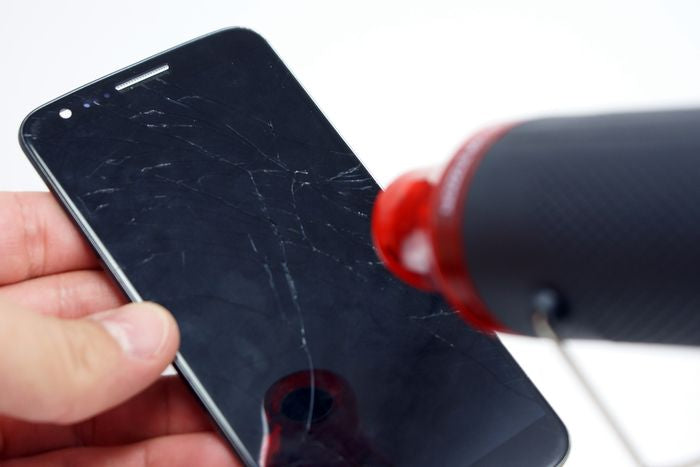
- The display assembly (LCD & touch screen) are fused together and secured to the frame /front housing of the LG D800 with a good amount of adhesive. It will require heat, and patience, to separate the display assembly from the frame.
- This procedure is only recommended on a G2 with a DAMAGED display that requires replacement. Use the heat gun or blow drier to heat the adhesive securing the display assembly (LCD & digitizer) to the G2?s frame/ front housing. The heat will loosen the adhesive securing the parts together.

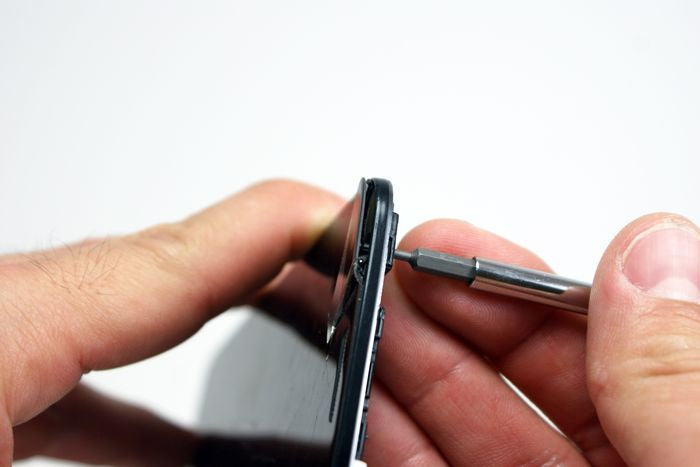
- To separate the display assembly from the frame/front housing, utilize one of the screwdrivers and through the front-facing camera hole, while securely gripping the sides of the G2 frame, carefully push the damaged display assembly away from the LG G2?s frame.

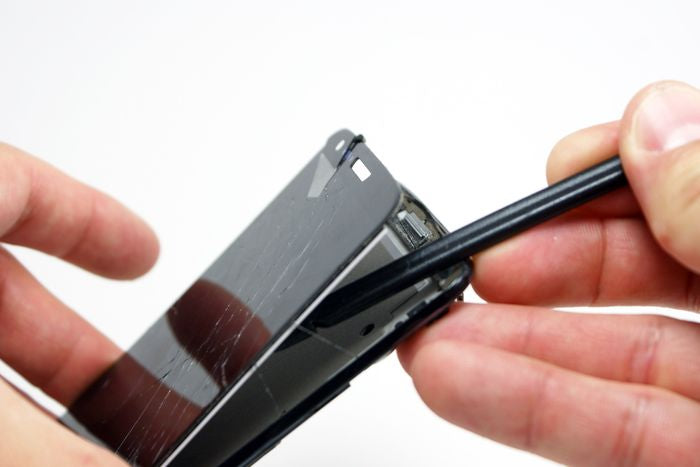
- You can now use the plastic opening tool or nylon spudger to continue working around the entire G2 display assembly slowly separating it from the frame/ front housing.
Notice:
RepairsUniverse does not accept any liability for damage, or injury caused, while you are following our disassemble guides. We make no representations, warranties, or conditions of any kind, express or implied. Utilizing these guides to assist you in repairing your mobile devices will void your warranty. RepairsUniverse strictly prohibits altering or modifying our teardown guides for commercial use, reproduction, or publication
