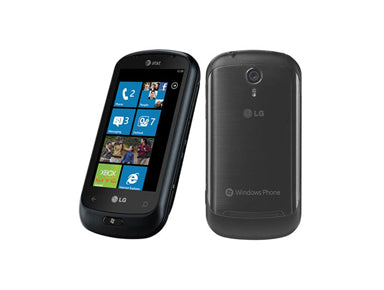
LG Quantom C900 Screen Repair Take Apart Guide
June 4, 2018 | 0 Comments

View the downloadable version of our how to fix a LG Quantom C900 screen guide.
The RepairsUniverse team has created a video take apart guide for the LG Quantum C900. Following this guide will walk you through all the steps required to repair a damaged glass touch screen digitizer, LCD display screen, and other internal parts.
This guide will help you to install the following LG Quantum C900 parts:
Tools Required:
LG Quantum C900 LCD & Touch Screen Digitizer Replacement Guide:
The LG Quantum C900 is now disassembled and you can replace the damaged part(s) with new ones. Reverse the instructions above to reassemble your phone.
Applying Adhesive to the Touch Screen Digitizer:
LG Quantom C900 Written Take Apart Screen Repair Guide:
- Remove back cover, battery and SIM card.
- Remove the 6 exposed chrome screws. Remove the back cover and set aside, set aside button covers (volume, camera and power) using a soft pry tool.

- Open the slider; remove the black screw covers and two external screws. There is an open hole that allows you to access a 'hidden' screw at the bottom of the phone across from the opposite slider screw.
- Remove the screw and shield from over the headphone connector and gently remove it (pry away from the phone's main board).Remove the last top cover screw thru the access hole now visible.

- Remove the top cover using a soft pry tool and disconnect the digitizer ribbon cable.

- GENTLY pry the glass out of the front face plate (real glass be careful).Remove speaker grille and set aside. Remove the spacer gasket form the old glass and set aside (to be reused with new face) fish new digitizer ribbon cable thru face plate, reinstall speaker grille and gently install new glass into face using scotch tape to hold glass (and windows button) in face securely. Make sure to remove plastic covers on from the new face and install spacer gasket from old screen.
- Reattach the digitizer ribbon cable and snap front face back onto main assembly (careful to not touch the inside of the new screen). Flip phone over and reinstall 4 screws. Using a screw reinstall audio connector and cover. Snap on back cover and reinstall 6 screws, use scotch tape to hold power, volume and camera buttons during reassembly
- Replace battery, sim and cover. Turn phone on and test.
Notice:
Repairs Universe's guides are for informational purposes only. Please click here for details.
Learn about restrictions on reproduction and re-use of Repairs Universe's repair/take-apart/installation guides, and about creating hyperlinks to our guides.

