Nokia Lumia 920 Take Apart Repair Guide
June 4, 2018 | 0 Comments
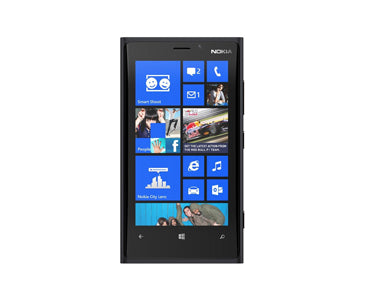
Repair a broken or cracked Nokia Lumia 920 screen or other internal component using this detailed, step by step repair guide. We walk you through each step you will need to perform to safely and effectively open your device and repair most major components.
This guide will help you install the following Nokia Lumia 920 part (s):
- Nokia Lumia 920 LCD + Touch Screen Assembly
Required Tools:
- Safe Pry Opening Tool
- T5 Torx Screwdriver
- T3 Torx Screwdriver
- Adhesive Strips
- Heat Gun/Hair Dryer
Lumia 920 Repair Guide:
How to fix a Nokia Lumia 920 (Step-by-Step Guide) :
-
To begin your repair you will need to fully power off your Nokia Lumia. Once it is powered off you can begin by removing the two (2) Torx T5 screws located on the bottom of the device near the USB port.
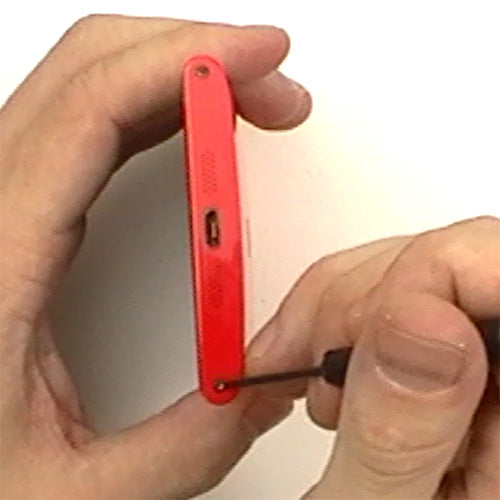
Figure 1
-
Once these screws are removed you can then use a safe open pry tool to pry in between the screen and the housing. Start near the bottom and slowly work your way around the edges, releasing the screen assembly and motherboard from the back housing. Be cautious of a flex cable still attached from the back housing to the motherboard.
-
Gently flip the housing over but be careful not to tear the connected flex. You can now remove the small metal plate covering the connection of this flex cable. It will have two (2) prongs located on the top side of the motherboard that will need to be released in order to fully remove the metal plate.
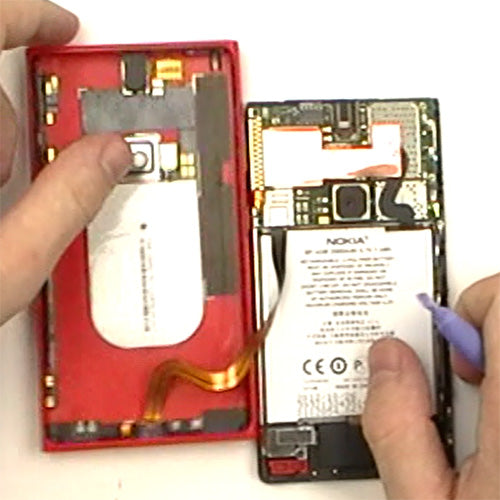
Figure 2
-
With the metal plate removed you will be able to safely disconnect this pop connector and place the back housing to the side.
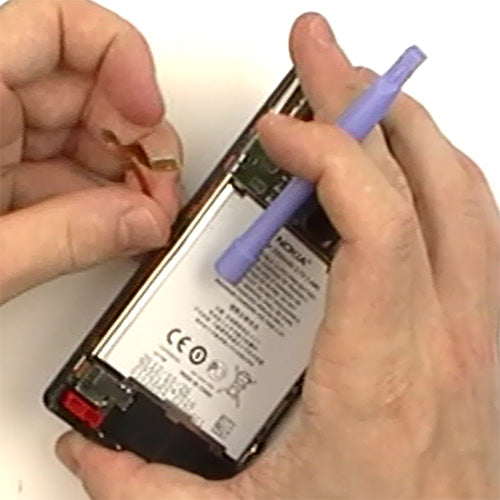
Figure 3
-
There will be one more pop connector located under this metal plate which will attach to the button flex cable running along the side of the device. Use a pry tool to gently release the connection and lift the cable away from the housing. It will be held in place with adhesive so take your time and be sure not to tear this flex cable. Once released it can be put to the side for reassembly.
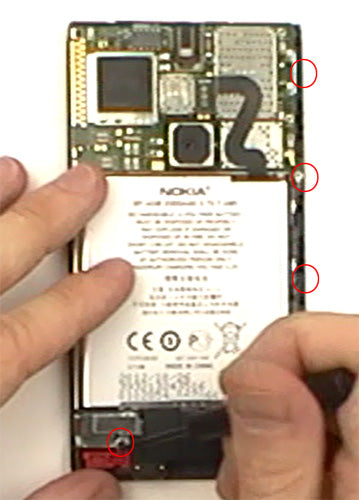
Figure 4
-
Using a Torx T5 screwdriver you will need to remove the three (3) screws located on the right side of the device. With these screws removed you can then remove one more T5 screw located in the bottom left corner, near the battery.
-
With this screw removed you will be able to remove the metal bracket and plastic filler located at the bottom of the battery.
-
The lower connections near the battery can now be released. This will include 2 pop connectors and releasing the cables and moving them away from the housing. There is a bit of adhesive holding one of the flex cables to the housing, so be cautious not to damage these.
-
The battery is now ready to be released and removed. To do this, gently pry up on battery connections flex cable and release it from the motherboard. With the battery released you can now gently pry up the battery, insuring not to bend it or damage it.
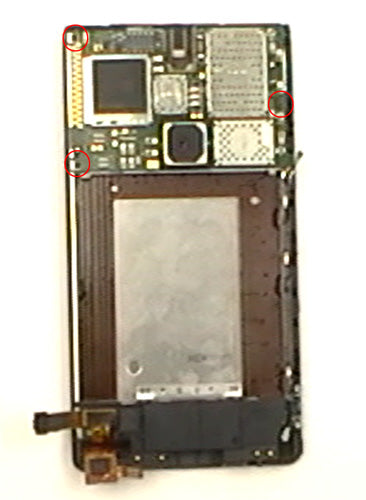
Figure 5
-
There are now three (3) torx T3 screws that will need to be removed in order to remove the motherboard from the device. With these screws removed you will then be able to lift the full housing and motherboard assembly away from the screen assembly (and front housing). To do this, pry along the RIGHT edge of the device. Be cautions and the left side is located under small pieces of metal housing which can cause damage to the motherboard. Once the upper right section of the motherboard and housing are released you can release the four (4) clips holding the lower section in place. Two will be in the lower battery compartment and the other two will be plastic near the bottom of the device. With these released you will be able to lift the board slightly and slide it to the right and away from the screen assembly.
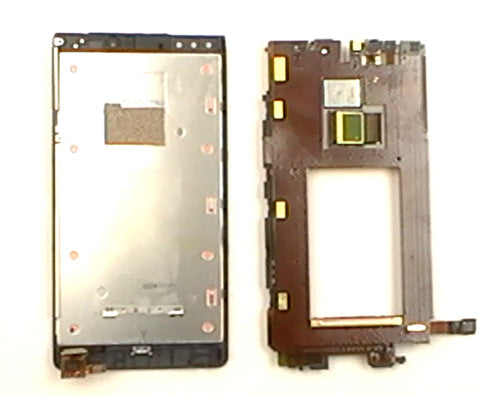
Figure 6
-
With the motherboard now removed you can now heat the front and back of the assembly using a heat gun or hair dryer. Use medium heat for about 30 seconds on each side of the screen, consistently moving the heat to insure you do not burn or melt one area. Stay a few inches away and thoroughly heat the adhesive holding the LCD and touch screen to the front frame. With the adhesive warmed you will be able to use a safe open pry tool to gently begin prying along the outside edges of the front frame to lift the LCD and touch screen out as one piece. With this complete you can then clean up any leftover adhesive and replace your screen assembly.
Simply replace the damaged parts with the new ones and reverse the order to put your phone back together again.
Notice:
Repairs Universe's guides are for informational purposes only. Please click here for details.
Learn about restrictions on reproduction and re-use of Repairs Universe's repair/take-apart/installation guides, and about creating hyperlinks to our guides.
