Samsung Galaxy Tab 2 7" Repair Guide
June 4, 2018 | 0 Comments
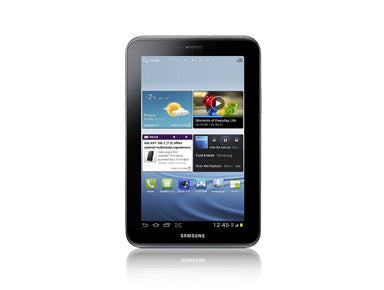
Repair a broken or cracked Samsung Galaxy Tab 2 7" screen or other internal component using this detailed, step by step repair guide. We walk you through each step you will need to perform to safely and effectively open your device and repair most major components.
This guide will help you install the following Samsung Galaxy Tab 2 7" part (s):
- Samsung Galaxy Tab 2 7" Touch Screen Digitizer Replacement
- Samung Galaxy Tab 2 7" LCD Screen Replacement
- Samsung Galaxy Tab 2 7" LCD + Touch Screen Digitizer Replacement
Required Tools:
- Safe Pry Opening Tool
- Small Phillips Screwdriver
- Small Flathead Screwdriver
- Adhesive Strips
- Heat Gun/Hair Dryer
Samsung Galaxy Tab 2 7" Repair Guide:
How to fix a Samsung Galaxy Tab 2 (Step-by-Step Guide) :
-
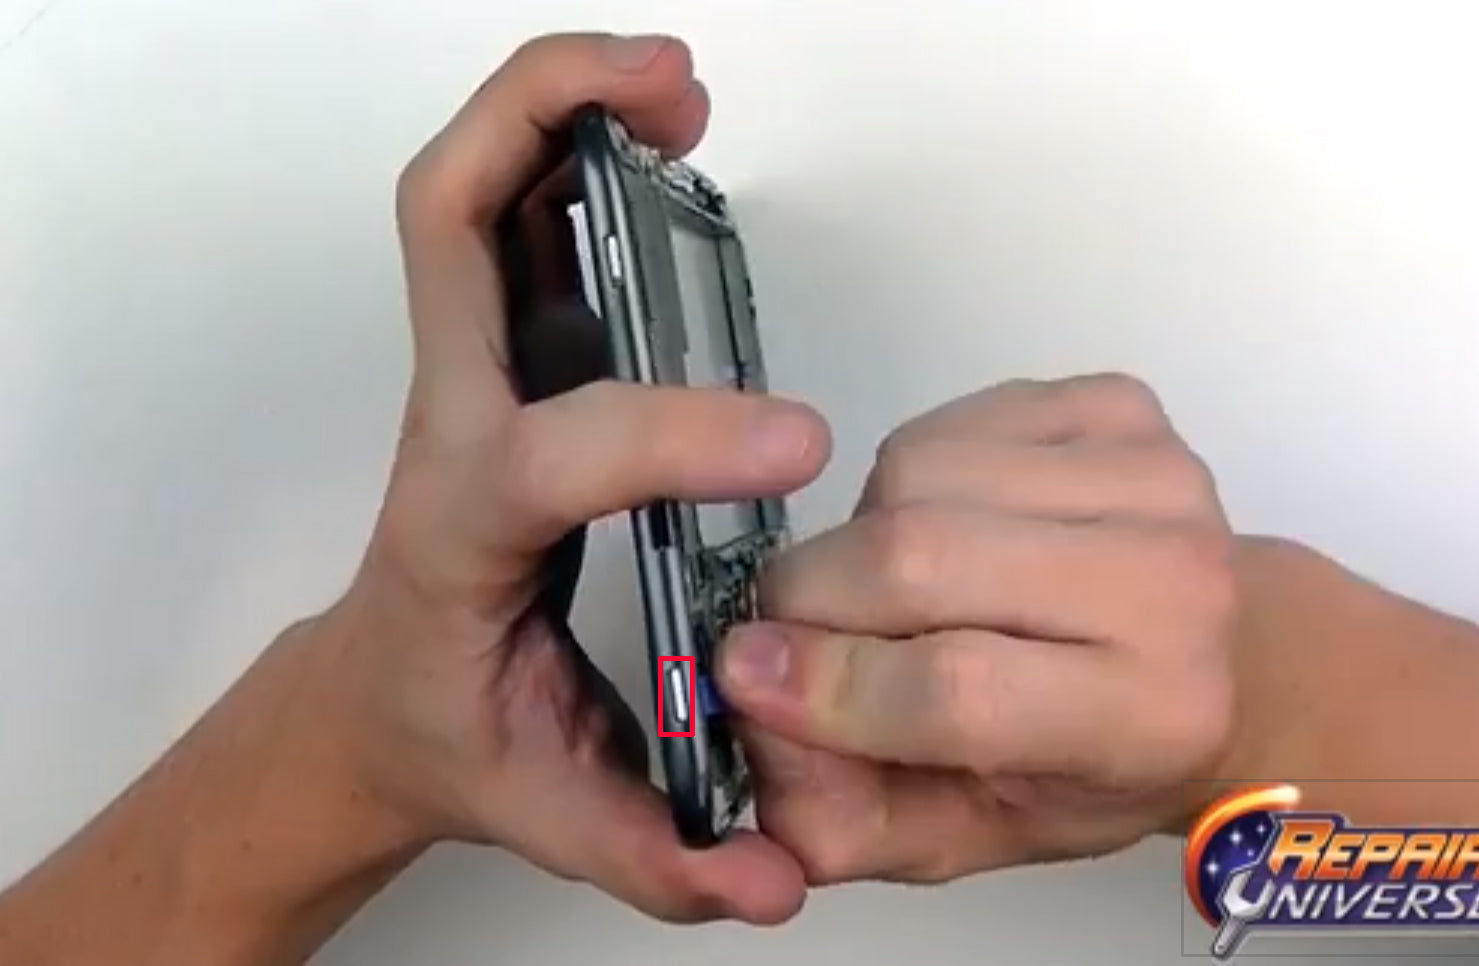
To begin your repair you will need to fully power off your Samsung Galaxy Tab 2. Once it is powered off, remove the micro SD card and separate the back cover from the rest of the assembly using the safe open pry tool. Begin near charge port at the very bottom and then sliding your pry tool along the seams of the bottom and the sides. Apply pressure to separate the clips that hold the back cover and the rest of the device together.
-
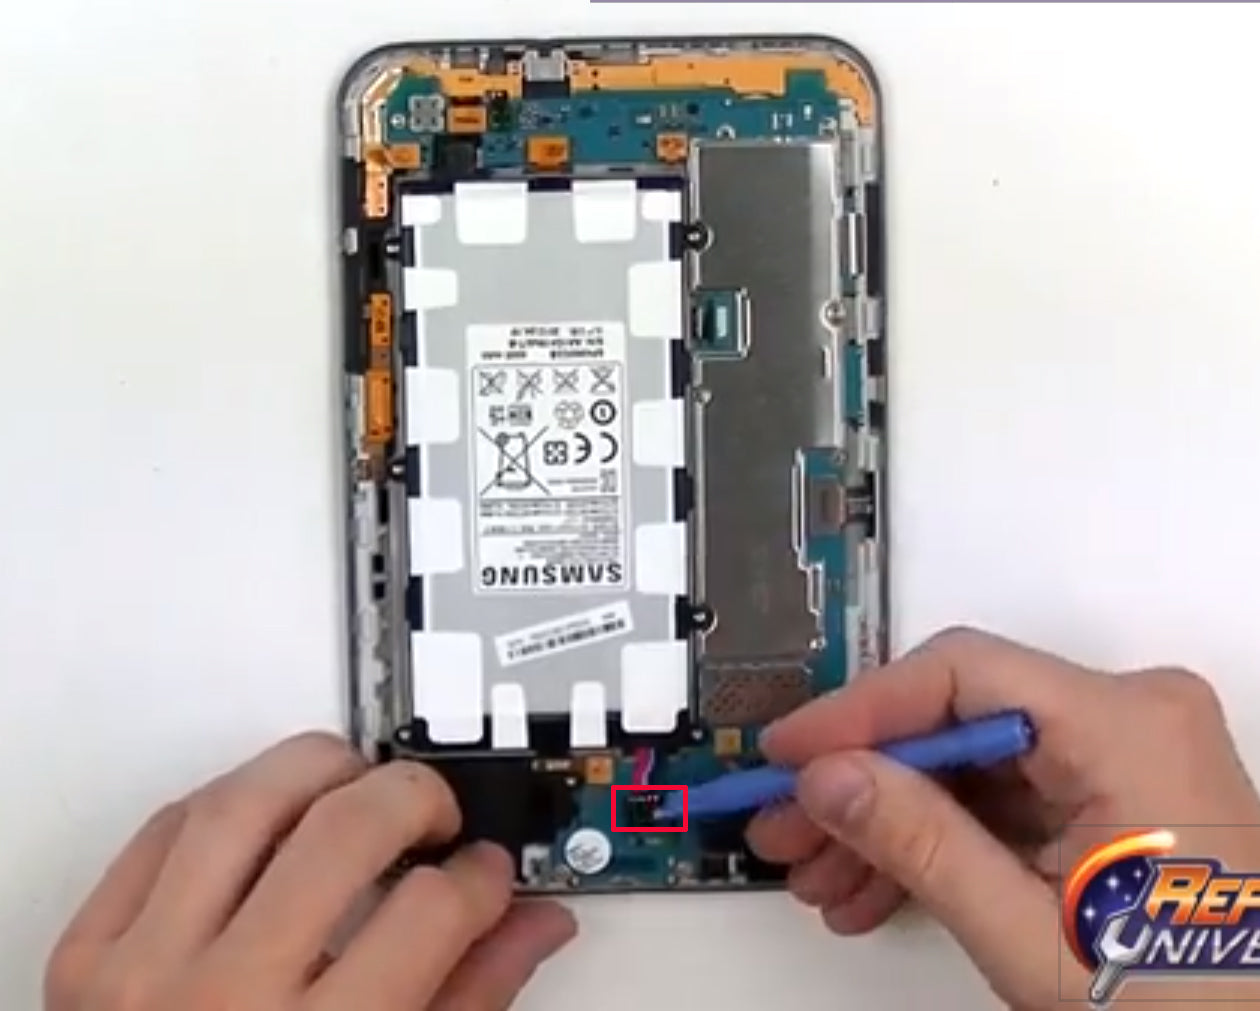
Once the back cover is removed you can then use the pry tool to release the battery connection at the bottom of the device, ensuring that all power is removed from the device.
-
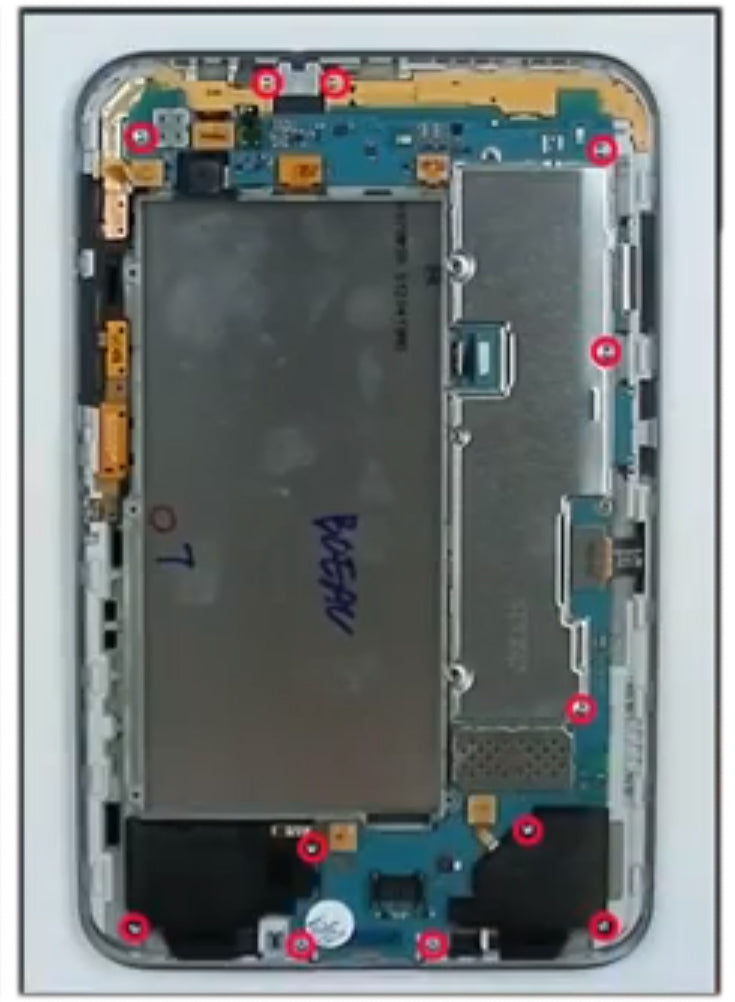
Remove the six (6) Small Phillips Screws that hold thebattery in place using the Small Phillips Screwdriver. You can then remove the battery from the device. Still using the Smal Phillips Screwdriver, remove the twelve (12) Small Phillips Screws highlighted in the diagram below.
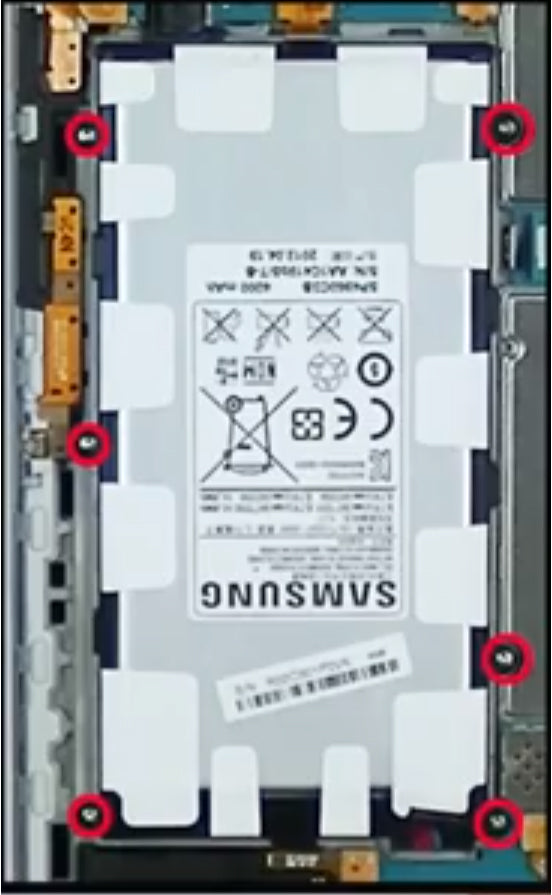
- Use your small Phillips screwdriver to remove the twelve (12) screws around the device, as shown below.
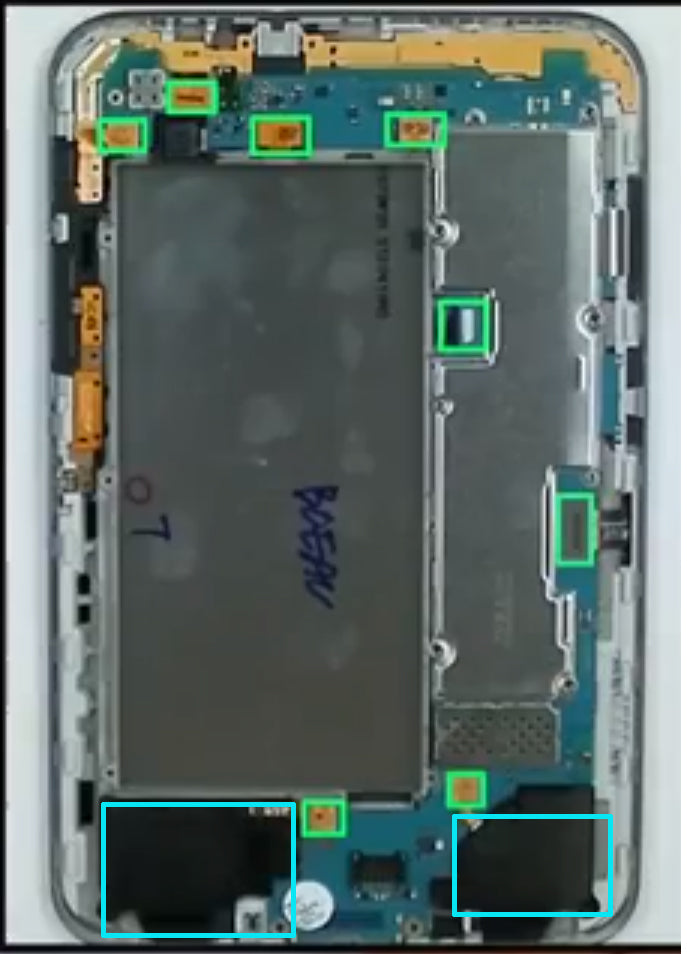
- Next, use the safe open pry tool to release all of the pop connectors outlined in the diagram below. Be careful to simply unsecure the pop connectors and not to rip any of the flex cables. The two (2) bottom pop connectors secure the loud speakers in place. Once these connections are released, remove the loud speakers completely. Once all eight (8) of the pop connectors are released, you can gently remove the motherboard from the device. The motherboard is easiest to remove from the top. Be careful not to rip any of the flex cables when you are removing the motherboard.
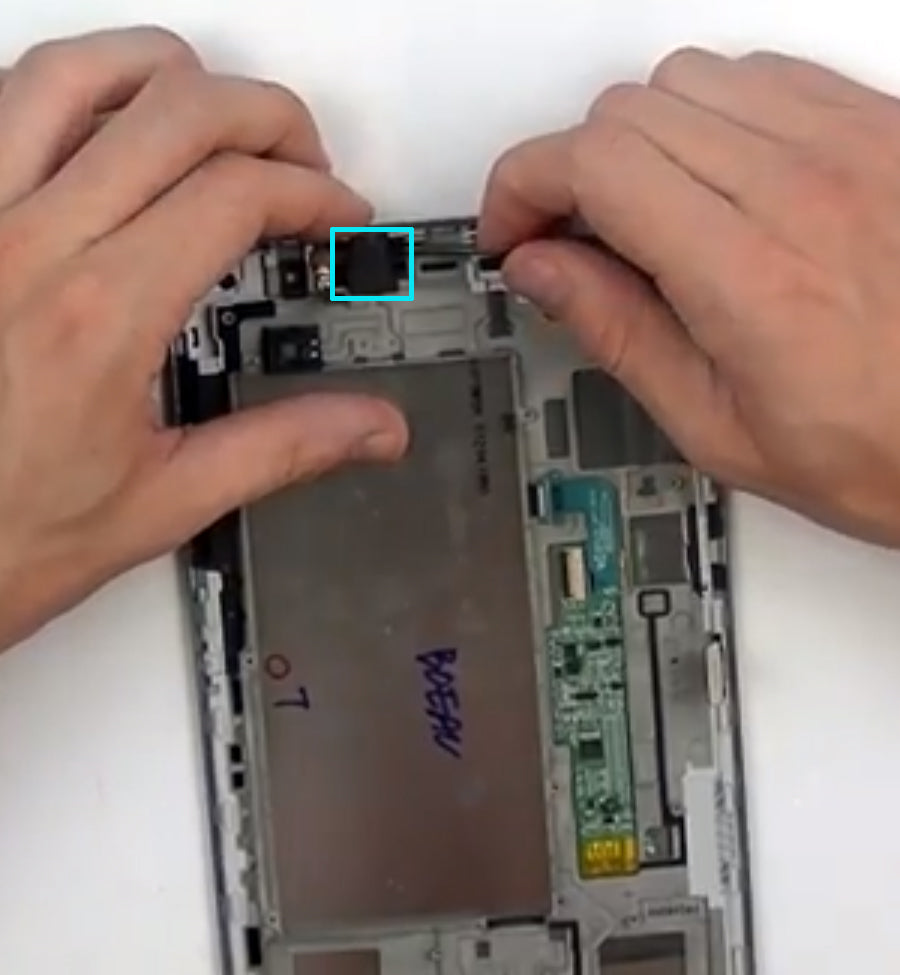
- Using a Small Flathead Screwdriver, remove the button flex cable on the left side of the device, which is held in place with adhesive. Then remove the main camera flex cable in a similar fashion. Next, remove the two main spacers on the top right and top left. These are held in place with clips, so apply a little bit of pressure with the Flathead Screwdriver and they should pop out quite easily. Next remove the front camera and sensor flex cables. Also remove the small metal cover and the small rubber grommit covering the headphone jack. The adhesive securing this piece is strong, so take your time.
-
To begin removing the screen, use a heat gun or hair dryer. Hold the heating device 1-2 inches away from the front screen on a medium heat settings for a hair dryer or low heat settings for a heat gun. Run the heating device slowly along the edges of the screen to loosen up the adhesive that holds the screen in place. Do this for about 45 seconds to 1 minute so as to not overheat the device.
- After heating the edges of the device, use the safe open pry tool to try and remove the glass screen. This is easiest if you start at the camera indention at the top, or an area around the edges that allows you access to the adhesive that secures the glass screen. This adhesive is strong, so take your time to safely remove the screen. If you have difficuly, heat the edges again.
- To remove the LCD screen if you are doing an LCD screen repair, remove the glass touch screen as described above, and then simply apply a little bit of pressure to the back of the LCD screen and pop it out. Be careful to feed the flex cable on the left side through the housing openings so it does not rip.
- To reassemble, simply replace the damaged parts with the new ones and reverse the order to put your phone back together again.
Applying Adhesive to the Screen Assembly:
Notice:
Repairs Universe's guides are for informational purposes only. Please click here for details.
Learn about restrictions on reproduction and re-use of Repairs Universe's repair/take-apart/installation guides, and about creating hyperlinks to our guides.
