Nexus 5 Repair Guide
June 4, 2018 | 0 Comments

This Google Nexus 5 repair guide is designed to help disassemble your device in order to perform a repair or install a new screen replacement. At Repairs Universe we know how frustrating it can be without a working phone. With that in mind we created this in depth guide that can help you replace a cracked or shattered touch screen digitizer, a broken LCD screen, as well as other internal parts that have stopped working. Whichever part your Nexus 5 repair may need, this guide will take you through step-by-step instructions and show to take apart the Nexus 5 and replace each component.
This repair guide will assist in the installation of the following Google Nexus 5 part(s):
Recommended Tools:
Google Nexus 5 Take Apart Guide:
How to Fix a Google Nexus 5 (Step-by-Step Guide) :
- Before starting the repair, make sure the device is completely powered off and the SIM card has been removed.
- (Figures 1.1 & 1.2) Using a safe open pry tool or a nylon spudger wedge between the back cover and the device (starting at the top) in order to pry off the back cover. Once the tool is wedged in between work your away around the sides and edges, releasing the clips. Use caution as the cover is plastic and can crack if excessive force is used.

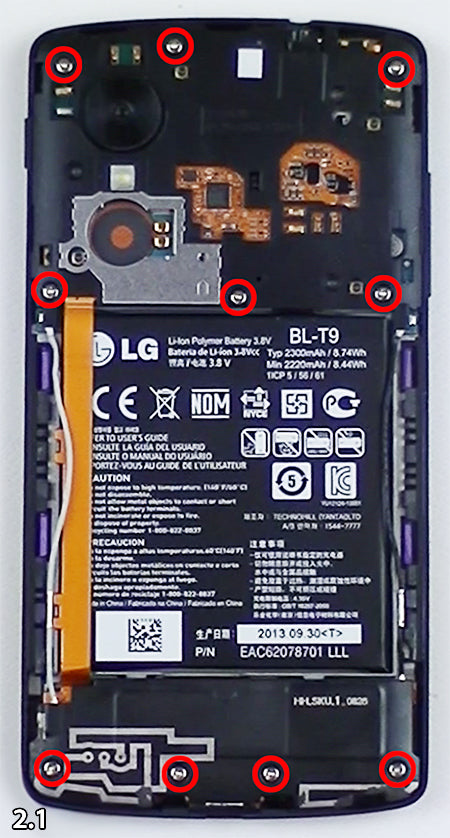
- With the back cover removed, you now have ten (10) Small Phillips screws to remove (circled in red in figure 2.1).
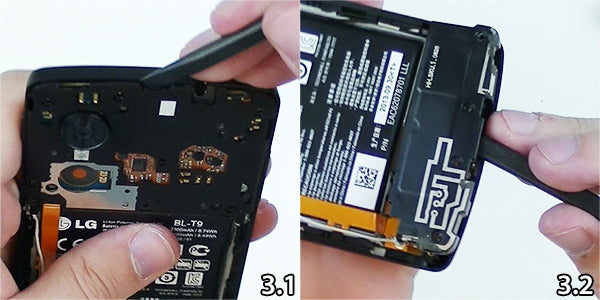
- (Figures 3.1 & 3.2) After the screws have been removed, use your pry tool and remove the top and bottom clip on covers. These covers protect the flex cables.
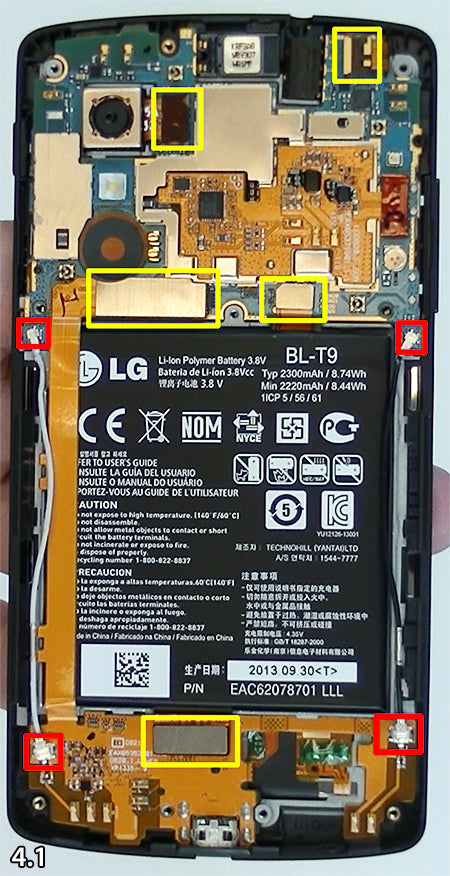
- Next you will begin removing five (5) flex cables and components (all highlighted in yellow in figure 4.1). The cables and components include the charging port/mic cable, battery connection cable, LCD connection, and front and rear camera.
- Now you can remove the antenna cables (highlighted in red in figure 4.1). Note, this step is optional as they can be removed with the motherboard in the next step.
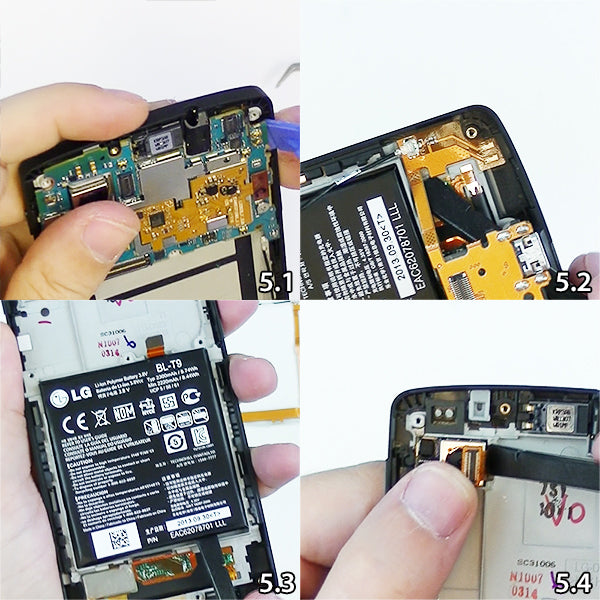
At this point all of the components have been removed, and your Google Nexus 5 has been fully disassembled and ready to repair with new parts!
Notice:
Repairs Universe's guides are for informational purposes only. Please click here for details.
Learn about restrictions on reproduction and re-use of Repairs Universe's repair/take-apart/installation guides, and about creating hyper links to our guides