iPad 2 Take Apart Video Repair Guide
June 4, 2018 | 0 Comments
View the downloadable version of our how to fix your iPad 2 screen guide.
The RepairsUniverse Team has compiled many in-depth repair guides for the iPad 2 which will show step by step how to replace many parts. If you are looking to replace the LCD screen, touch screen digitizer, or any of the small flex cables inside the iPad 2, these guides will assist you. These disassembly guides will allow you to safely and efficiently replace these parts and get your iPad 2 working like new again.
This guide will help you to install the following Apple iPad 2 parts:
- iPad 2 Touch Screen Glass Digitizer - Black
- iPad 2 Touch Screen Glass Digitizer - White
- iPad 2 LCD Display Screen
- iPad 2 Speakers, Flex Cables, & Small Parts
Recommended Tools:
iPad 2 LCD Screen Replacement Guide:
We recommend fully watching the video before starting the repair, and then pausing / rewinding and reviewing when needed.
iPad 2 Touch Screen Glass Digitizer Replacement Guide:
We recommend fully watching the video before starting the repair, and then pausing / rewinding and reviewing when needed.
iPad 2 Headphone Jack, Power Button Flex Cable, WiFi Antenna Cable Take Apart Repair Guide:
We recommend fully watching the video before starting the repair, and then pausing / rewinding and reviewing when needed.
Simply reverse the instructions above to reassemble your iPad 2.
Find all the replacement parts and screens for your iPad 2 here at RepairsUniverse to get your tablet working like new again!
iPad 2 Take Apart Guide:
This written take apart repair guide shows how to disassemble the iPad 2 quickly and safely. This guide was designed to help you replace a cracked or damaged touch screen glass digitizer, and damaged and faulty LCD display screens, as well as other internal faulty parts such as speakers, flex cables, and buttons.
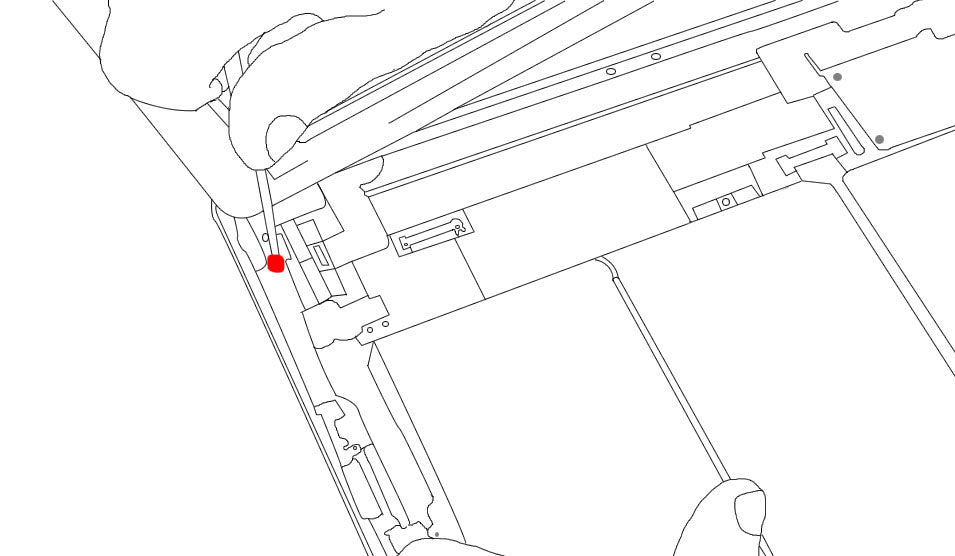
- Separate the Screen by putting the flat tool in and gently work the adhesive. Use a heat gun or hair dryer to warm the outside edges of the device, releasing the adhesive. There is a cable under the glass attached from the home button glass. Carefully detach it. Add a little bit of pressure to lift the screen. The digitizer cable is held on the lower left hand side.
- You will see 4 small Phillips screws. Remove the screws. Lift the LCD and you will see a slightly different lock bar. Lift the lock bar up to slide the cable out and separate the LCD.
- Once the LCD is separated, you will see the 2 digitizer cable. You will also need to remove the 2 Phillips screws which are blocking the clips for the digitizer cable.
- Gently lift up the two digitizer cable clips and slide the digitizer cable out of the socket.
- For the front-facing camera, you will notice that it has a cable that runs through a connector for the headphone jack and is controlled together in one socket.
- Lift the clips of the cable controlling the front camera and headphone jack. The cable is adhered so gently slide something underneath the cable to lift it up.
- Pull out the 2 Phillips screws in the headphone board. Slightly slide up the cable. You will see two connectors. Slide a flat tool between the cable and the back of the camera. The front camera and headphone module is now removed.
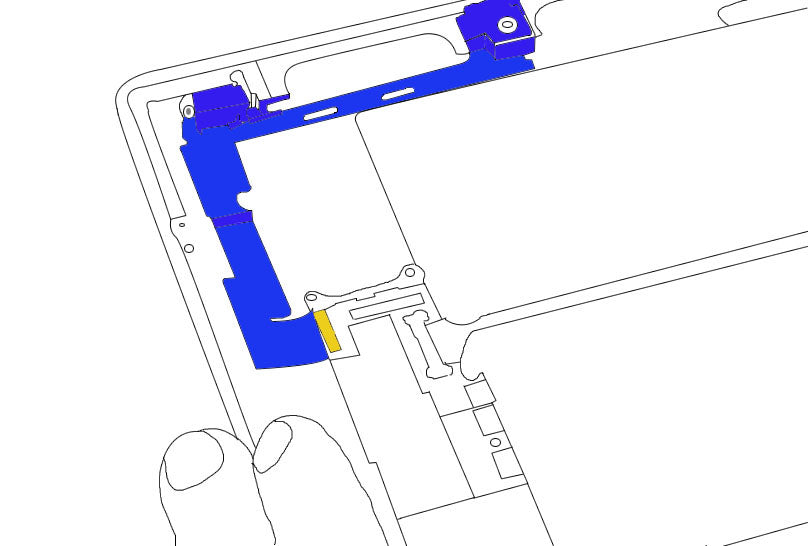
- Next separate the dock connector and Wi-Fi antenna which is located on the bottom of the iPad 2. You can see a piece of tape over the connection so you would need to loosen it a bit. Once loosened and removed, lift the connector out of the socket. The connector is underneath the speaker connection. Remove the 2 Phillips screws on the dock connector. The dock connector slides right out of the socket.
- Take out the screws for the wifi antenna. Lift up the cable. To completely remove the antenna, you would need to remove the logic board first.
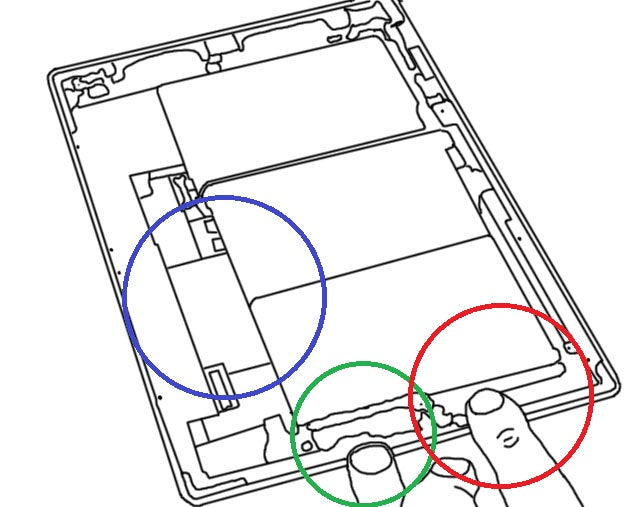
- Lift the cable connector up. Remove the screws that are holding the logic board in place. The board is adhered so slightly pry it up using a flat tool.
- The antenna comes up with the logic board. It is connected by a standard connection. You can then take it out.
- Once the logic board is removed, you can gently lift up the battery as it is only held in place with adhesive.
- Remove the tape near the speaker assembly to remove the speaker. Once the tape is removed, you can slowly remove the speaker assembly.
- Take out the screws that are holding the connectors in place. You will see several thin cables so be sure to carefully pull these out. Remove the iPad 2 back. Remove the screws and gently prying it up to loosen the camera.
- Using a flat tool, gently slide the daughter board out of its connectors. There is a small piece of tape connecting the cables to the daughter board. Unwrap the tape and lift the daughter board from its socket.
- Gently pull the cables. Be very careful with the cables as they easily tear.
- Remove the hold switch, volume rocker.
- Using the tweezers, gently pry up the microphone.
- Poke the switch in to remove the switch assembly and the hold switch.
Notice:
RepairsUniverse does not accept any liability for damage, or injury caused, while you are following our disassemble guides. We make no representations, warranties, or conditions of any kind, express or implied. Utilizing these guides to assist you in repairing your mobile devices will void your warranty. RepairsUniverse strictly prohibits altering or modifying our teardown guides for commercial use, reproduction, or publication