iPhone 5c Take Apart Repair Guide
June 4, 2018 | 0 Comments

Have you just dropped your brand new iPhone 5c and you need to replace the glass touch screen or LCD screen. This take apart repair guide will show you how to tear down the iPhone 5c to repair a broken or cracked screen or other internal components that you may need to replace in your iPhone 5c. Repairs Universe offers only the highest quality repair parts for the iPhone 5c.
This guide will help you to install the following iPhone 5C parts:
Recommended Tools:
- Safe Open Pry Tools
- Small Phillips Screwdriver
- Small Flat Head Screwdriver
- iPhone 5-Point Pentalobe Screwdriver
- Adhesive Strips
- Suction Cup
- Spudger
- Fine Tip Curved Tweezers
iPhone 5c Video TearDown Repair Guide
iPhone 5c Written TearDown Repair Guide
RepairsUniverse's Official iPhone 5c Teardown Repair Guide will show you how to disassemble your iPhone 5c. The instructions we have provided will show you step by step how to teardown and disassemble your Apple smartphone to replace or repair a damaged display assembly or internal component. With parts from RepairsUniverse your Apple device will be working like new again, quickly and affordably!

Display Assembly
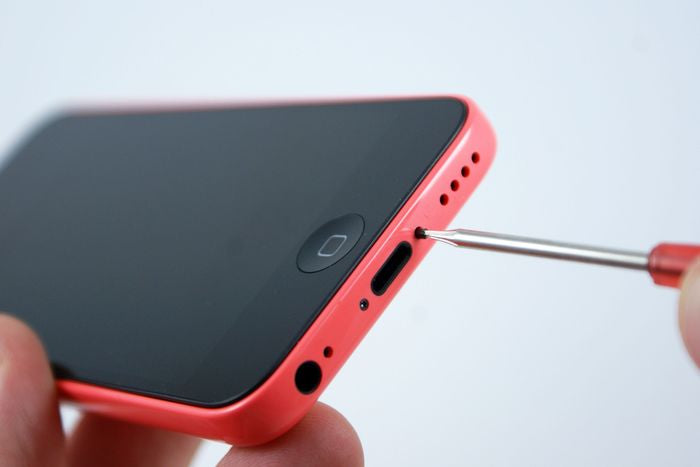
- To begin disassembling the iPhone 5c, locate and remove the two pentalobe screws on either side of the lightning dock connector port on the bottom of the iPhone.

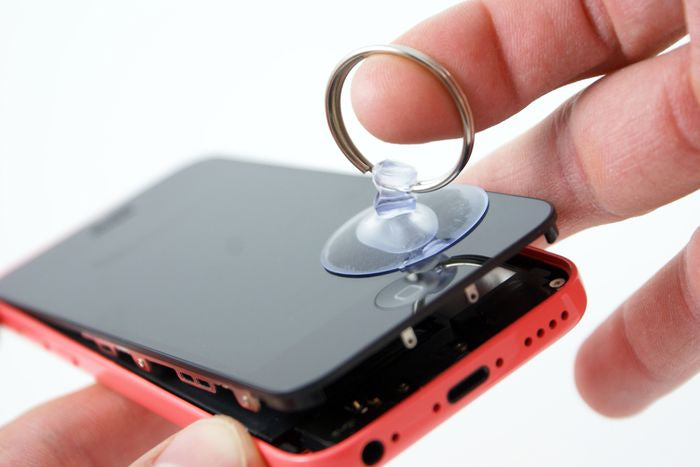
- Next, put the suction cup close to the home button on the display assembly side of the iPhone. While holding the outside of the iPhonedown, use the suction cup to pull the display assembly away from the rear case/housing.
- The left corner, on the home button side of the iPhone 5c, has an area that will expose enough space to insert the plastic opening tool. Use the plastic opening tool to separate the display assembly from the
case/housing of the iPhone.

- After lifting up the display assembly, you will see a metal cover that secures the display assembly and front-camera cables.
- Locate and remove the four Phillips screws (#00) that secure the cover, and then remove the cover from the iPhone 5c.

- Utilize the plastic opening tool to pry up the series of three connections for the display assembly and front camera.
- You can now remove the display assembly from the iPhone 5c.

Home Button
- Locate and remove the two Phillips screws (#00) that secure the back plate for the home button assembly.

- With the lightning connector and speaker assembly free from the case, use the spudger to separate the two units from each other. They are held together with a small amount of adhesive.

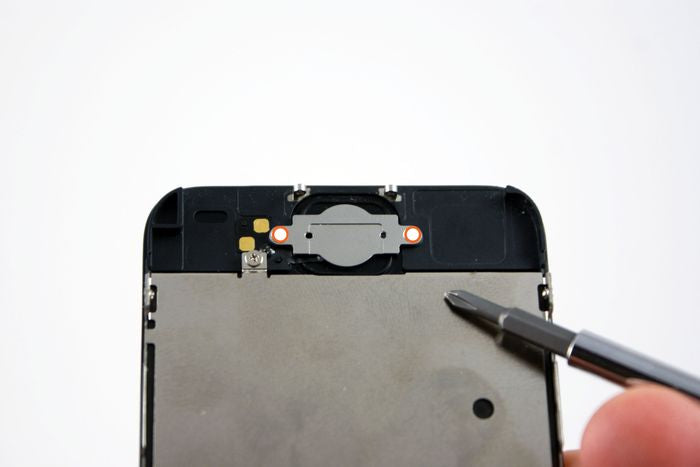
Earpiece Speaker
- Locate and remove the two small Phillips screws (#00) securing the metal clip over the earpiece speaker.

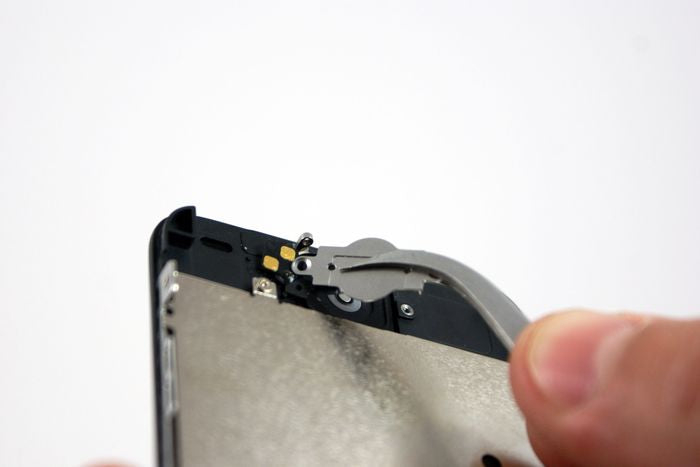
- Pry up the clip from its location with a pair of tweezers to free the speaker assembly and remove it from the iPhone 5c.

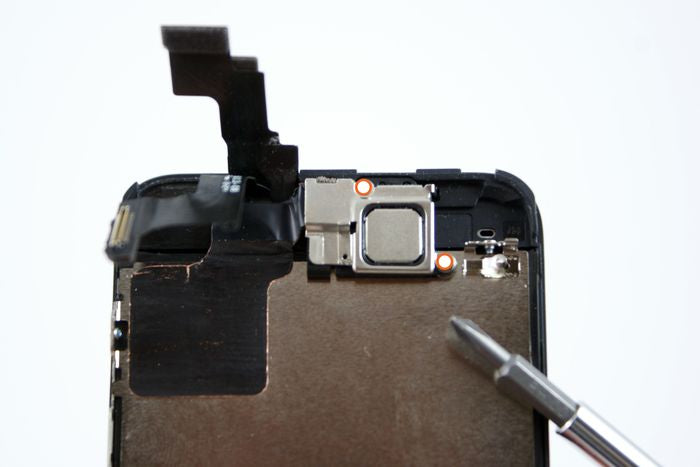
Front Facing Camera
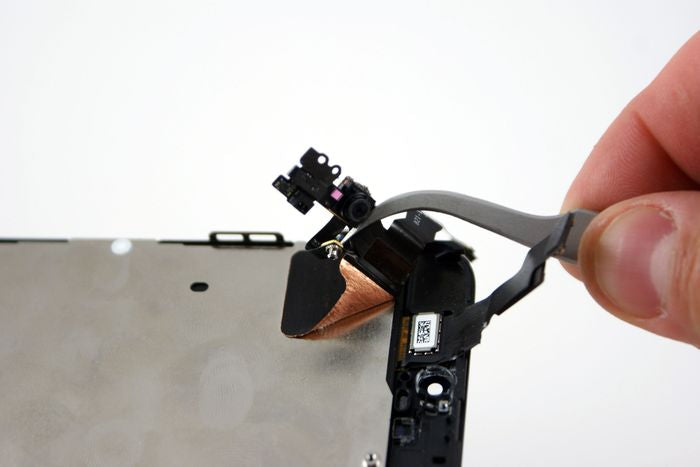
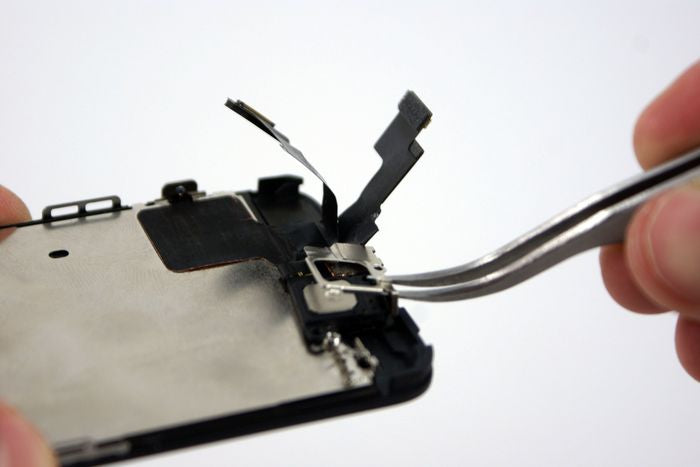
- The front-facing camera assembly is a series of components that you need to pry up from their housing. The assembly is also held down by a sticker/adhesive.
- You can now remove the front-facing camera assembly from the iPhone 5c.

Battery
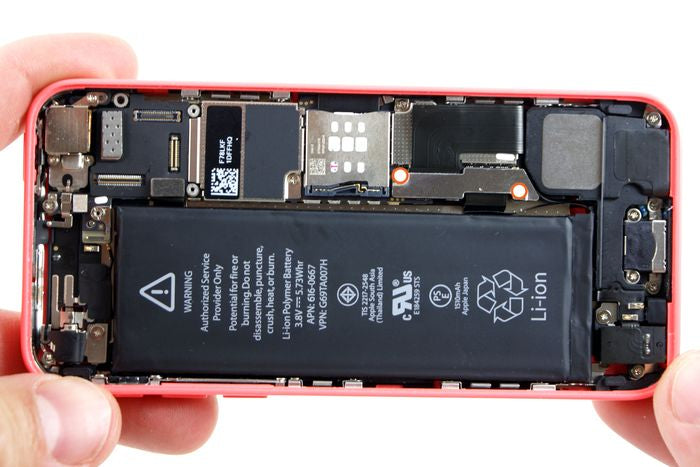
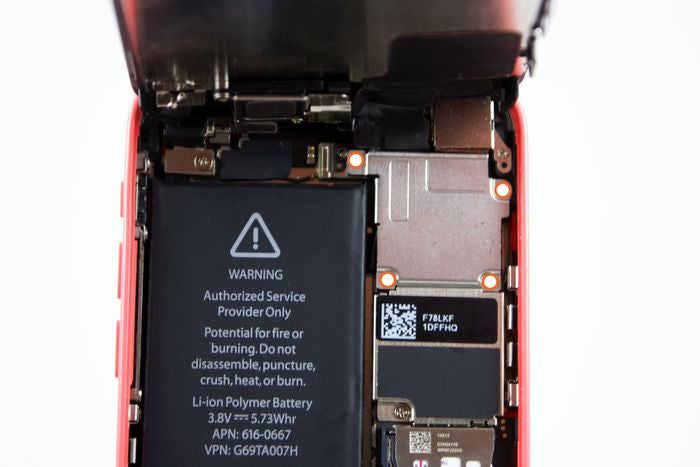
- Locate and remove the two Phillips screws (#00) that secure the battery connector?s metal cover. Next, gently pry the connector up to release it from the motherboard.

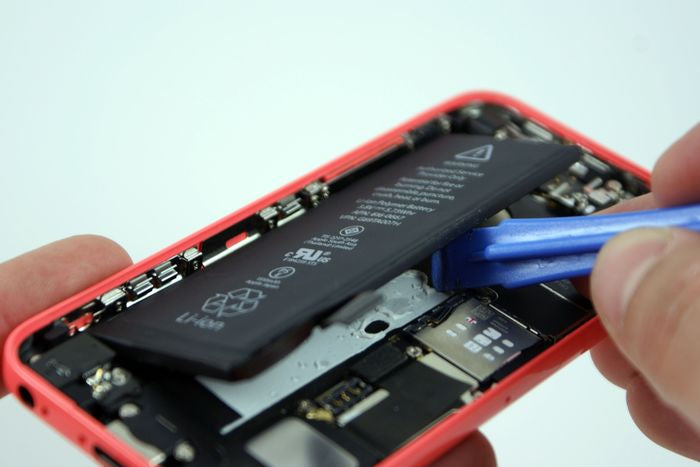
- Use the spudger or the plastic opening tool to pry the battery from the adhesive securing it to the iPhone.
- You can now remove the battery from the iPhone 5c.

Lightning Dock Port Assembly and Loudspeaker
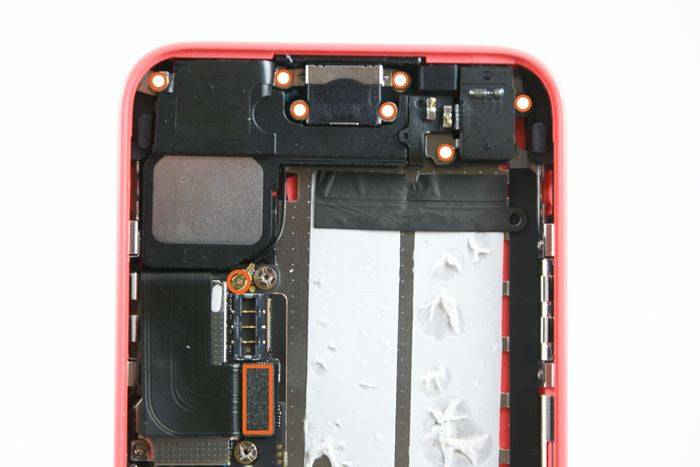
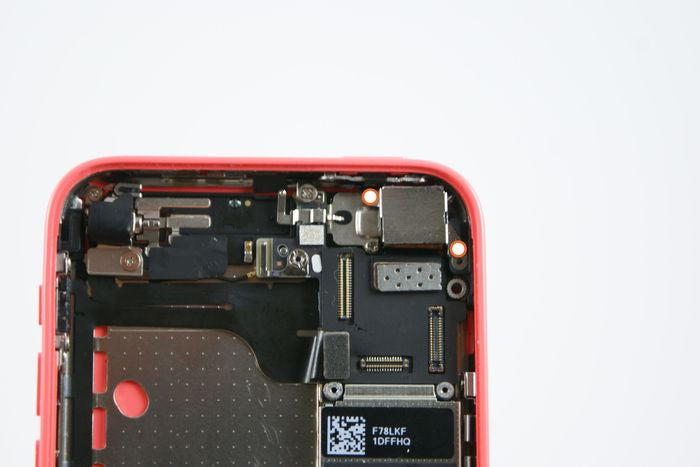
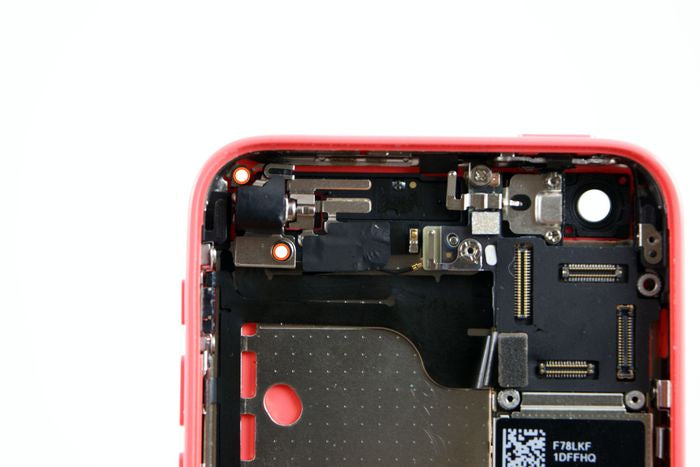
- Locate and remove the seven Phillips screws (#00) that secure the loudspeaker and lightning port assembly (marked with white dots)..
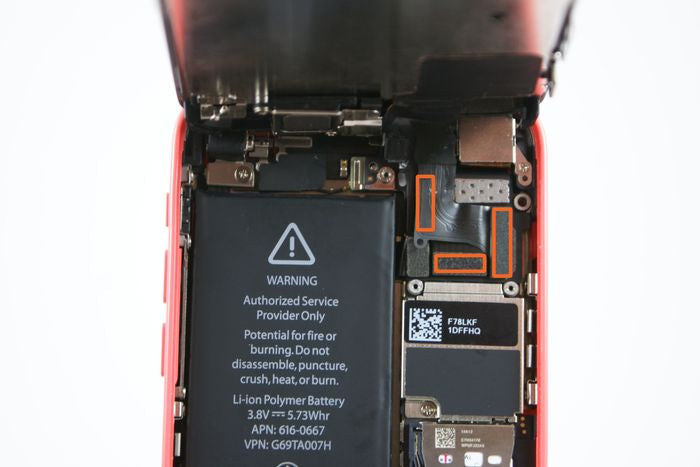
- Next, locate and disconnect the coaxial antenna plug (circled in orange).
- Now, locate and disconnect the connector for the lightning port assembly (marked by a rectangle in orange).

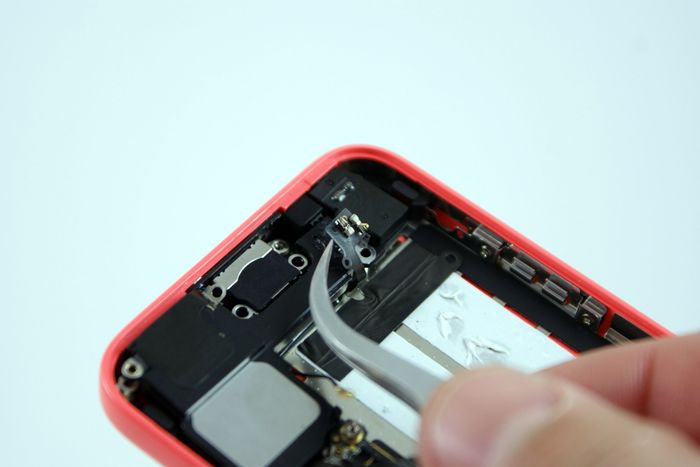
- There is a small ribbon wire connection that is adhered to the loudspeaker. Peel up this contact to free the loudspeaker for removal from the iPhone 5c.

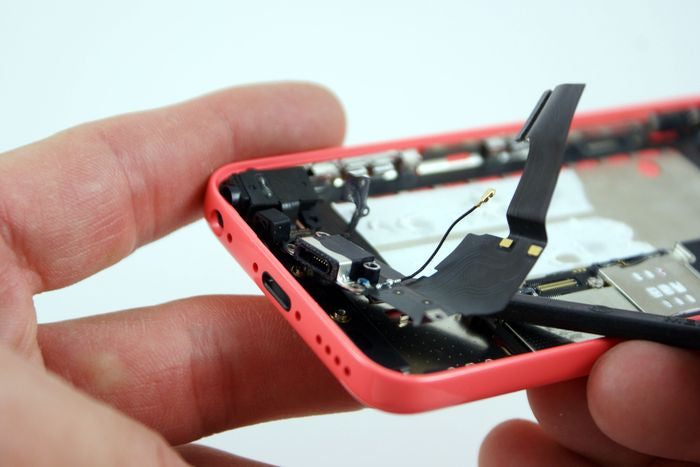
- Use the spudger to maneuver and pry up the lightning port & headphone jack assembly and remove it from the bottom of the iPhone.

Rear Facing Camera
- Locate and remove the two Phillips screws (#00) that secure the rear-facing camera and then lift it out of the iPhone.

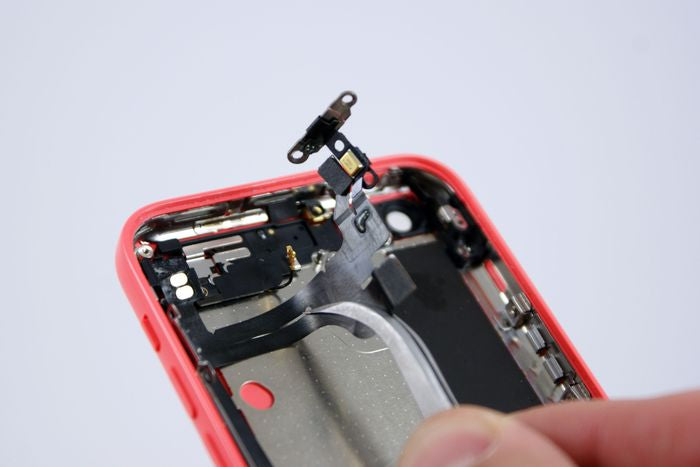
Vibrator Unit
- Locate and remove the two Phillips screws (#00) that secure the vibrator to the body of the iPhone.
- You can now remove the vibrator from the iPhone 5c.

SIM Card Tray
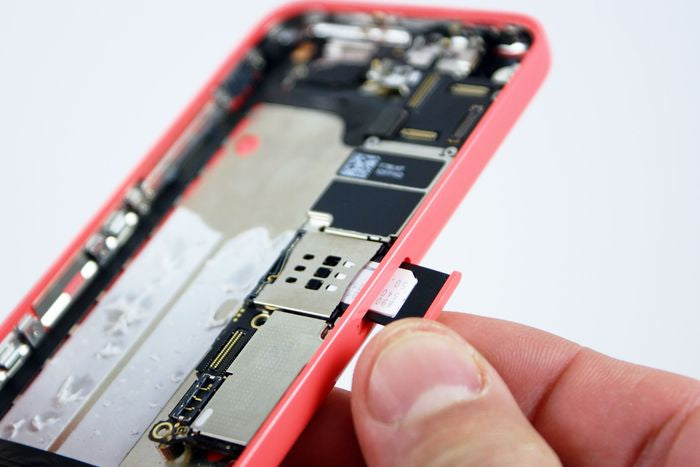
- Use the SIM card removal tool, or a paper clip, to remove the SIM card tray from the side of the iPhone.

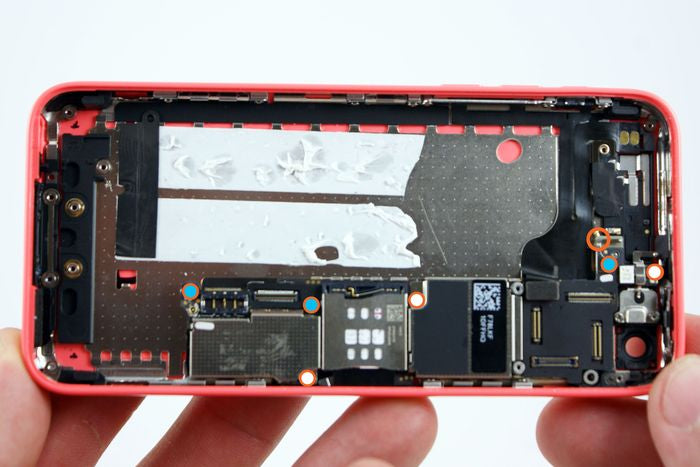
- Locate and remove the three Phillips screws (#00) that secure the motherboard into the iPhone (white dots mark them)..
- Locate and remove the two standoffs with the small flathead screwdriver. The standoffs secure the mother-board to the iPhone (blue dots mark them).
- Locate and disconnect the coaxial antenna plug (circled in orange).

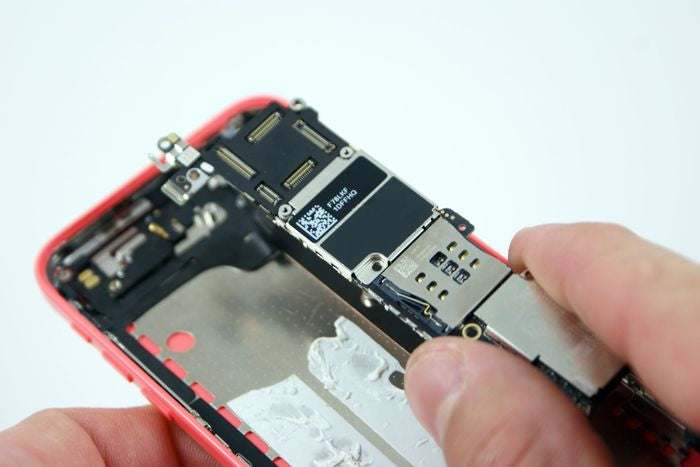
- With all screws and connections removed, the motherboard is now free. Maneuver the motherboard out of its location and lift it from the iPhone 5c.

Power and Volume Button Assembly
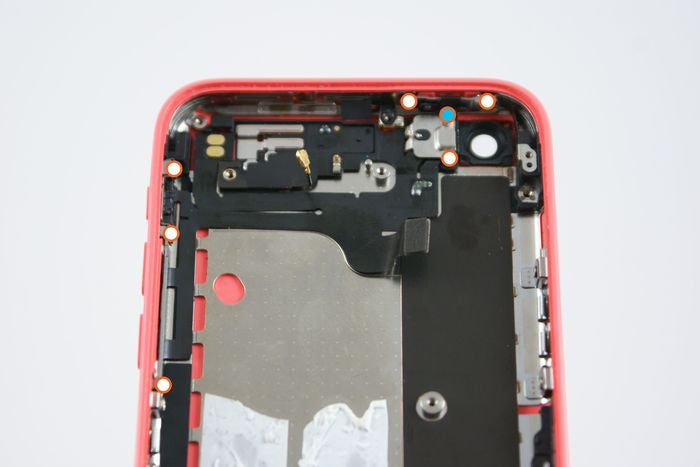
- Locate and remove the six Phillips screws (#00) that secure the power & volume button assembly to the motherboard (white dots mark them).
- Locate and remove the one standoff with the small flathead screwdriver (blue dot marks it).

- A small amount of adhesive is still securing the power and volume button assembly to the iPhone. Use the spudger or the tweezers to peel up and remove the assembly from the iPhone 5c.
Notice:
RepairsUniverse does not accept any liability for damage, or injury caused, while you are following our disassemble guides. We make no representations, warranties, or conditions of any kind, express or implied. Utilizing these guides to help assist you in repairing your mobile devices will void your warranty. RepairsUniverse strictly prohibits altering or modifying our teardown guides for commercial use, reproduction, or publication