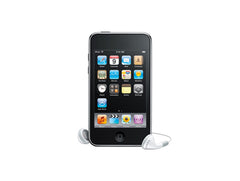
iPod Touch 3rd Gen Screen Repair Replacement Guide (Video)
June 4, 2018 | 0 Comments

View the downloadable version of our how to fix your iPod Touch 3G screen guide.
Our video below shows the procedure to replace the glass touch screen digitizer on the Apple iPod Touch (iTouch) 3rd Generation. The Repairs Universe team hopes you enjoy this take apart guide and find it useful and that it enables you complete your iPod screen repair safely and easily.
This guide will help you to install the following iPod Touch 3rd Generation part(s):
- iPod Touch 3rd Generation Touch Screen Digitizer Replacement
- iPod Touch 3rd Generation Touch Screen Digitizer Assembly Replacement
- Other Parts
Tools Required:
iPod Touch 3rd Gen Touch Screen Replacement Repair Guide:
iPod Touch 3rd Gen Touch Screen Reassembly:
iPod Touch 3rd Generation Touch Screen Replacement Summary:
Using this summary in correlation with the video will insure proper instructions are given and a safe repair is made.
- Use a safe open pry tool to open the iPod touch, along this the metal crown frame and the glass digitizer. There are several clips on all sides of the iPod and all this clips must be released.
- Try to pry from the bottom as there?s a ribbon cable being connected in the top of that corner. You can continue to pop up the clips along the sides.
- Lift up the digitizer but be careful as its still holding place for the ribbon cable from the top left corner. The ribbon from the digitizer is connected to the iPod. T o safely release the digitizer from the iPod use a safe pry tool and gently pop the connector up.
- To replace the digitizer from the iPod touch, you have two options: you can purchase a new mid section and just install the new digitizer straight into the new mid section and into the iPod or you can use the original mid section but to do this you need to first separate the digitizer from the mid section.
- Place the pry tool between the mid section and the digitizer and start to gently pry apart. If you?re having trouble separating you can use a hot hair dryer or heat gun to warm the glue to make this process easier. Continue to gently pry this part to part until separated.
- Remove the excess glue from the mid section and you put the home button back into place and attached the new digitizer.
Notice:
Repairs Universe's guides are for informational purposes only. Please click here for details.
Learn about restrictions on reproduction and re-use of Repairs Universe's repair/take-apart/installation guides, and about creating hyperlinks to our guides.

