LG Optimus Vu Re-Assembly Repair Guide
June 4, 2018 | 0 Comments
This LG Optimus Vu Re-Assembly Repair Guide is designed to help put your device back together in working order during a repair or installation of a new screen replacement. We created this Step-by-Step Re-Assembly guide to help you replace a cracked touch screen digitizer, a broken LCD screen, or any other internal component that may have stopped working or become damaged. Whichever part your LG Optimus Vu may need to be repaired, these instructions will take show how to Re-Assemble the LG Optimus Vu and replace each part.
This repair guide will assist in the installation of the following LG Optimus Vu parts:
- LG Optimus Vu P895 Touch Screen Digitizer Replacement - Black
- LG Optimus Vu P895 Touch Screen Digitizer Replacement - White
- LG Optimus Vu P895 LCD Screen Replacement
Tools Required:
If you haven't already, check out our LG Optimus Vu Take Apart Repair Guide to learn how to dis-assemble your device first.
LG Optimus Vu Re-Assembly Guide:
How to Re-Assemble your LG Optimus Vu (Step-by-Step Guide) :
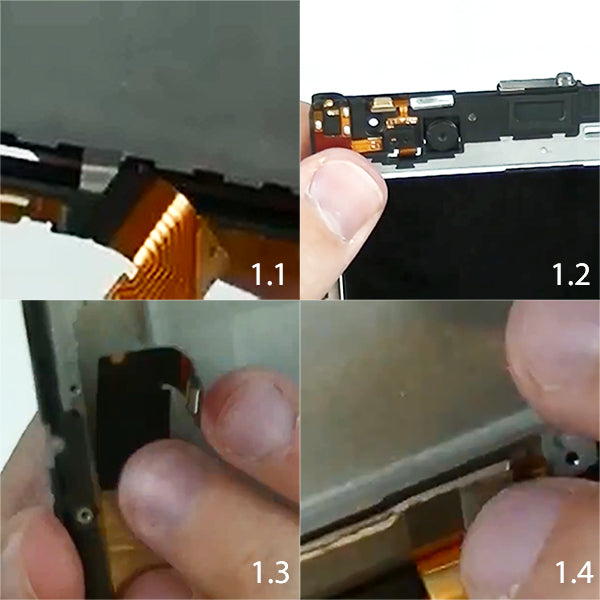
- (Figures 1.1 & 1.2) Take your LCD flex cable and slide it in the bottom housing of the phone. Slowly slide the cable in and around the phone. Fit the LCD properly in the housing.
- (Figures 1.3 & 1.4) On the back side of the housing you will fit the flex cable on the phone. Make sure you have the flex cable in place before moving on.
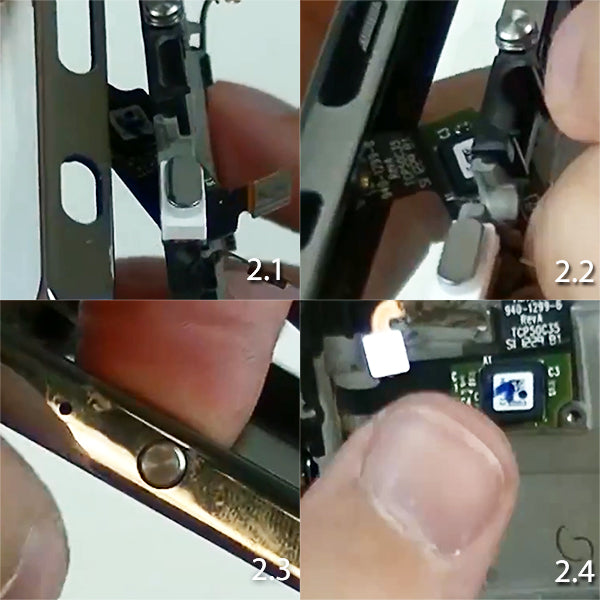
- (Figures 2.1 & 2.2) Take your Digitizer and Take the flex cable from the top and slide it in the casing at the top. ( Go slow here ) Once you have the flex cable in you can move on.
- (Figure 2.3) Grab your Power button and fit it in the top housing. ( you can put it in only one way so don't worry if you do not know which way to put it in.
- (Figure 2.4) Push the Digitizer flex cable down and stuck to the casing of the phone. It should adhere to the back housing.
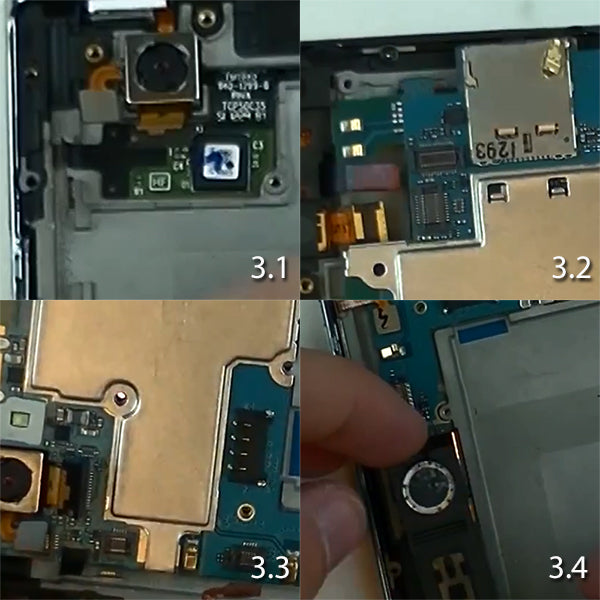
- (Figure 3.1) Install the Back Facing Camera to the casing. Make sure the flex cable from the camera is pointed down.
- (Figure 3.2) Once your camera is installed. Take your motherboard and install it from the right side first. as shown
- While you are installing the motherboard. Make sure all flex cables are bent away so you can firmly install it.
- (Figure 3.3) Shows that each flex cable is moved so the motherboard can be installed.
- (Figure 3.4) Take your Bottom speaker set and install it. ( MAKE SURE to push down the vibrator motor the correct way. ( Black facing up )
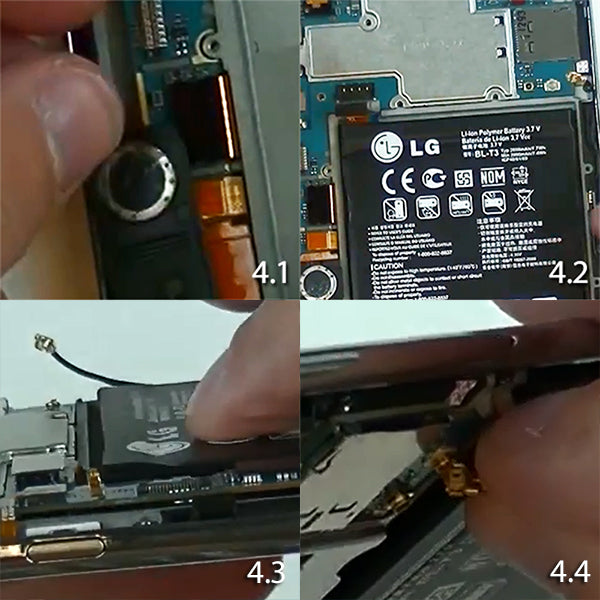
- (Figure 4.1) Once you have the vibrator motor showing the correct way. You can now move on with the lower speaker. Place the bottom speaker , start from the bottom and snap it in from the sides
- you will see that it will fit snug in the housing.
- (Figure 4.2 &4.3) Take your battery and install it on the phone. You can connect the Flex cable to as well. See Figure 4.2 to see which way you are putting the battery in the housing.
- (Figure 4.4) Now connect your antenna on the right side to the motherboard.( take your time and go slow , do not over push the connection.
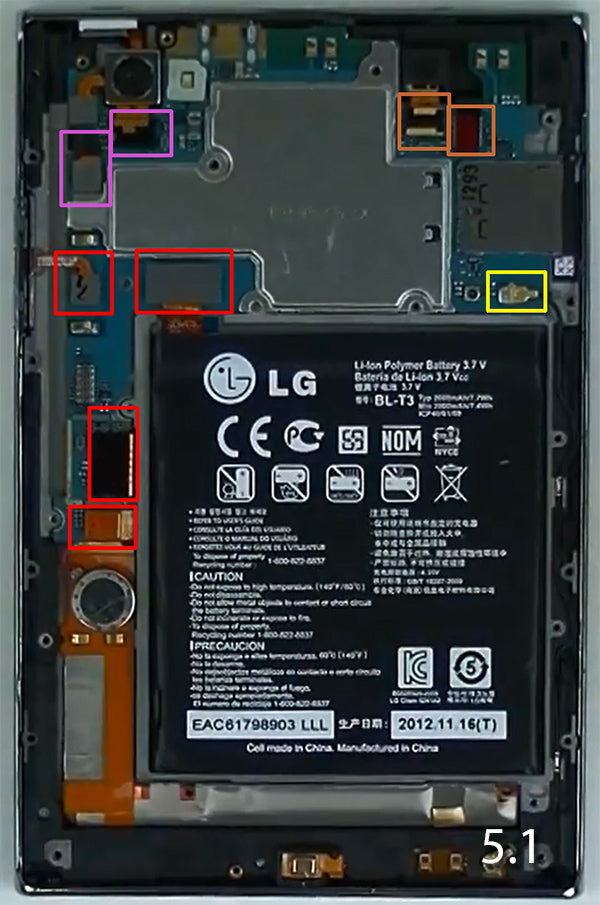
- (Figure 5.1) shows all the flex cables and need to be all pushed/snapped in to the motherboard. Take your time on each flex / connector / jawbone. Do not over push or over snap each one. They have teeth on each one that will allow it to snap in on its on.
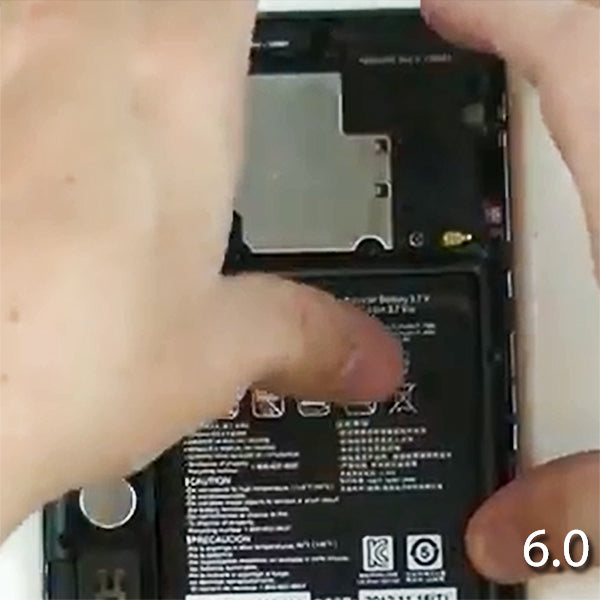
- (Figure 6.0) Shows the Back facing cover that needs to be snapped in place around the phone . Start from the right side and slowly work around till it is fasted on the phone. ( Go slow do not break the clips on the back cover.)
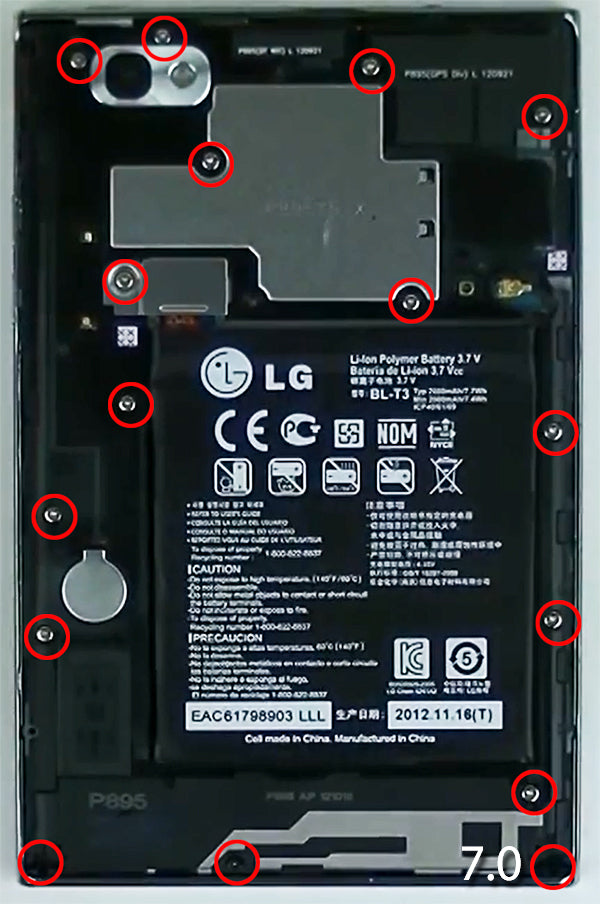
- (Figure 7.0) Now with the back cover in place you will have sixteen (16) Screws that will need to be tightened to keep the back cover on. You will be using the Phillips screwdriver here.
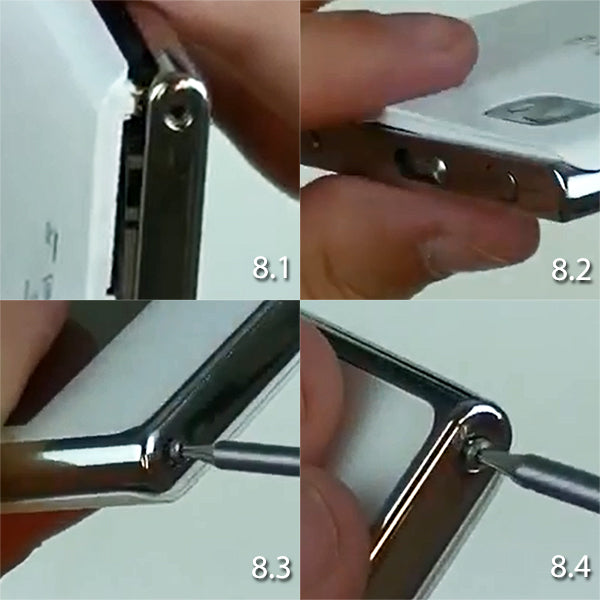
- (Figure 8.1 & 8.2) Now take the back door and start from the bottom. Allow it to snap in to place. Don`t force the cover.
- (Figure 8.3 & 8.4) Once the back door is on the device. You will have two (2) screws they are going to be t4 go ahead and tighten them on the device. You will be using the T4 screwdriver.
Congrats you have now reassembled the LG Optimus VU For more helpful guides and reviews please check the follow link. Thank you.
Notice:
Repairs Universe's guides are for informational purposes only.Please click here for details.
Learn about restrictions on reproduction and re-use of Repairs Universe's repair/take-apart/installation guides, and about creating hyperlinks to our guides