LG Optimus Vu Tear Down Repair Guide
June 4, 2018 | 0 Comments
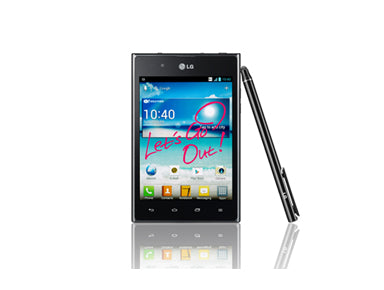
This LG Optimus Vu repair guide is designed to help tear down your device in order to perform a repair or install a new screen replacement. We created step-by-step repair guide to help you replace a cracked touch screen digitizer, a broken LCD screen, or any other internal component that may have stopped working. Whichever part your LG Optimus Vu may need for repair, these instructions will take you step-by-step and show to take apart the LG Optimus Vu and replace each part.
This LG Optimus Vu Repair Guide will help you install the following replacement parts:
- LG Optimus Vu P895 Touch Screen Digitizer Replacement - Black
- LG Optimus Vu P895 Touch Screen Digitizer Replacement - White
- LG Optimus Vu P895 LCD Screen Replacement
Tools Required:
LG Optimus Vu Take Apart Guide:
How to Fix the LG Optimus Vu (Step-by-Step Guide) :
- Before starting the repair, make sure the device is completely powered off and the SIM card has been removed.
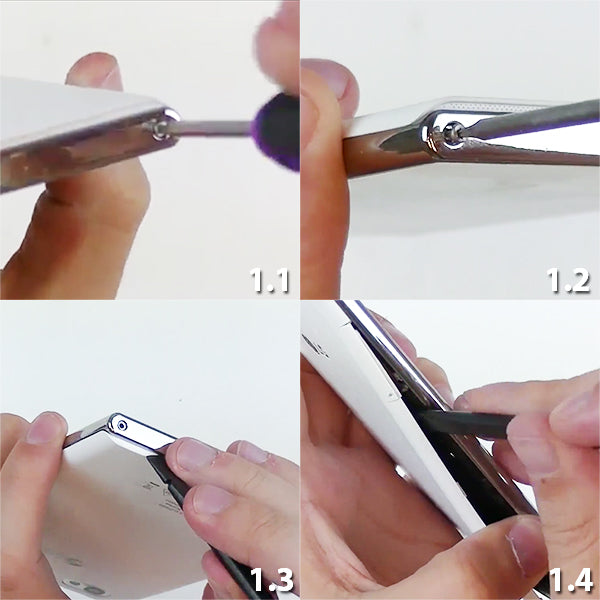
- (Figures 1.1 & 1.2) With your Torx T4 screwdriver. On the bottom of the phone you will have two ( 2 ) screws that need to be removed.
- (Figures 1.3 & 1.4) With your screws out. Take your safe pry tool and start front the bottom and wedge it in as you see at 1.3 once you have it in you can slowly go around the sides getting from the top to the bottom and the back case will come off.
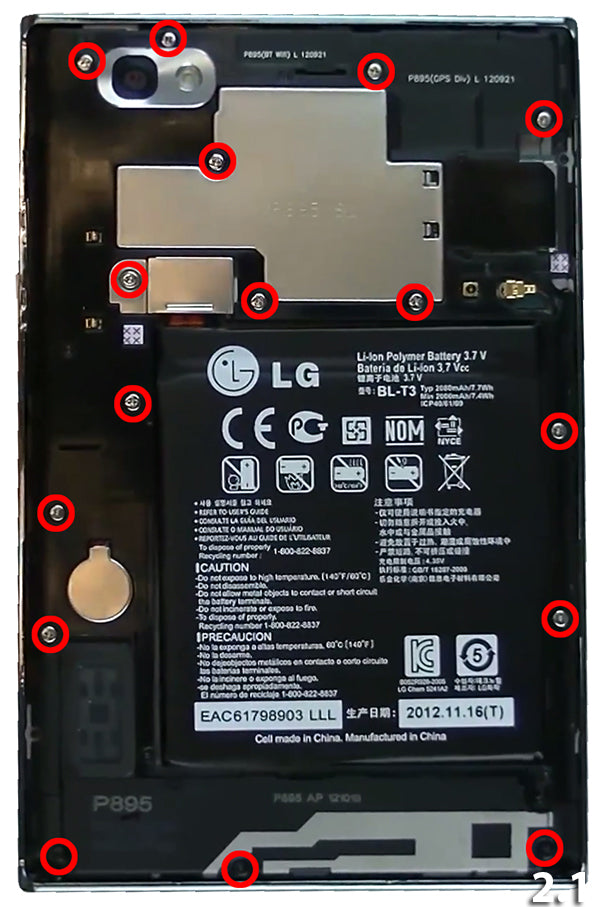
- With the back cover removed, you now have sixteen (16) Small Phillips screws to remove (circled in red in figure 2.1).
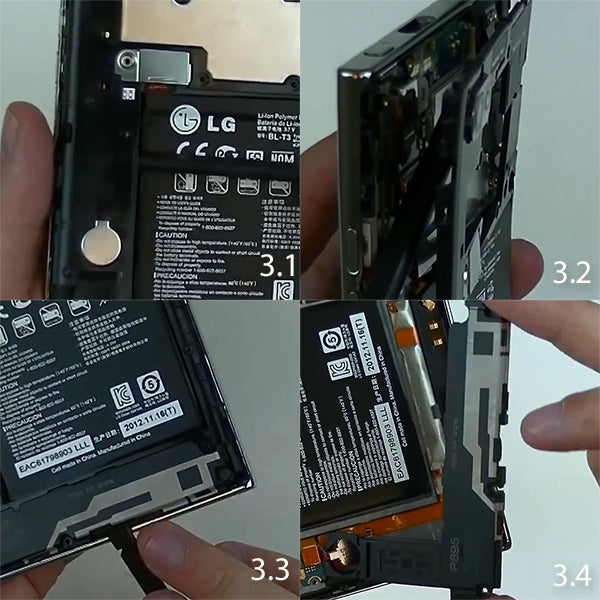
- (Figures 3.1 & 3.2) After the screws have been removed, use your pry tool and remove the top clip on covers. These covers protect the flex cables.
- (Figures 3.3 & 3.4) Use your pry tool and remove the bottom clip on covers. These covers protect the flex cables.
- (Figures 3.3 & 3.4) Once you have the bottom removed . Take your time because you will see the vibrator motor.
Caution: Please use extreme care when removing the vibrate motor from the housing as you do not want to damage the wires connecting it to the motherboard
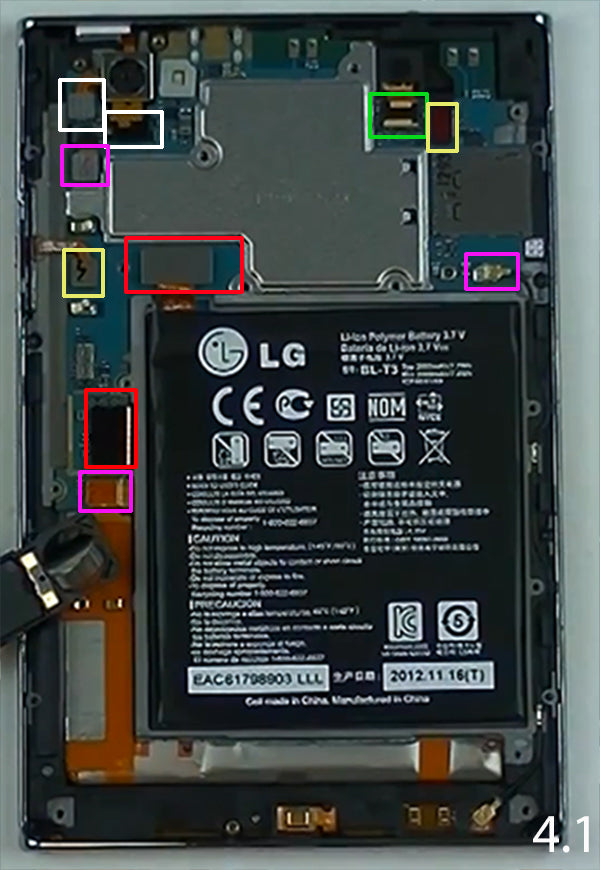
- Next you will begin removing five (9) flex cables and components (figure 4.1). The cables and components include the charging port/Mic cable, battery connection cable, LCD connection, and front and rear camera.
- Now you can remove the antenna cables (highlighted in red in figure 4.1). Note, this step is optional as they can be removed with the motherboard in the next step
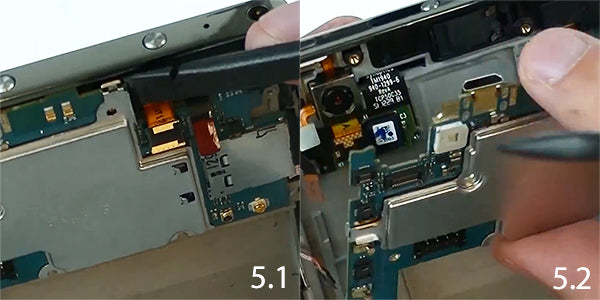
- (Figure 5.1) Now that the flex cables have been removed you will need to lift out the top motherboard. Use your pry tool and carefully wedge behind the motherboard. Create separation by wiggling the tool back and forth in order to remove the motherboard. Use caution during this step as the motherboard is held in place with adhesive.
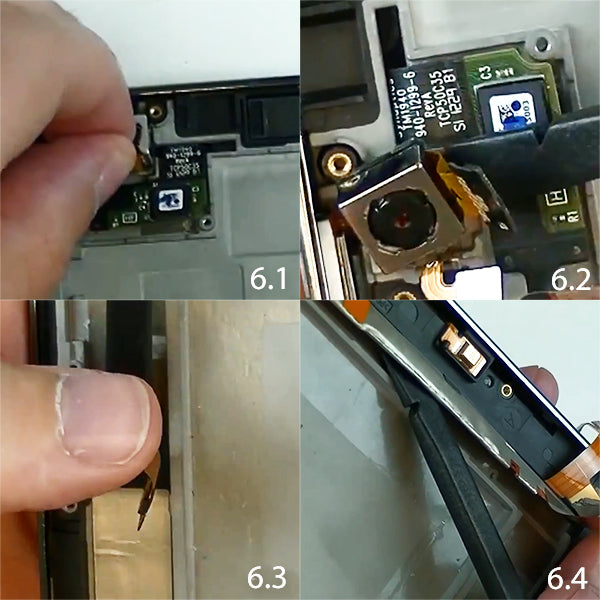
- Now with the motherboard removed. We can now removed the back facing camera show in (Figure 6.1 & 6.2)
- (Figure 6.3 & 6.4)Take the LCD flex from the back as you remove some of the adhesive.
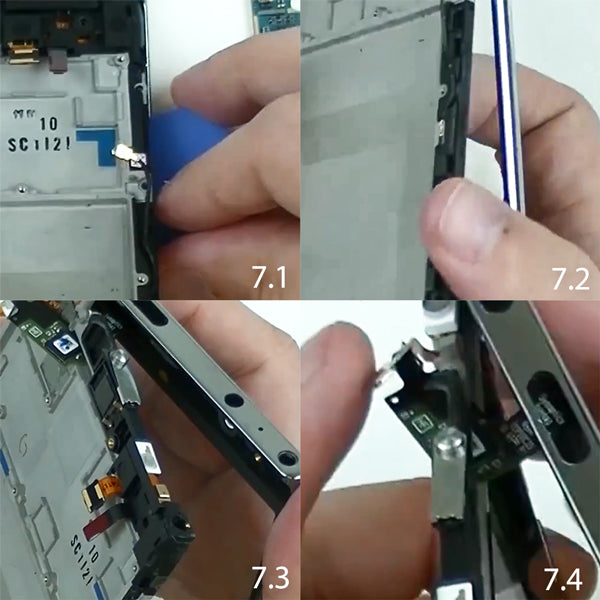
- (Figure 7.1) Take your safe pry tool and wedge it in the phone from the right side.
- Once you have it started you can lift up on the LCD casing and slowly put it away as shown in (Figure 7.2)
- (Figure 7.3 & 7.4) Shows you the Digitizer flex that you will need to slide it in the slot out of the phone as the Digitizer is now free.
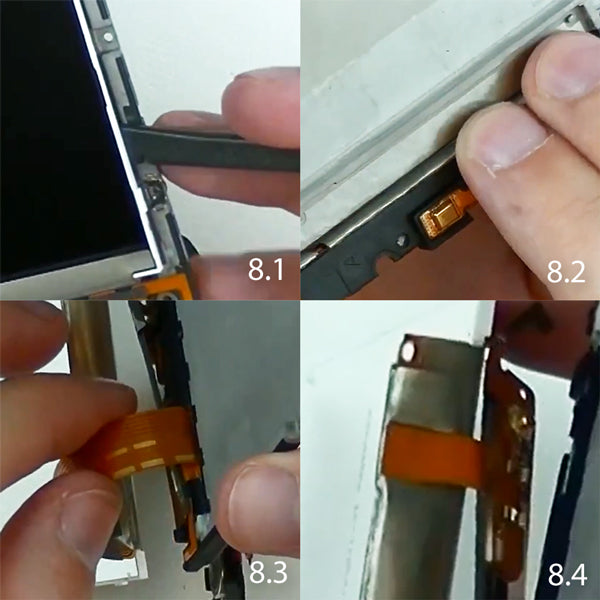
- (Figure 8.1) Once you have the Digitizer out we are now going to remove the LCD from the casing.
- (Figure 8.2) On the back of the LCD you will need to slide the LCD flex cable out of the casing.
See Figure 8.3 & 8.4 for Reference:
At this point all of the components have been removed, and your LG Optimus has been fully disassembled and ready to repair with new parts!
Notice:
RepairsUniverse does not accept any liability for damage, or injury caused, while you are following our disassemble guides. We make no representations, warranties, or conditions of any kind, express or implied. Utilizing these guides to assist you in repairing your mobile devices will void your warranty. RepairsUniverse strictly prohibits altering or modifying our teardown guides for commercial use, reproduction, or publication