Samsung Droid Charge i510 Take Apart Repair Guide
June 4, 2018 | 0 Comments
View the downloadable version of our how to fix your Samsung Droid Charge screen guide.
The RepairsUniverse team now offers this written repair guide to assist you in taking apart your Samsung Droid Charge i510. Follow each step as listed to be able to safely install new parts on your phone, such as a LCD + Touch Screen Digitizer Replacement. Please read the entire guide from start to finish before beginning repair on your phone.
This guide will help you install the following Samsung Droid Charge i510 parts(s):
- Samsung Droid Charge i510 LCD + Touch Screen Digitizer Replacement
- And Other Samsung Droid Charge i510 Replacement Parts
Tools Required:
Samsung Droid Charge i510 take apart/repair guide:
- Remove the back battery cover. Now remove the battery, sim card, and memory card.
- Remove the six (6) screws using the small Philip screwdriver as shown in Figure 1.
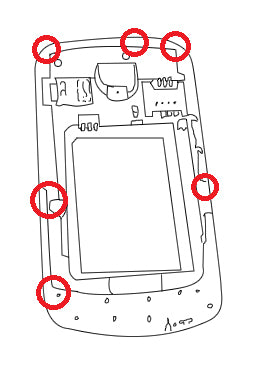
Figure 1
- Then, using an open safe pry tool carefully pry apart the back housing of the phone from the front housing, starting at one end and working your way slowly around the phone, releasing the clips.
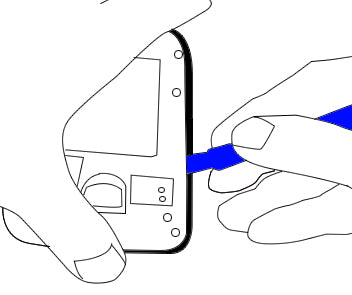
Figure 2
- Remove the main pop connector located on the left side of Figure 3. Simply use a pry tool and apply pressure upwards and the cable will release.
- Now gently lift the 2 flex cables attached to the housing by adhesive. Carefully pry under the cables to release them from the housing.
- Then, you can use the open safe pry tool (included free with the replacement parts) to remove the camera ribbon cable off its socket in the motherboard.
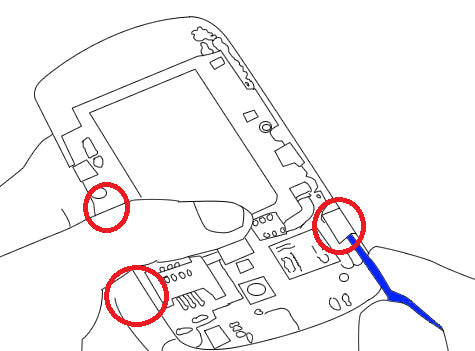
Figure 3
- Now you can remove the motherboard, careful not to damage any ribbons or cables in the process. Use the open safe pry tool or your fingers where it will help to separate the two, and use your safe open pry tool to lift the tape and disconnect the antenna wire.
- You are now left with the screen assembly with front housing. Use a heat gun or hair dryer to warm the front of the screen for about 45 seconds using medium heat. Use quick movements around the outside edges of the screen.
- Now use a safe open pry tool to pry between the screen and the housing. Carefully remove the housing. Reheat the adhesive if necessary.
- Once released you can now replace the LCD + Touch Screen Digitizer.
Notice:
Repairs Universe's guides are for informational purposes only. Please click here for details.
Learn about restrictions on reproduction and re-use of Repairs Universe's repair/take-apart/installation guides, and about creating hyperlinks to our guides.