Samsung Galaxy Note II Repair Guide
June 4, 2018 | 0 Comments
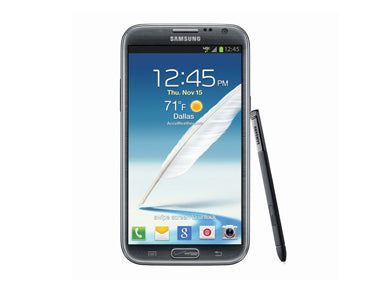
Do you have a broken or cracked Samsung Galaxy Note II screen? This in-depth repair guide will help you repair the screen or other internal parts and components. The guide will take you through each necessary step that will be essential in performing a successful and safe opening of your device and repair nearly any desired part.
This guide will assist in the installation of the following Samsung Galaxy Note II parts:
- Samsung Galaxy Note II LCD + Touch Screen Replacement w/Housing - Grey
- Samsung Galaxy Note II LCD + Touch Screen Replacement w/Housing - White
Required Repair Tools:
- Safe Pry Opening Tool
- Small Phillips Screwdriver (#00)
- Small Flathead Screwdriver
- Spudger Tool
- Adhesive Strips
- Heat Gun/Blow Dryer
Samsung Galaxy Note II Take Apart Repair Guide:
- To get started with the repair you will first need to power off your device.
- Start by taking out the stylus pen and the removing the back battery cover. Once the battery cover is taken off, remove the battery, sim card, and memory card.
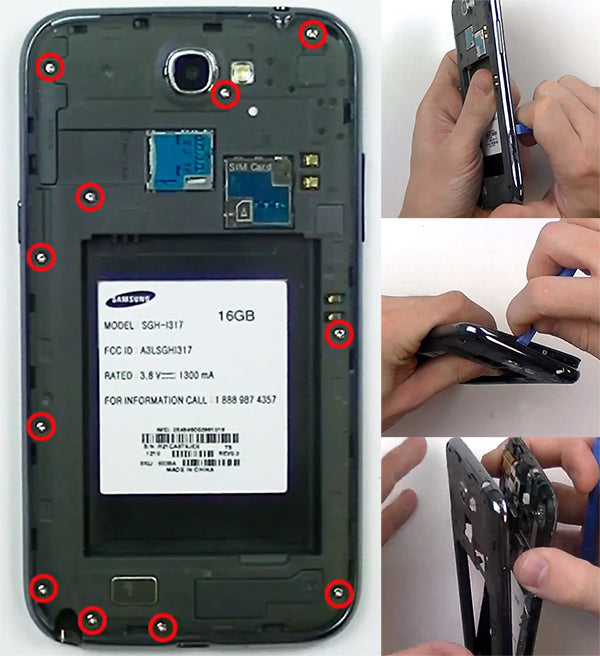
- Use a Small Phillips screwdriver and unscrew the eleven (11) screws from the back housing, highlighted in red in the figure directly below.
- Once these are removed, use a safe open pry tool to take off the back housing. Wedge the pry tool into the seam between the housing and the chrome bezel and run the tool along the sides and corners of the device releasing the clips in order to separate the housing. Note that one of the clips is located above the battery tray.
- After the back housing has been removed, you will se the motehrboard.
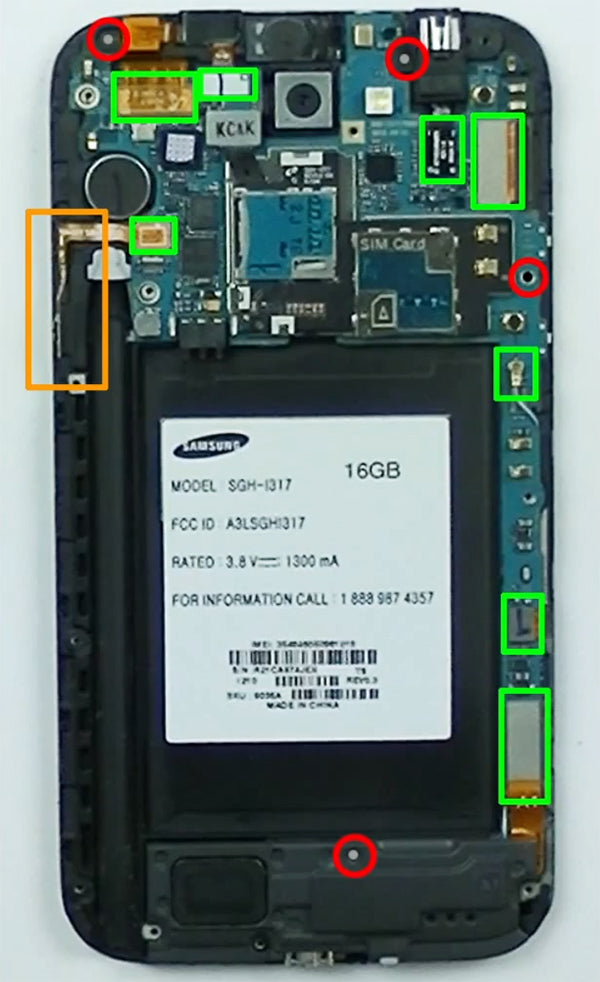
- You will now need to unscrew four (4) more Small Phillips screws (highlighted in red below).
- Once the screws are taken out, you can remove the loud speaker assembly which is located near the bottom of the device (below the bottom screw that was just removed)
- Now the pop connectors and antenna holding the motherboard in place can be released using your pry tool. These parts are highlighted in green below.
- During the release of the connections you will also completely remove the button flex cable which is held to the housing by a small amount of adhesive. This cable is on the left side of the device and is highlighted in orange below. It should be set aside for later.
- You can now gently remove the motherboard. Be mindful not to rip any of the flex cables whose connectors you have released.
- Located on the motherboard is a main camera. Use the pry tool to easily release the pop connector holding the camera to the motherboard. Then set these parts aside.
- Once the motherboard has been taken out, remove the following small components with your pry tool or small flathead screwdriver.
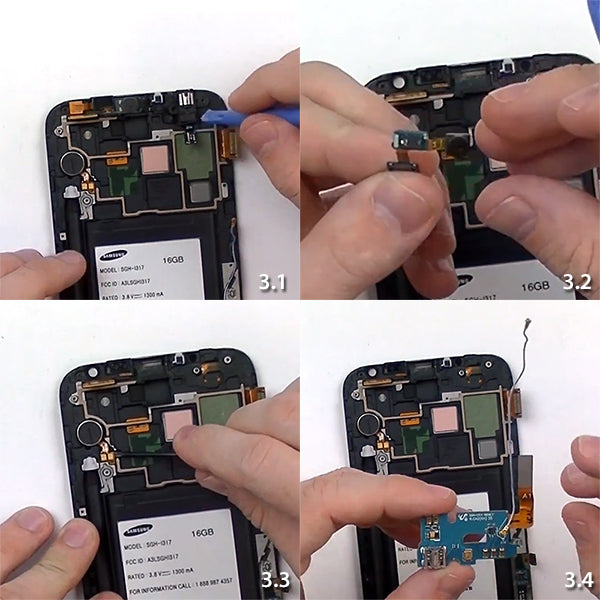
- (Figure 3.1) Remove the headphone jack along with the ear speaker.
- (Figure 3.2) Next, remove the front camera and sensors.
- (Figure 3.3) With the Small Flathead screwdriver, wedge underneath the vibrate motor to loosen and remove it. The adhesive holding this component is strong, and is best loosened using the Small Flathead screwdriver.
- (Figure 3.4) Now using the pry tool, lift the antenna cable away from its slot and lift away the flex cable (which holds your mic and USB port).
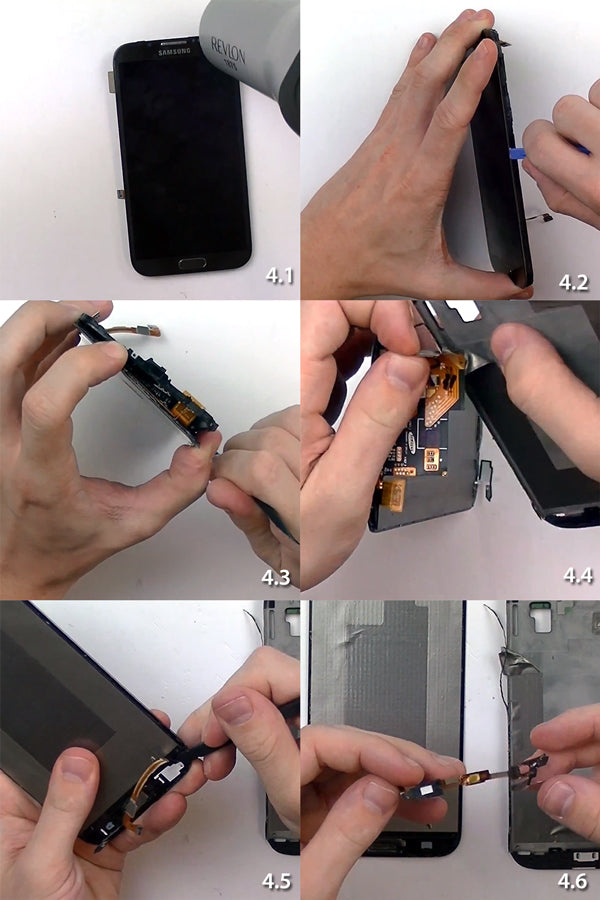
- (Figure 4.1) With a heat gun (on low) or blow dryer (on medium) heat the sides and edges of the touch screen for 45 seconds to 1 minute at about an inch or two away from the screen in order to loosen up the adhesive which holds the screen assembly to the front housing. Do not heat for longer than 1 minute at a time.
- (Figure 4.2) Wedge the pry tool between the seam of the touch screen and the front housing. It is generally easiest to start at the seam on the side of the device, and work your way to the bottom. Be wary not to damage the bottom flex cable.
- (Figure 4.3) Continue to pry along the seams of the touch screen in order to release it from the housing and the adhesive holding it in place. Use a spudger tool to loosen the top of the device, and then to pry above the LCD screen in order to be able to feed the cable through the slot in the housing.
- (Figure 4.4) Remove the last bit of adhesive that covers the flex cable.
- (Figure 4.5) With the spudger tool, remove the home button flex cable.
- (Figure 4.6) Finally, apply pressure to the home button to push it out.
- Simply reverse these steps in order to reassemble your device back together.
Notice:
RepairsUniverse does not accept any liability for damage, or injury caused, while you are following our disassemble guides. We make no representations, warranties, or conditions of any kind, express or implied. Utilizing these guides to assist you in repairing your mobile devices will void your warranty. RepairsUniverse strictly prohibits altering or modifying our teardown guides for commercial use, reproduction, or publication