Toshiba Thrive Repair Guide
June 4, 2018 | 0 Comments
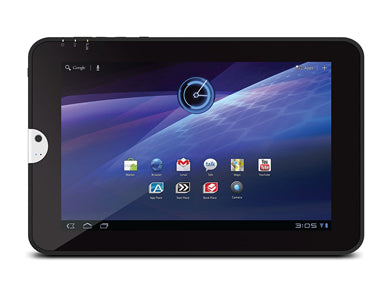
This repair guide will walk you through step by step instructions the tear down the Toshiba Thrive tablet to perform repairs such as replacing a cracked touch screen digitizer. You can order the parts and do this repair yourself to restore your broken Toshiba Thrive back to new working condition again.
This repair guide will help when needing to install the following Toshiba Thrive parts:
- Toshiba Thrive AT105/AT100 Touch Screen Digitizer Replacement
- Toshiba Thrive 7" LCD + Touch Screen Assembly Replacement
Recommended Repair Tools:
- Small Phillips Screwdriver
- Adhesive Strips
- Safe Open Pry Tool
- Heat Gun or Blow dryer
Toshiba Thrive Repair Guide:
How to Fix a Toshiba Thrive (Step-by-Step Tutorial) :
- You will want to start off by powering off your tablet completely.
- Next you will want to slide the two (2) tabs on the sides of the device to unlock the back cover. Then taking your safe open pry tool gently release the clips holding the cover in place.
- Once the back cover is removed slide the two (2) tabs to unlock the battery. Then take your finger of pry tool to lift out the battery from the device.
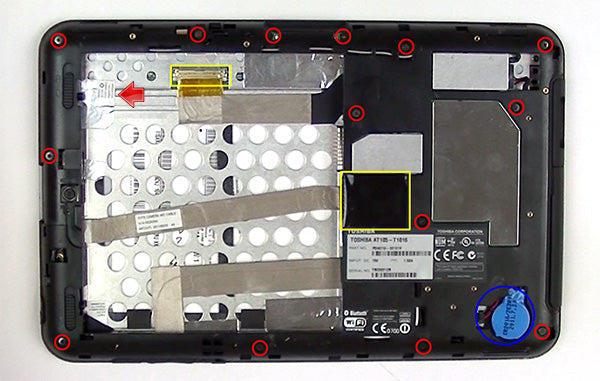
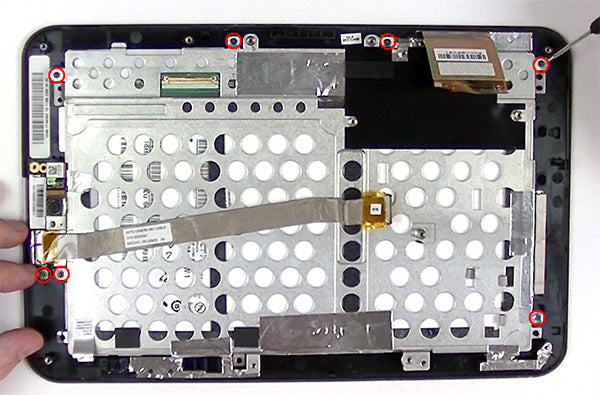
- Next take you pry tool and remove the c mos battery circled in BLUE in the figure below. You should be able to pry it up from the housing and release it from its socket connector.
- Now you will want to release two (2) connections highlighted in YELLOW in the figure below. The connctions are covered with some protective film that you will need to remove to expose the connection.
- With these connections released you can now take your Small Phillips Screwdriver (#00) and remove the fourteen (14) screws circled in the figure below.
- Before you can pry off the back housing you will want to lift up the mylar tape pointed out with a red arrow in the figure below.
See figure below for screw and connection locations.
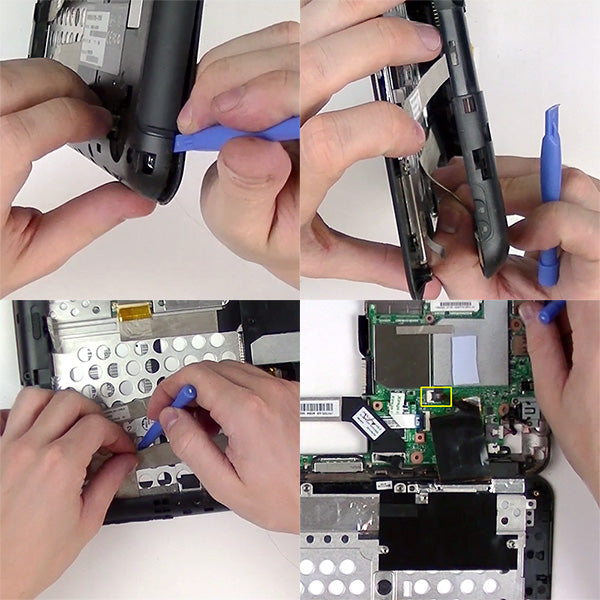
- With all of the screws and connections release you can now take your safe open pry tool and start prying off the back housing. Insert your pry tool in between the seam of the housing and mid-frame to release the clips holding them in place.
- While doing the you will wan to be cautious of the flex ribbon connector that may still be adhered to the metal housing. Just gently lift it off the adhesive holding it to the frame.
- With the cables free and all the clips released fold the back housing over to the side that is still connected to the main motherboard.
- In the figure below you will see a jaw-bone connection highlighted in YELLOW you will need to release to remove the screen assembly and housing from the main motherboard.
See figure below for reference.
Now that you have removed the motherboard from the screen assembly you will have seven (7) Small Phillips Screws to remove circled in the figure below. Keep note there are other screws left but would only need to be removed to if you are replacing the LCD screen. These screws hold the LCD screen to its metal housing.
See figure below for screw locations.
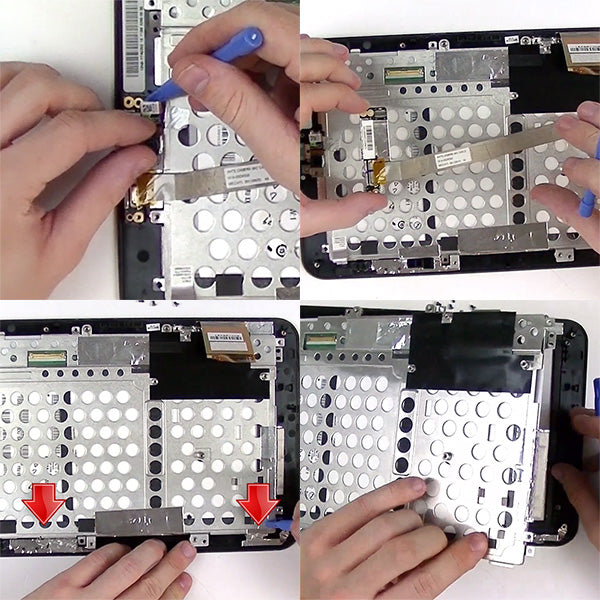
- With all of the proper screws removed you can release the connector for the rear camera and gently pry up and lift out the small circuit board with attached flex cable.
- You will then want to peel up the mylar tape pointed out with arrows in the below figure to be able to pry and lift out the LCD and frame assembly.
See figure below for reference.
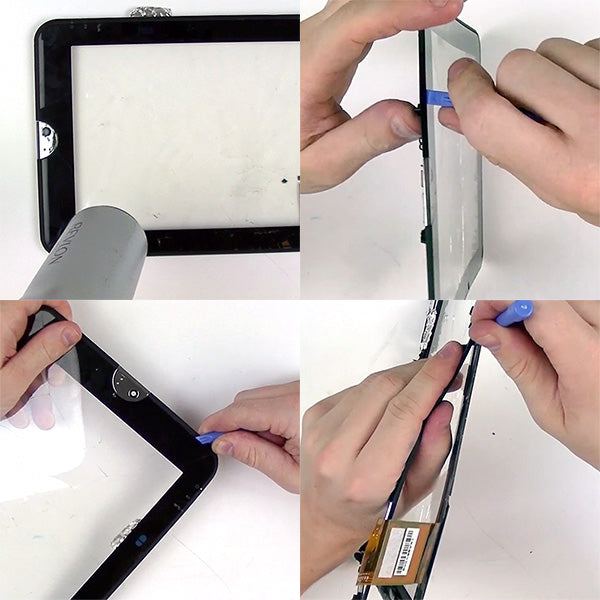
- Now that you have the glass touch screen and front housing remaining you can begin the process of removing the touch screen.
- Take your heat source on a medium setting and apply heat to the outer edges of the screen. Be sure to evenly apply heat in 30-45 seconds intervals. The outer bezel is quite fragile so you will want to make sure not to over heat and melt it.
- With the bezel properly heated you can now insert your pry tool and begin releasing the adhesive holding it together.
- If your touch screen is completely shattered you may find using some clear packing tape to cover the cracks will dramatically reduce the amount of shards coming off during this process.
- Re-apply heat to stubborn areas to help loosen the adhesive to finish the process.
See figure below for reference.
Notice:
RepairsUniverse does not accept any liability for damage, or injury caused, while you are following our disassemble guides. We make no representations, warranties, or conditions of any kind, express or implied. Utilizing these guides to assist you in repairing your mobile devices will void your warranty. RepairsUniverse strictly prohibits altering or modifying our teardown guides for commercial use, reproduction, or publication