HTC Inspire 4G Screen Repair Take Apart Guide
June 4, 2018 | 0 Comments
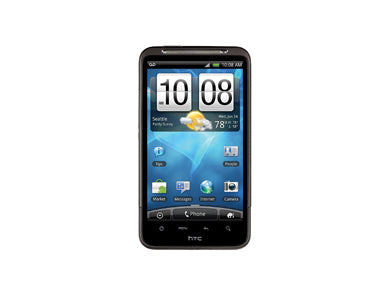
This written guide for the HTC Inspire will walk you through fully disassembling and replacing nearly all internal components. This guide has been compiled by the RepairsUniverse team and can be used to safely and quickly replace damaged or faulty parts, such as a cracked glass touch screen digitizer, damaged LCD display, and even faulty speakers. Our screen repair guide for the Inspire / Desire HD are basic installation instructions for screens but can also be used to repair nearly any internal component.
This guide will help you to install the following HTC Inspire 4G part(s):
- HTC Inspire 4G LCD Replacement Display
- HTC Inspire 4G Touch Screen Digitizer Replacement
- HTC Inspire 4G Housing Assembly Replacement
- HTC Inspire 4G Loud Speaker Replacement
- HTC Inspire 4G Earpiece Speaker Replacement
- HTC Inspire 4G Sim Card Tray Replacement
- Other HTC Inspire 4G Parts
Tools Required:
- Safe open pry tool
- Small Phillips
- Torx T5 Screwdriver
- Heat Gun / Hair Dryer
HTC Inspire 4G Screen Repair Take Apart Guide:
- The first step will be to remove the battery. To do this, remove the long cover located on the side of the phone. With the cover removed, you can then slide the battery out.
- Now, remove the cover located at the bottom of the phone.
- The next step will be to remove the cover located next to the camera. This one is a bit more secure in place and may take some time to work out. Use a pry tool to slowly lift the cover, being sure not to damage the clips holding it in place. You may need to press it out from the inside. There are many methods to do this, the key is using something strong and thin to work through the battery slot (without damaging internal components) and then forcing the cover up, from the inside.
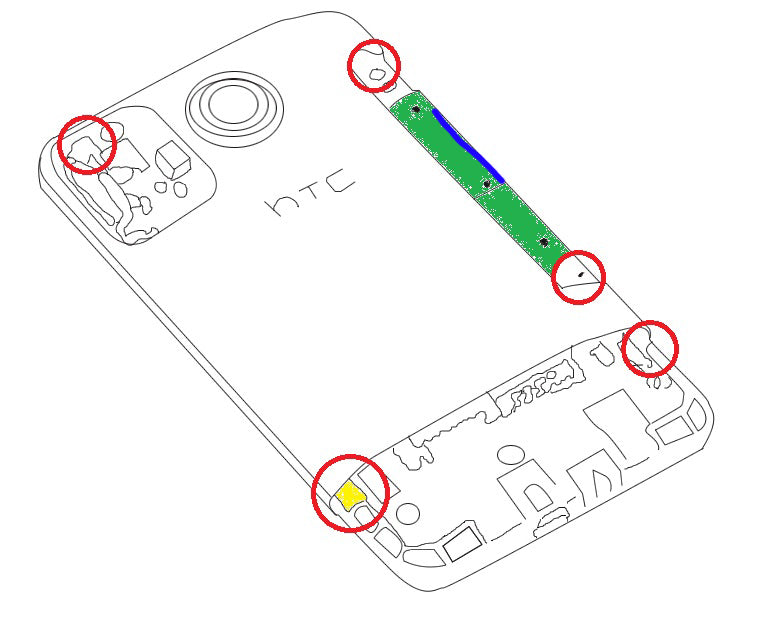
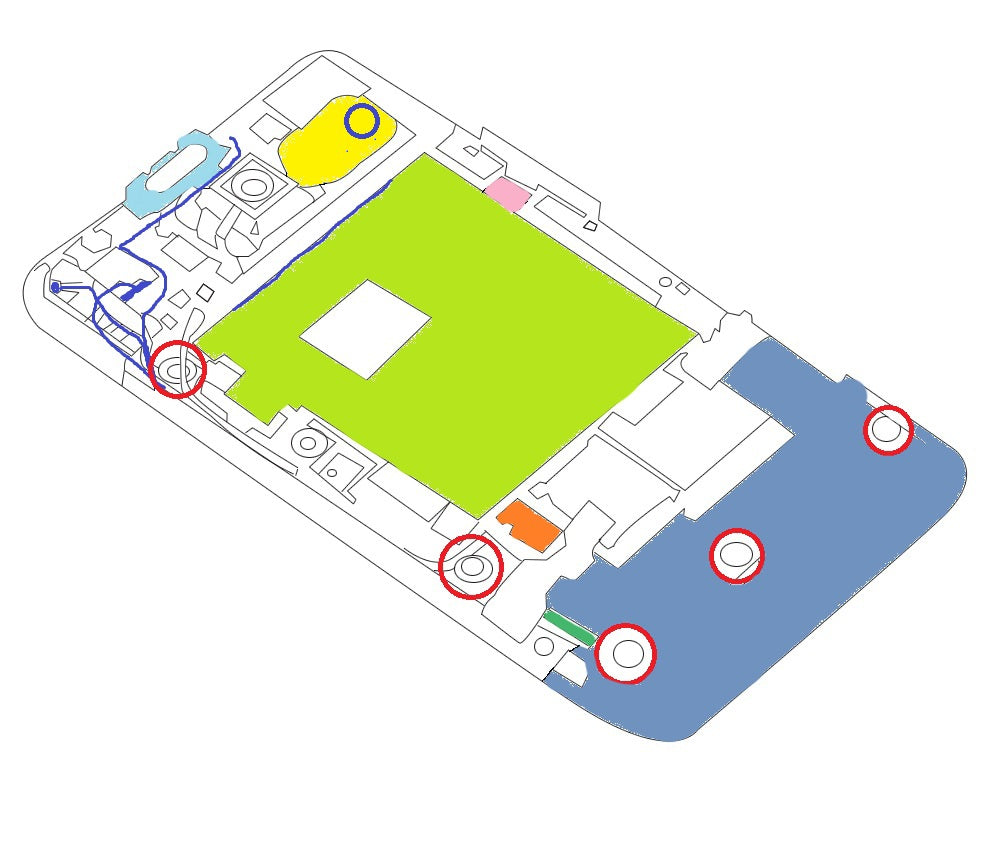
- With all of the housing covers removed, remove the five (5) torx T-5 screws (red circle). One is located by the GPS / Flash cover, two are located on the battery side cover, and the final two are located on the edges of the bottom cover.
- Remove the small metal plate from the bottom left of the bottom cover (yellow). You will then need to remove the sticker/product label in the battery compartment. This will give you access to the volume button flex cable. Gently remove the cable from behind the volume button, be cautious as this is very fragile. Once the cable is lifted from the housing, you can proceed.
- Remove the back housing by gently lifting it from the rest of the phone.
- Locate the three (3) torx T-5 screws holding the plastic cover at the bottom of the phone (red circles). Remove these and the plastic cover by gently lifting it away (pale blue).
- Located near the sim card tray, there is a rubber bumper and tape, remove these, making note of the location (near orange). This will expose a large pop connector near the bottom of the phone, this is the LCD flex cable. Use a safe open pry tool to lift the connector up (dark green).
- Now remove the antenna cable frame, this is a small piece of metal located at the top of the battery compartment. Simply pull it up and away. (blue, above battery compartment)
- Use a safe open pry tool to pry the vibrator motor up, this is located below the battery connector (pink).
- Now, remove the loud speaker, this is the oval speaker located next to the camera (yellow). Gently lift the speaker up and remove the one (1) small Phillips screw hidden underneath (blue circle).
- Now, remove the ear speaker from the housing (teal). You can do this without disconnecting the speaker from the motherboard, simply pry it up and away, careful of the flex cable.
- Disconnect the black antenna cable, located next to the ear speaker by prying it up with a safe open pry tool (blue cables).
- You can now remove the tape covering the sim card tray. It is held in place with a pop connector. Disconnect this and remove the sim card tray assembly (orange).
- Above the battery port, there is one (1) last torx T5 screw, remove this (red circle).
- You should now be able to remove the full motherboard assembly. Be careful nothing else is connected and slowly work it away from the rest of the phone.
- You will now need to heat the screen assembly using either a heat gun or hair dryer. Use quick movements, all around the back and front of the assembly. This will take some time and may need to be reheated.
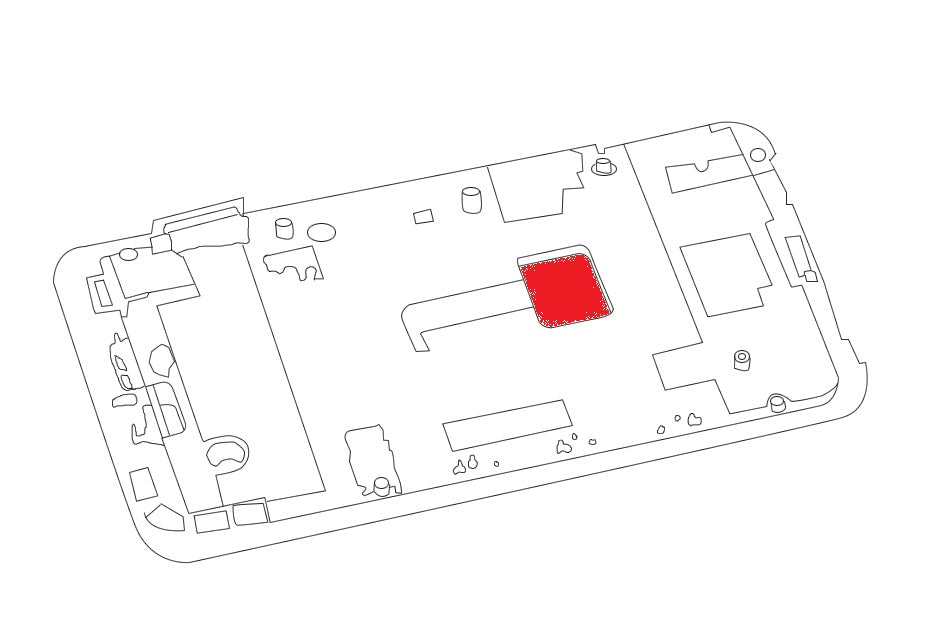
- Use a pry tool, flat head screwdriver, or any thin piece of metal on the small hole ((red) has the bar codes, etc) on the back of the assembly, you will need to release all of the very strong adhesive, holding the screen assembly in place. This is the most tedious and important step and requires much time and patients.
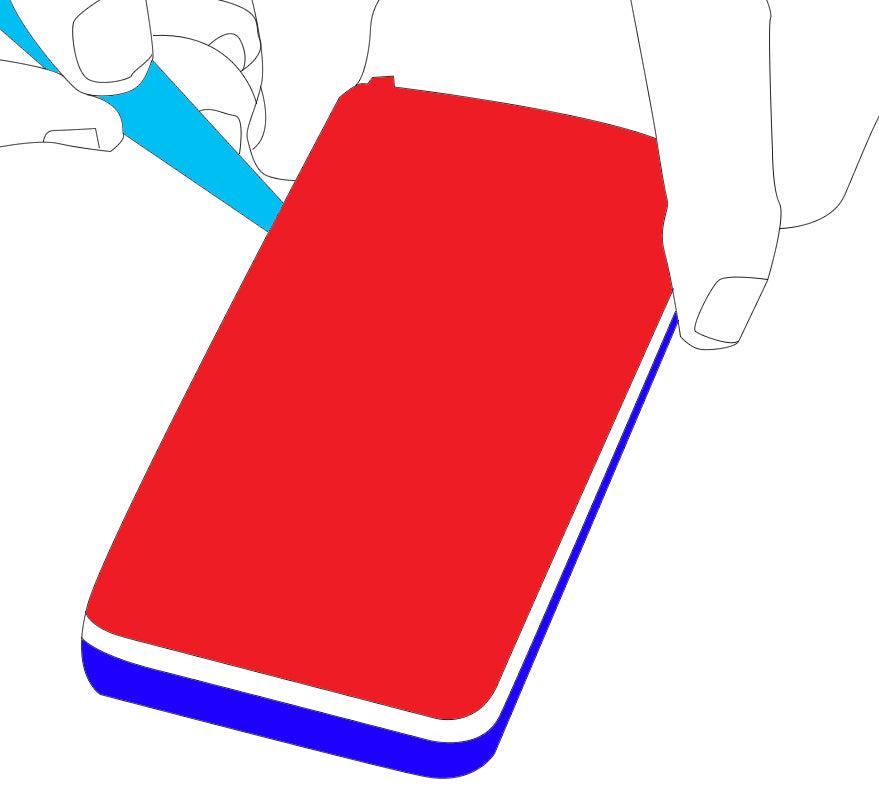
- You will now need to use a safe open pry tool around the outside edge of the screen and housing. If done properly, the screen assembly should come away from the front housing with a small bit of force.
- Split the LCD screen from the touch screen digitizer using a safe open pry tool. Be careful as to not damage either screen.
- With the screens separate, you can now replace the glass touch screen digitizer or the LCD display.
- Follow the video guide below for information about the touch screen digitizer replacement.
- Your HTC Inspire / Desire HD is now disassembled. To re-assemble, follow this guide in reverse.
Applying Adhesive to the Touch Screen Digitizer:
Notice:
Repairs Universe's guides are for informational purposes only. Please click here for details.
Learn about restrictions on reproduction and re-use of Repairs Universe's repair/take-apart/installation guides, and about creating hyperlinks to our guides.