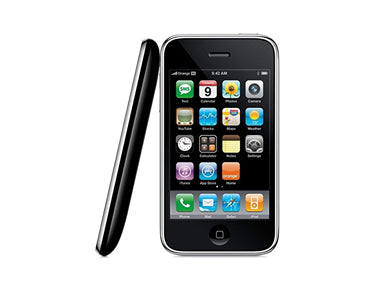
iPhone 3GS Take Apart Glass Touch Screen Digitizer Repair Guide
June 4, 2018 | 0 Comments

This Repairs Universe video guide shows how to take apart and disassemble the iPhone 3GS cell phone. We go through the steps required to quickly and safely open your phone and install a replacement glass touch screen digitizer. This guide has been designed and put together by the Repairs Universe team. For more information about cracked iPhone 3GS screens, click here.
This guide will help you to install the following iPhone 3GS replacement parts:
Recommended Tools:
iPhone 3GS Glass Touch Screen Digitizer Replacement Take Apart Repair Guide:
To reassemble your iPhone 3GS, simply reverse these instructions.
iPhone 3GS LCD & Touch Screen Digitizer Replacement Summary:
Using this summary in correlation with the video will insure proper instructions are given and a safe repair is made.
- Remove the sim card and remove the 2 screws from the bottom of the phone. Using a safe pry tool run as along the bottom of the phone between the bezel and glass. Next slowly lifts the glass.
- There are now 3 flex ribbon connectors which need to be released. Two of the connectors are �pop� connectors which simply need pressure applied in an upward direction to release them. The third connector is a jaw connector. To release the cable from the jaw connector lift the white tab up 90 degrees using a safe pry tool and carefully pull the ribbon out of the connector.
- Remove the digitizer glass from the rest of the phone. To access the LCD and digitizer we need to remove several small Philips screws. Remove all of the screws.
- Remove the LCD screen away from the digitizer. Use a flat headed screw driver and just pray away the metal frame. Slide out and then lift the LCD.
- Use hair drier to heat the glue. Pry up the digitizer from the plastic mid section use a safe fry tool. Gently lift it up. Once you had released the glue from one end you need to start on the other.
- Release the digitizer from the mid section. Remove the digitizer from the mid section. Now you have separated the digitizer from the mid section, remove any exist glue from the mid section, and you can now install a new digitizer.�
This guide will help you to install the following iPhone 3GS replacement parts:
iPhone 3GS Dock Port Assembly Replacement Guide:
Notice:
Repairs Universe's guides are for informational purposes only. Please click here for details.
Learn about restrictions on reproduction and re-use of Repairs Universe's repair/take-apart/installation guides, and about creating hyperlinks to our guides.

