LG Thrill 4G Screen Repair Video Guide
June 4, 2018 | 0 Comments
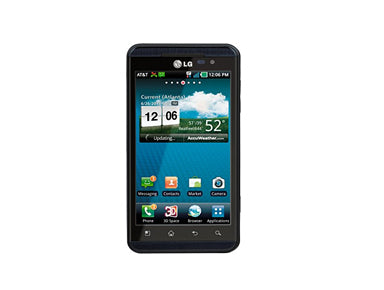
View the downloadable version of our how to fix a LG Thrill 4G screen guide.
This is a detailed video guide for the LG Thrill. Following this guide will insure you quickly and safely take apart your Thrill to replace the touch screen or LCD screen. While the phone is disassembled you will also have access to many other parts that can be repaired or replaced.
This guide will help you to install the following LG Thrill part(s):
Tools Required:
- Safe open pry tool
- Small Phillips Screwdriver
- Heat Gun / Hair Dryer
LG Thrill take apart guide:
We recommend watching the below video from start to finish before starting the repair, and then pausing / rewinding and reviewing when needed.
Reverse the instructions above to reassemble your phone.
Applying Adhesive to the Touch Screen Digitizer:
LG Thrill 4G Written Repair Guide
This guide will help you take apart the latest LG Thrill 4G fairly easily in a step by step manner giving you a chance to replace faulty parts. It should also help you take apart your LG Thrill 4G to a certain point, replace the parts which are not working and then put it back together again following the instructions in reverse.
This guide will help you to install the LG Thrill 4G part(s):
Tools:
- Small Phillips Screwdriver
- Safe Open Pry Tool
- Adhesive Strips (For Touch Screen Replacements)
- Heat Gun / Hair dryer
LG Thrill 4G Disassembly Guide:
- The first step is to turn off your phone and remove back battery cover with your fingers and remove battery. If there is a SIM and memory card remove and set aside as well.
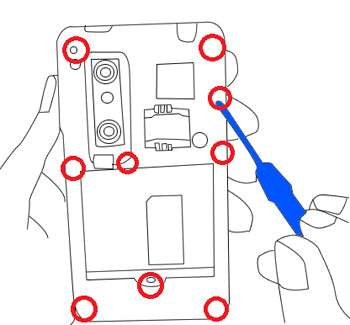
- Use a small Phillips screwdriver, remove all nine (9) screws on the back of the cover as shown in Figure 1.
- Once you have taken out the screws you will need to remove the back housing by running a safe open pry tool around the sides. Run the tool around the entire length of the binding in order to release the plastic latches, as shown in Figure 2.
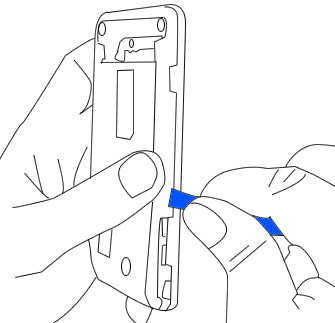
Figure 2
- Remove the power, volume, and side button from the housing and put to the side.
- You will now be able to use a pry tool to release the 3 flex cables located in red in Figure 3. Once these have been release, you will be able lift the sim card circuit board from the motherboard (green).
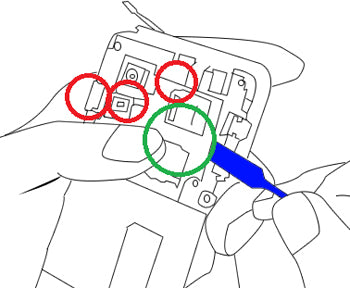
Figure 3
- You may now remove the last 3 cables from the motherboard, located in red circles on Figure 4. You must also release the power and volume button flex cables (located in yellow) from the housing.
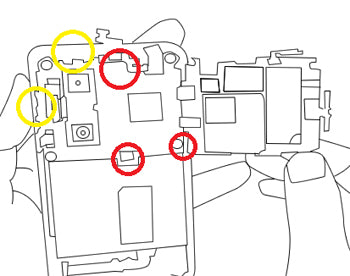
Figure 4
- The motherboard can now be removed.
- Use a hot air gun or hair dryer to heat up the front of the phone and loosen the glue that holds the LCD screen and the touch screen digitizer intact. You can begin to use your pry tool along the seam to separate the two pieces.
Now you will be able to replace any parts on your LG Thrill 4G. Simply replace the damaged parts with the new ones and reverse the order to put your phone back together again.
Notice:
Repairs Universe's guides are for informational purposes only. Please click here for details.
Learn about restrictions on reproduction and re-use of Repairs Universe's repair/take-apart/installation guides, and about creating hyperlinks to our guides.
