HTC Amaze 4G Take Apart Repair Guide
June 4, 2018 | 0 Comments

View the downloadable version of our how to fix your HTC Amaze 4G screen guide.
The RepairsUniverse team has put together a take apart repair guide for replacing various parts on your HTC Amaze 4G. In this guide you will learn the steps to properly take your HTC smartphone apart safely. Repair nearly any internal component on your Amaze 4G using this detailed repair guide.
This guide will help you to install the following HTC Amaze 4G part(s):
Tools:
- Safe Open Pry Tool
- Torx T5 Screwdriver
- Adhesive Strips (For Touch Screen Repairs)
- Heat Gun/Hair Dryer
HTC Amaze 4G Take Apart Repair Guide:
- To begin, remove the back battery cover, battery, sim card, and memory card.
- Remove the seven (7) Torx T5 screws as located in Figure 1.
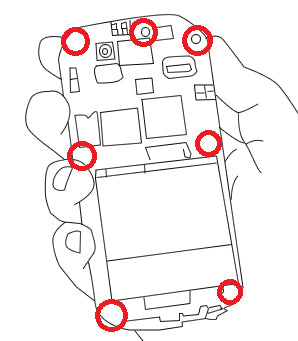
Figure 1
- You can now remove the back housing from the rest of the smartphone. Do this by carefully using a safe open pry tool to lift the outer edges, unclipping each clip holding the housing in place.
- With the back cover removed, you now have access to the motherboard. The upper portion of the motherboard will have one connection located on the back side of the motherboard. Carefully lift the motherboard away from the rest of the screen assembly and carefully release this connection. It will be a "jaw" connector, so you will need to carefully lift the back flap of the connector and slide the flex cable out of the connection.
- Gently fold the motherboard towards the bottom of the phone. There are two (2) flex cables that will need to be released. Both will be covered by mylar tape. Remove the tape and release both jawbone connectors. With these flex cables released, you can remove the motherboard from the rest of the phone.
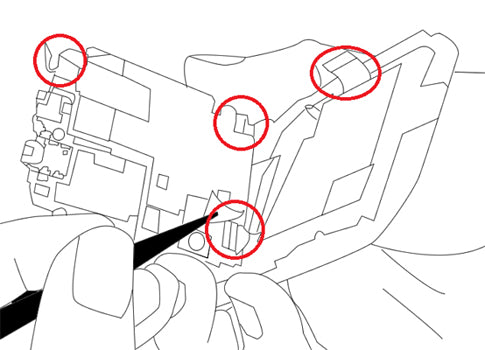
Figure 2
- Now, heat the front of the screen using a hair dryer or heat gun. Use quick movements, not staying in one area for too long. Medium - high heat will be required to properly warm the adhesive holding the screen assembly in place. Take your time and reheat as required. Also be aware of the 2 flex cables that are located under the screen assembly (touch screen and LCD screen flex cables).
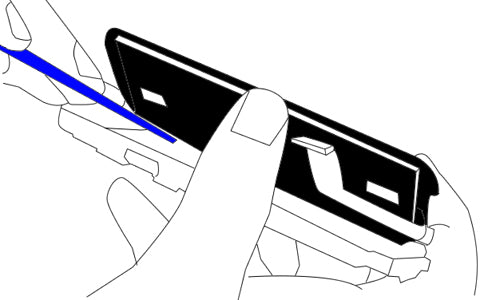
Figure 3
- Once the screen assembly has been removed from the housing, you can now use a small flat head screwdriver or similar to carefully separate the LCD screen from the touch screen digitizer. Heat may be required.
- You can now replace either the touch screen digitizer or the LCD screen.
Applying Adhesive to the Touch Screen Digitizer:
Simply replace the damaged parts with the new ones and reverse the order to put your phone back together again.
Notice:
Repairs Universe's guides are for informational purposes only. Please click here for details.
Learn about restrictions on reproduction and re-use of Repairs Universe's repair/take-apart/installation guides, and about creating hyperlinks to our guides.