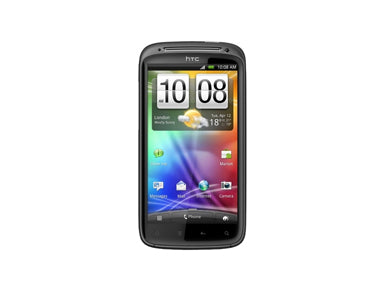
HTC Sensation Take Apart Repair Guide
June 4, 2018 | 0 Comments
RepairsUniverse now has a take apart repair guide for the HTC Sensation. Our video will guide you through the required steps to disassemble and repair many internal components; touch screen digitizer and LCD screen. Following this guide will insure a quick and safe repair is made.
This guide will help you to install the following HTC Sensation 4G part(s):
- HTC Sensation Touch Screen Digitizer Replacement
- HTC Sensation LCD Screen Replacement
- And other HTC Sensation Parts
Tools Required:
- Safe open pry tool
- Torx T5 Screwdriver
- Small Phillips Screwdriver
- Adhesive Strips (For Touch Screen Replacement)
HTC Sesnation Take Apart Guide:
We recommend watching the below video from start to finish before starting the repair, and then pausing / rewinding and reviewing when needed.
Reverse the instructions above to reassemble your phone.
Applying Adhesive to the Touch Screen Digitizer:
HTC Sensation Written Take Apart/Repair Guide:
- Remove the back battery cover by pressing in the button that will loosen the cover. Remove the cover using your fingers, and then you can easily remove the back battery.
- Remove the six tiny T5 Torx screws using your Torx screwdriver and set aside .
- Then, using your open safe pry tool, you can easily pry apart the back housing of the phone from the front housing, starting at one end and working your way slowly around the phone.
- Using Torx screwdriver, remove screw as shown in figure 1.
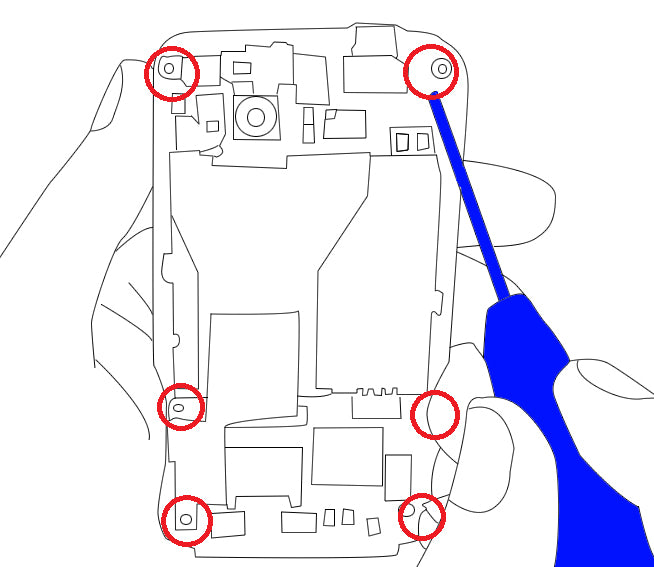
Figure 1
- Carefully lift tape at the edge of the motherboard, and unclip any clips that are holding any ribbons, etc. in place. These will often appear as flat pieces of metal, but are sometimes an actual ribbon, such as the camera ribbon cable.
- Then, you can use the open safe pry tool (included free with the replacement parts) to remove the camera ribbon cable off its socket in the motherboard.
- Now you can remove the motherboard, careful not to damage any ribbons or cables in the process. Use the open safe pry tool where it will help to separate the two, and use your nippers to lift the tape and disconnect the antenna wire, as shown in figure 2.
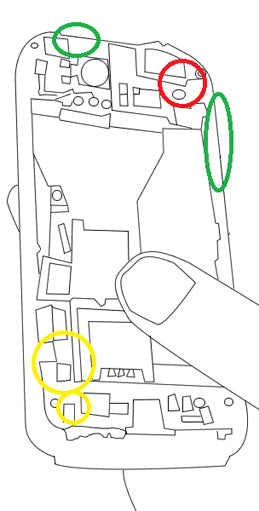
Figure 2
- Once the motherboard is separated from the frame, you will need to remove the ribbon flex cable that connects the two. Remove the tape that covers it and then carefully remove this cable without ripping it.
- After removing this cable, you will have the motherboard completely separated from the LCD screen and touch screen digitizer. To begin removal of the touch screen, you will need to use your hot air gun or hair dryer to heat the glue on the edges of the phone.
- Once heated well enough to loosen the glue, use the safe pry tool to slide along all edges of the phone and separate the screen from its housing. Take your time, and slowly separate as you slide along the edges.
- When they are officially separated, the flex cable beneath the touch screen will become disengaged from the screen. You can carefully remove it by sliding it through the hole as shown in figure 3.
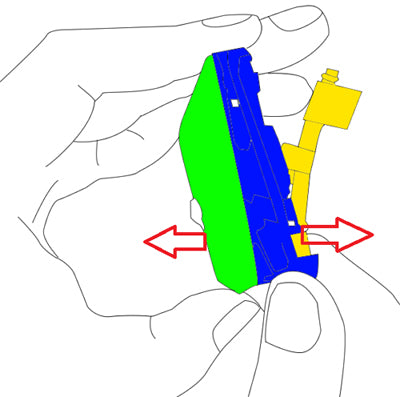
Figure 3
- At the other end of the phone, there is tape/glue that holds the screen in place. Carefully use your pry tool to separate the two pieces.
- If replacing the LCD screen, you can continue with the take-apart, and the next step is to heat the entire back of the LCD screen.
- Just as with the touch screen digitizer, you will use the pry tool to carefully follow all edges and separate the cables as necessary as you go.
Now you will be able to replace any parts on your HTC Sensation. Simply replace the damaged parts with the new ones and reverse the order to put your phone back together again.
Replacing HTC Sensation Speakers
Are you having issues with the speakers on your HTC Sensation? These detailed video guides will walk you through replacing both the loud speaker and the earpiece speaker to resolve all your audio issues on your HTC smartphone
This guide will help you to install the following HTC Sensation parts:
Tools Required:
Optional Tools:
- Small Flathead Screwdriver
- Adhesive Strips - May be required for certain speakers.
HTC Sensation Earpiece speaker replacement guide:
Note: Some speakers may need to be raised, using adhesive, to give full contact with the connectors. You may attempt to re-use the previous adhesive from an old speaker, but fresh adhesive is recommended.
HTC Sensation Loud speaker replacement guide:
Note: Some speakers may need to be raised, using adhesive, to give full contact with the connectors. You may attempt to re-use the previous adhesive from an old speaker, but fresh adhesive is recommended.
Notice:
Repairs Universe's guides are for informational purposes only. Please click here for details.
Learn about restrictions on reproduction and re-use of Repairs Universe's repair/take-apart/installation guides, and about creating hyperlinks to our guides.