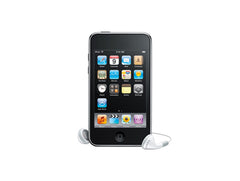
iPod Touch 2nd Generation Screen Reassembly Repair Guide
June 4, 2018 | 0 Comments

View the downloadable version of our how to fix your iPod Touch 2G screen guide
This video from RepairsUniverse is a step-by-step guide to reassembling your iPod touch as well as replacing your touch screen digitizer on a 2nd generation iPod touch. The products in this video can all be found on our website. Replacing the iPod Touch digitizer is a fast and simple repair, as shown in the video. With the correct tools and parts provided by RepairsUniverse, you can have your 2nd generation iPod touch back together in no time! In the video it will explain how to prep a new Mid Section or reuse an old one. This video will further explain the use of adhesive strips and placement of the Mid Section to the digitizer. Followed by complete reassembly of the iPod touch 2nd generation.
This guide will help you to install the following iPod Touch 2nd Generation replacement parts:
- iPod Touch 2nd Gen (iTouch) Replacement Touch Screen + Digitizer
- iPod Touch 2nd Gen Mid Section for Digitizer and Glass
- iPod Touch 2nd Gen (iTouch) Home Button Flex Replacement Metal Plate
- iPod Touch 2nd Gen (itouch) Home Button Replacement
Tools Required:
iPod Touch reassembly screen repair guide:
Apple iPod Touch 2nd Generation Touch Screen Digitizer Assembly Summary:
Using this summary in correlation with the video will insure proper instructions are given and a safe repair is made.
- Remove the home button flex cable which is attached to the metal plate (please note you can skip your step if you are reusing your original mid section). Pry the metal frame into the sides with a small screwdriver or safe pry tool (do not pry the middle as you could damage the home button flex ribbon cable).
- Reattached the metal plate to a new mid section (please note you can skip your step if you are reusing your original mid section).Place the metal plate in place over the small black box and gently press down. Remove the covering that has already adhesive strips pre installed.
- Put the mid section on one side and then remove the screen protectors from a newly purchase glass touch screen digitizer replacement.
- Put your home button in place makes sure attach fit the holes on the mid section. Then being careful of the ribbon cable put the glass touch screen digitizer in place on to the mid section and presses down secure in place.
- Reattach the digitizer to the iPod. Line the digitizer connector up with the connector of the iPod and gently press in place (be careful not to pull or twist the ribbon cable as it quite fragile and can easily rip).
- Gently place the glass into the correct position. Before pushing the glass into place you have to check if it?s working. Once everything is okay gently press it down so it clips in.
Notice:
Repairs Universe's guides are for informational purposes only. Please click here for details.
Learn about restrictions on reproduction and re-use of Repairs Universe's repair/take-apart/installation guides, and about creating hyperlinks to our guides.