LG enV2 Take Apart Repair Guide
June 4, 2018 | 0 Comments

The RepairsUniverse Team has compiled this written guide to show how to take apart and disassemble the LG enV2 cell phone. This shows the method used to quickly and safely open your phone so you can install a replacement LCD screen and glass touch screen digitizer.
This guide will help you to install the following LG enV2 replacement parts:
- LG enV2 LCD Screen Replacement
Tools Required:
LG enV2 disassembly guide:
- To begin, remove the back battery cover and the battery.
- In Figure 1 the location of six (6) screws are shown, however, five (5) are covered with small plastic caps that will need to be removed first.
- Now, using a small Phillips screwdriver, remove the six (6) screws around the phone, as shown in Figure 1.
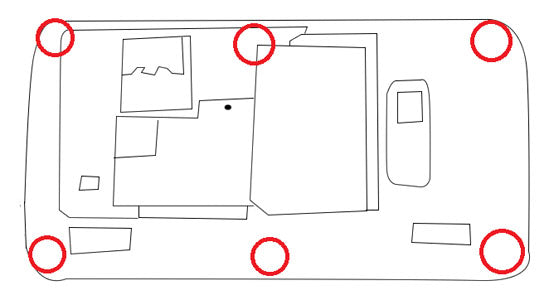
Figure 1
- Use a safe open pry tool to pry up the bezel surrounding the keyboard. Work your way around all the edges and lift the bezel as much as possible to remove the keys.
- You can then flip the motherboard over slightly to gain access to the one (1) pop connector. Use a safe open pry tool to release this cable from the motherboard.
- The motherboard can now be removed.
- There will now be four (4) screws which will need to be removed using a small Phillips screwdriver as shown in Figure 2
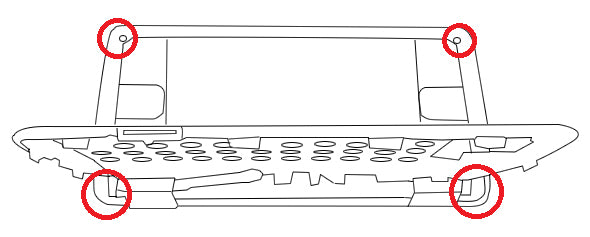
Figure 2
- Now, using a safe open pry tool, separate the front screen assembly from the rear housing.
- Be cautious as the housing and keyboard bezel will still be attached due to the motherboard flex.
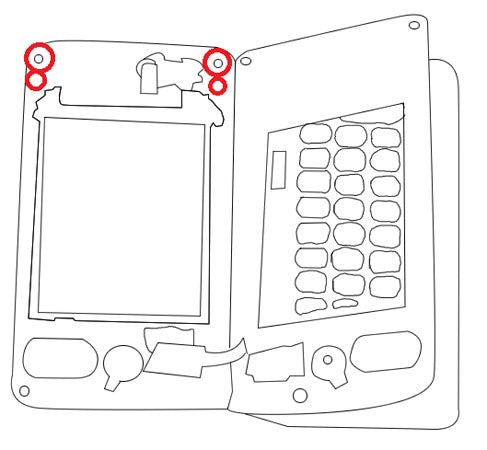
- With the back housing released (still connected to the assembly the MB flex) remove the four (4) screws to release the screen assembly as shown in Figure 3.
- Use a safe open pry tool to gently remove the front housing from the rest of the device. Carefully pry along all edges.
- The lower LCD screen flex will be soldered onto the board. Carefully de-solder the connection and pry the LCD screen from the rest of the screen assembly.
- The front keypad will be adhered onto the screen assembly.
Simply replace the damaged parts with the new ones and reverse the order to put your phone back together again.
Notice:
Repairs Universe's guides are for informational purposes only. Please click here for details.
Learn about restrictions on reproduction and re-use of Repairs Universe's repair/take-apart/installation guides, and about creating hyperlinks to our guides.