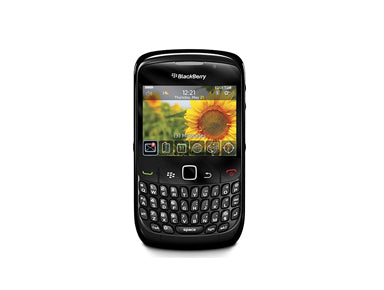
Blackberry Curve 8520 LCD Screen Repair Guide
June 4, 2018 | 0 Comments

This video guide shows how to disassemble the Blackberry Curve 8520 / 8530 cell phone quickly and safely. This guide has been designed and put together by the Repairs Universe team.
This guide will help you to install the following Blackberry Curve 8520 / 8530 parts:
- Blackberry Curve 8520 / 8530 LCD Screen Replacement Version 001/004
- Blackberry Curve 8520 / 8530 LCD Screen Replacement Version 002/004
- Blackberry Curve 8520 / 8530 LCD Screen Replacement Version 003/004
- Blackberry Curve 8520 / 8530 LCD Screen Replacement Version 005/004 & 111/112 Version
- Blackberry Curve 8520 / 8530 LCD Screen Replacement Version 007/011
- Blackberry Curve 8520 / 8530 Loud Speaker Replacement
- Blackberry Curve 8520 / 8530 Earpiece Speaker Replacement
- Blackberry Curve 8520 / 8530 Trackpad Replacement
Tools Required:
Blackberry Curve 8520 / 8530 Take apart guide:
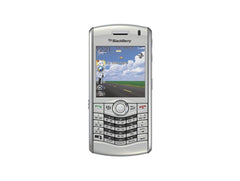
How To Determine Which LCD Version Your Blackberry Curve 8520 Is:
Blackberry Curve 8520 / 8530 LCD Screen Replacement Summary:
Using this summary in correlation with the video will insure proper instructions are given and a safe repair is made.
- The first step to disassembling the phone is to remove the back battery cover and battery as well as the sim card. You can now remove the two T6 Torx screws located behind the battery cover.
- Turn the phone over and using a safe pry tool pry off the lens cover. With the lens removed you can now use a safe pry tool to release the clips along the sides of the phone to release the front bezel.
- You need to release the clips of the side from top and the bottom of the phone. Once you have removed the front bezel use a T6 Screwdriver to remove the two screws at the top of the phone.
- Use a safe pry tool to release the LCD screen pop connector. Release the clips of the side of the LCD screen using a safe pry tool, there is one each side.
- Once you have released one, you gently lift out the LCD screen and you can now replace the screen and reassemble your phone.
Replacing Blackberry Curve 8520 Speakers
Tools Required:
Optional Tools:
- Small Flathead Screwdriver
- Adhesive Strips - May be required for certain speakers.
Blackberry Curve 8520 Earpiece / Buzzer & Loud Ringer Speaker Replacement Guide:
Note: Some speakers may need to be raised, using adhesive, to give full contact with the connectors. You may attempt to re-use the previous adhesive from an old speaker, but fresh adhesive is recommended.
Blackberry Curve 8520 Disassembly Guide:
Replacing a Blackberry Curve 8520 Trackpad
This video guide shows how to take apart and disassemble the Blackberry Curve 8520 cell phone to replace and repair the trackpad quickly and safely. This guide has been designed and put together by the Repairs Universe team.
This guide will help you to install the following Blackberry Curve 8520 replacement parts:
Tools Required:
Blackberry Curve 8520 Trackpad replacement take apart repair guide:
Blackberry Curve 8520 Trackpad Replacement Summary:
Using this summary in correlation with the video will insure proper instructions are given and a safe repair is made.
- The first step to disassembling the phone is to remove the back battery cover and battery as well as the sim card and memory card. Remove the screw using the T6 Torx screwdriver.
- Once the screws has been removed slide the metal frame to the right then pick out the metal plate using the safe pry tool. Release the pop connection using a safe pry tool. Once release you can remove the track pad from the phone.
- To install the new track pad to the phone simply inside in place. Gently press down the pop connector until it clicks in place using a safe pry tool.
- Put the metal cover back put it in place in his form slide to the left. Once in place attach again using a T6 screw which you removed earlier
- Your new track pad is now ready to use.
Repairs Universe's guides are for informational purposes only. Please click here for details.
Learn about restrictions on reproduction and re-use of Repairs Universe's repair/take-apart/installation guides, and about creating hyperlinks to our guides.

