Blackberry Z10 Repair Guide
June 4, 2018 | 0 Comments
Repair a damaged screen or other internal components on your BlackBerry Z10 using this detailed take apart guide provided by RepairsUniverse. This guide will walk you through each step of disassembling your BlackBerry Z10 and explain how to replace damaged parts.
This guide will help you to install the following BlackBerry Z10 part(s):
Tools Required:
- T4 Torx Screwdriver
- Pentalobe Screwdriver
- Adhesive Strips (for screen repairs)
- Hot Air Gun / Hair Dryer
BlackBerry Z10 Repair Guide:
- Begin by removing the back cover. You can do this by using the pry tool and simply pull off the back cover from the bottom of the device
- Remove the battery, sim card, and memory card.
- There are nine T4 screws that need to be removed on the back housing of the device
- Using the pentalobe screwdriver you will need to remove 2 screws located on the very left side edge
- Once you have removed all of the screws you can then release 4 clips on each corner of the back housing in order to remove the back cover near the charging port.
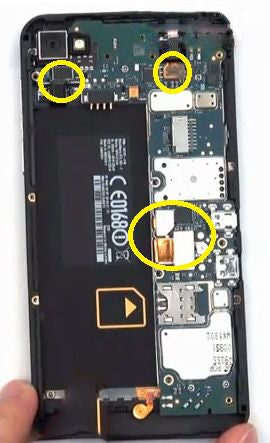
- Next you will need to disconnect 5 connections total, in order to remove the mother board. You have 3 of these connections located at the center of the motherboard. Note- the larger connection is over lapping one connection. At the top on either side there are 2 more connections. Now you can remove the motherboard
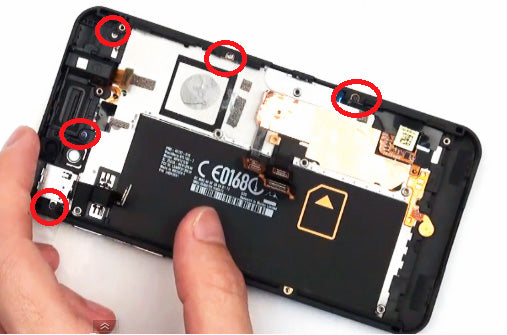
- Using your pentalobe screwdriver you will need to remove 5 screws located in the image below.
- Remove the rubber covering the vibrating motor at the top right side of the device, on top of where the battery would go.
- Right above the camera lens you will need to remove the black circular noise blocking microphone.
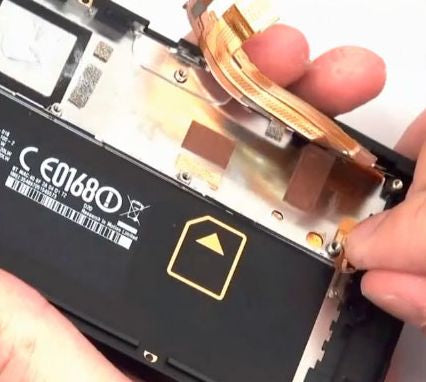
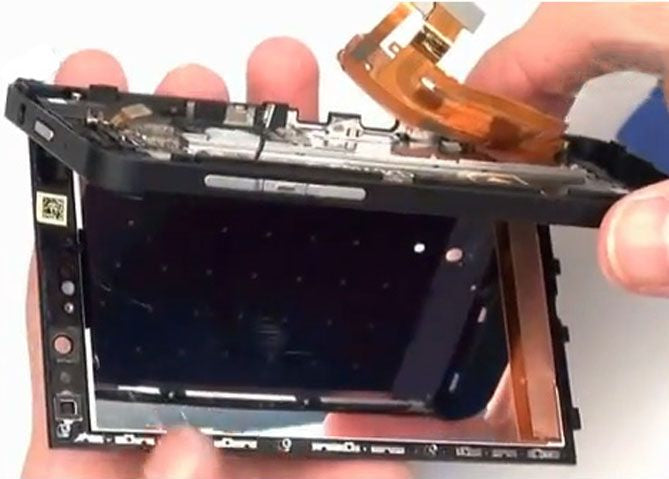
- Lift up the orange tape holding the flex cables outward carefully
- Next lift up and remove the circular orange flex cable at the bottom of the device, this is the microphone
- Using your safe open pry tool you can begin separating the screen assembly from the device. Start on the sides of the device and work your way around slowly separating the screen assembly. Make sure not to pull the screen assembly out without removing the Flex ribbon cables.
- When you begin gently feeding the cables through the slot in the front housing, you will need to remove a small thread of black adhesive covering the cables directly next to the slot.
- Finish feeding the cables through and you then you are ready to replace the LCD and touch screen digitizer.
Notice:
Repairs Universe's guides are for informational purposes only. Please click here for details.
leave a comment
Your email address will not be published. Required fields are marked *