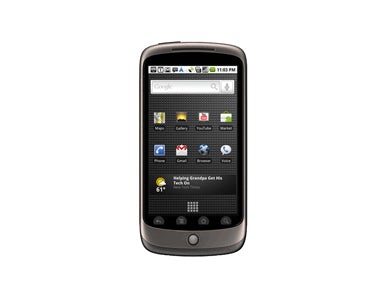
Nexus One Screen / Ear Speaker Replacement Repair Guide
June 4, 2018 | 0 Comments

In this video we will take you through the steps on how to dissemble your Google Nexus One smartphone safely and easily so you can install replacement parts and repair your phone. This take apart repair video guide has been put together by the Repairs Universe team and will walk you through the steps required to replace the glass touch screen digitizer, the display LCD, earpiece speaker, and motherboard flex ribbon cable..
This guide will help you to install the following Google Nexus One parts:
- Google Nexus One LCD Screen Replacement
- Google Nexus One Touch Screen Digitizer Replacement
- Google Nexus One Motherboard Flex Ribbon Cable Replacement
- Google Nexus One Earpiece Speaker Replacement
Tools Required:
Google Nexus One Take Apart / Screen Replacement Guide:
Reverse the instructions above to reassemble your phone.
Applying Adhesive to the Touch Screen Digitizer:
Google Nexus One Earpiece Speaker Replacement:
Google Nexus One Writen Take Apart Guide:
- In order to disassemble a Google Nexus One phone first of all you need to remove the battery cover (rear back cover) of the phone.
- After the removal of the battery cover you should be able to see three screws - a Phillips screw at the left-middle side and two T5 screws at the top-left corner and top-right corner. Remove all three screws using the respective screwdrivers. Remember to note the positions of screws for the reassembly.
- After removing the three screws, use a pry tool to pry off the frame (battery tray).
- Now pry the bottom cover off using the pry tool again, this would be slightly difficult as it is held tighter.
- There will be two more T5 screws to be removed after the bottom cover comes off. These will be located at bottom left and bottom right corners of the phone. Remove both of these screws using the Torx 5 Screwdriver.
- Use the pry tool again to pry the bottom frame off.
- You will now have to remove two more Phillips screws using the small Phillips screw driver. These screws will be positioned at bottom-left and top-left corners of the phone.
- Undo the three flex connections which can be found at the lower-right half of the phone. You can use the pry tool to achieve this.
- Undo the coaxial cable connection which will be located at the upper-left side of the phone.
- After you have undone the flex connections and the coaxial cable, you can pry the top board off to unclip it.
- Remove the volume button.
- Unhook the main board from the peg and then push it up and out of the phone. Note, the rubber microphone channel might fall out. Put it aside and don't lose it.
- Upon removal of the main board you will find three more screws almost inline at the bottom end of the phone which are required to be removed to free the trackball assembly beneath the plate.
- After removing the three screws lift this plate to free the trackball assembly (this is similar to that of Blackberry trackball).
- Loosen the tape holding the LCD in place.
- Free the flex connector from the LCD. It?s held on with tape.
- Now the LCD can come out. Carefully unclip it using the pry tool (you can use the pry tool for this).
Your Nexus one is now fully disassembled. Reverse the instructions above to reassemble your phone.
Notice:
Repairs Universe's guides are for informational purposes only. Please click here for details.
Learn about restrictions on reproduction and re-use of Repairs Universe's repair/take-apart/installation guides, and about creating hyperlinks to our guides.

