Motorola Xoom Video Repair Guide
June 4, 2018 | 0 Comments
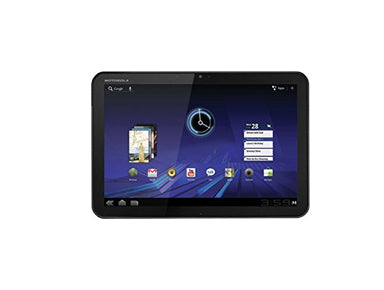
Repair a damaged screen or other internal parts on your Motorola Xoom using this detailed take apart guide provided by the RepairsUniverse team. We take you through all the steps required to quickly and safely repair a damaged touch screen and replace it with a brand new digitizer. Following this guide will insure a secure repair is made on your Motorola tablet.
This guide will help you to install the following Motorola Xoom parts:
Tools Required:
- Safe Open Pry Tool
- Torx T5 Screwdriver
- Torx T6 Screwdriver
- Adhesive Strips (for touch screen digitizer)
Motorola Xoom take apart guide:
We recommend fully watching the video before starting the repair, and then pausing / rewinding and reviewing when needed.
Applying Adhesive to the Touch Screen Digitizer:
Simply reverse the instructions above to reassemble your Motorola Xoom.
Motorola Xoom Written Take apart guide:
- Begin by removing the two (2) T5 screws at the bottom of the unit in your data charging sync ports. Remove the plastic cover over the ports.
- Slide the bottom portion of the back cover down. The bottom portion of the back cover uses slides with small clips to hold unto on unit. Uses small screwdriver or similar objects to push the clips and completely remove the back cover.
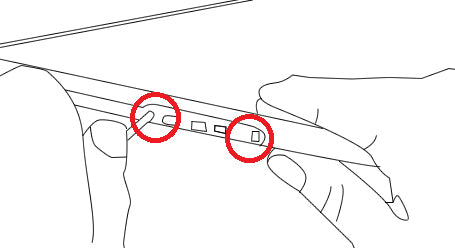
Figure 1
- Next will remove the top portion of the back cover. There two (2) T5 screws holding this on as well as the small connectors from the power button.
- There thirteen (13) T7 screws located in red on Figure 2 and two (2) T5 screws located in yellow in Figure 2holding the battery. Carefully pull out the battery and disconnect the small cable connecting it to the motherboard.
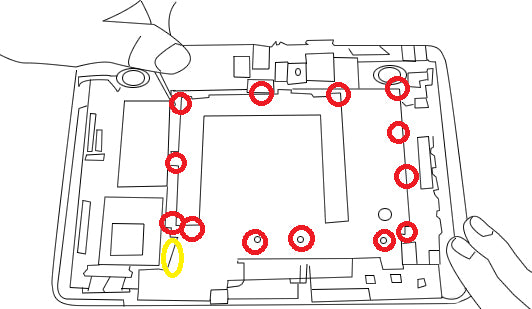
Figure 2
- Use your safe open pry tool to carefully remove the two (2) small speakers located in green on Figure 3. Carefully remove the camera it is sitting in small plastic frame that you have to remove first then remove the ribbon cable and pull the camera out, located in yellow..
- Disconnect the two connectors at the bottom of the unit and one on the either side at the top, as located in orange on Figure 3.
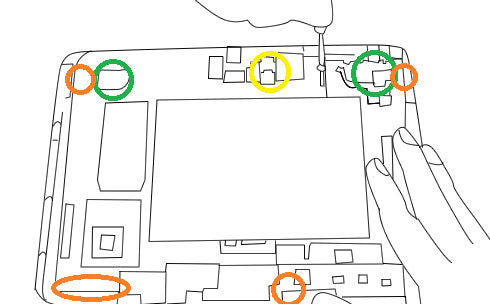
Figure 3
- There are ten (10) screws that hold the motherboard into the unit, two of this screws are gold and have a special bracket they're along the top. Carefully remove the motherboard.
- There are seventeen (17) T7 screws holding the screen frame together. Carefully remove the touch panel from the rest of the screen.
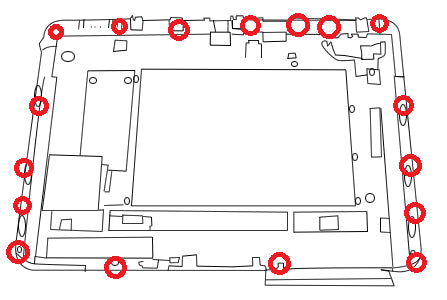
Figure 4
- If repairing a damaged touch screen digitizer: Heat the outside of the screen to soften the adhesive holding the screen in place. Use a heat gun or hair dryer on a medium setting for around 1 minute, working around the edges in quick movements. Now, use a safe open pry tool to pry in between the touch screen digitizer and frame, being careful of the flex cable.
- To repair the LCD screen: remove the thirteen (13) T5 screws holding the LCD into the screen frame, located in Figure 5. Carefully lift the LCD out of the frame.
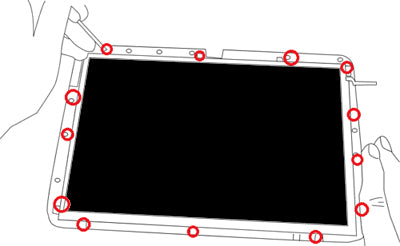
Figure 5
Now you will be able to replace any parts on your Motorola Xoom. Simply replace the damaged parts with the new ones and reverse the order to put your phone back together again.
Notice:
Repairs Universe's guides are for informational purposes only. Please click here for details.
Learn about restrictions on reproduction and re-use of Repairs Universe's repair/take-apart/installation guides, and about creating hyperlinks to our guides.