HTC Dash 3G / HTC Snap Take Apart Repair Guide
June 4, 2018 | 0 Comments
This following take apart guide shows the HTC Dash 3G / HTC Snap dissembled by the Repairs Universe team. By following this guide you should be able to easily and safely open your cell phone and repair or replace any damaged parts.
This guide will help you to install the following HTC Dash 3G / HTC Snap part(s):
- HTC Dash 3G Snap LCD Screen Replacement Display
Tools Required:
HTC Dash 3G / HTC Snap Take apart guide:
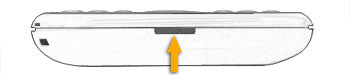
Figure 1
- In order to disassemble HTC Dash 3G phone, first of all you need to remove the back cover (battery cover) of the phone. This can be done by pulling the tab at the bottom of the phone (indicated by the arrow in figure 1) and the battery cover will come off. Then remove the battery from the phone.
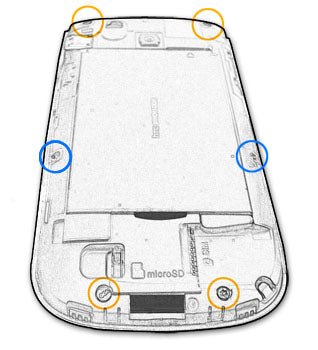
Figure 2
- Now you will need to remove the back frame (battery compartment) from the unit. In order to do that remove the six screws at the locations indicated in the figure 2. Note that four of these screws highlighted in figure in orange color are T5 screws and will require a T5 Torx screwdriver for the removal while those highlighted in blue color are Phillips screws and you will have to unscrew these with a small Phillips screwdriver.
- You can now pry up the back frame using the safe open pry tool. Note that you will need to unclip 3 clips at the top and two each at the bottom and at both sides of the unit to release the frame. Insert the safe open pry tool between the edges (frame and the body of phone) to unclip these. Also note that while prying up the clips, a black rubber piece that covers the USB port will also come out loose. Put it aside because you will need it while reassembling the phone. Once you have unclipped all the clips the back cover will be released.
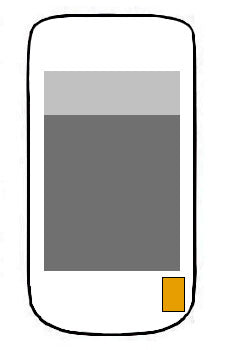
Figure 3
- The next step is to disconnect a connector using safe open pry tool at the location shown in the figure 3.
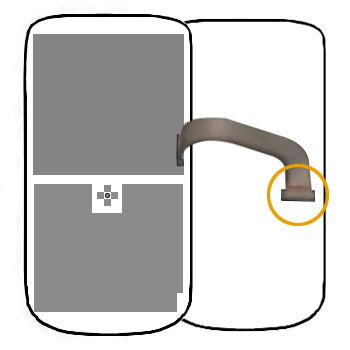
Figure 4
- After removing the connector, you can gently flip the motherboard open from one side as shown in the figure 4. Be careful because the motherboard will still be connected with a unit through a ribbon cable and you have to disconnect this connector before the motherboard can be released. Detach the connector lock using a safe open pry tool and then pull out the cable. This will release the motherboard from the unit.
- You can now take out the LCD screen by gently pulling on the ribbon cable that you have just disconnected from the motherboard. Be careful because the LCD screen may be held in place with an adhesive.
Your HTC Dash 3G / HTC Snap is now disassembled and you can replace the damaged part(s) with new ones. Reverse the instructions above to reassemble your phone.
Notice:
Repairs Universe's guides are for informational purposes only. Please click here for details.
Learn about restrictions on reproduction and re-use of Repairs Universe's repair/take-apart/installation guides, and about creating hyperlinks to our guides.