iPod Nano 7G Written Repair Guide
June 4, 2018 | 0 Comments

View the downloadable version of our how to fix your iPod Nano 7G screen guide.
This written repair guide is for the iPod Nano 7th Generation. If you have damaged the screen on your iPod Nano we suggest following the steps in this guide to safely and quickly perform a screen replacement or other internal repairs. This guide has been compiled by the Repairs Universe team.
This guide will help you to install the following iPod Nano 7G part(s):
Tools Required:
- Safe Open Pry Tool
- Small Phillips Screwdriver
- Adhesive Strips (For touch screen repair)
iPod Nano 7G Take apart repair guide:
- The first step will be to remove the lower back cover. Use a heat gun or hair dryer for 15 seconds to warm the adhesive holding it in place. Now use a pry tool while applying downward pressure to release the cover.
- With the cover removed we can move the flex cable slightly over to expose a small Phillips screw attached to another plastic cover. Remove this cover and two more small Phillips screws will be revealed.
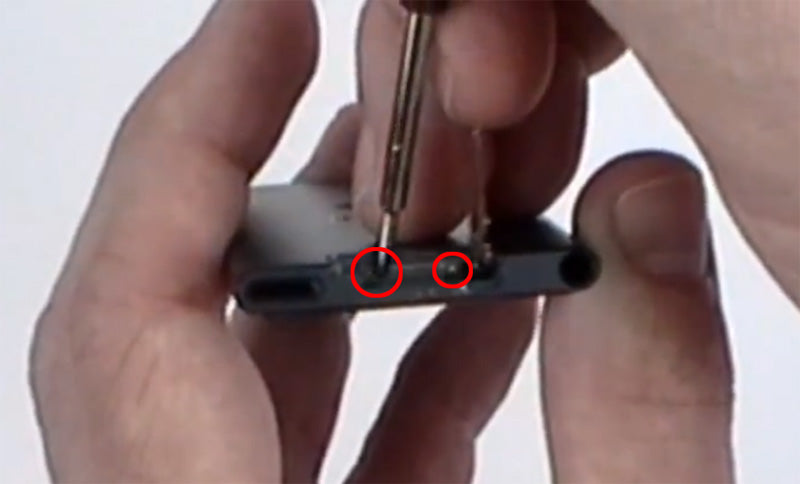
Figure 1
- Now use a heat gun or hair dryer to warm the outside edges of the screen assembly and use a pry tool to gently begin lifting the assembly out of the casing. You can press through the inside and apply pressure to the home button to lift the screen slightly, allowing you to get a grip on the screen.
- Once the touch screen is slightly lifted, you will need to begin working up the metal mid frame with LCD screen. This mid frame is fit snug, so be patient and take your time when working this up.
- When the lower part of the mid frame is released, you will be able to pull the screen up slightly, then out, being careful as the battery is attached to the back side of the mid frame.
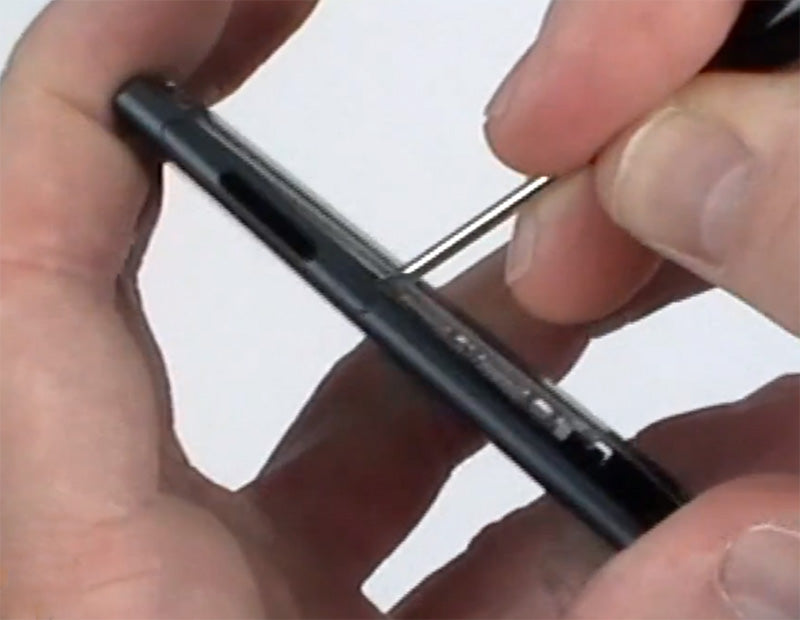
Figure 2
- Use a pry tool to gently release the battery, as it is just held in place with adhesive.
- We can now release the two screen connectors located on the motherboard. These are pop connections, simply use a pry tool to gently lift the cable up.
- The screen assembly can now be removed from the rest of the device.

Figure 3
- The next step will be to separate the touch screen from the LCD & midframe. Simply use a pry tool to gently lift the touch screen away from the adhesive. Careful near the bottom as the home button area does have a large amount of adhesive.
- With the touch screen separated, feed its flex cable through the slot in the mid frame housing. The touch screen can now be replaced.
- To remove the LCD screen we will need to remove six small Phillips screws located on the side edges of the mid frame, three on each side.
- Once these are released we can gently flip the LCD screen around, being careful as it is still held in place by the flex cable with adhesive.
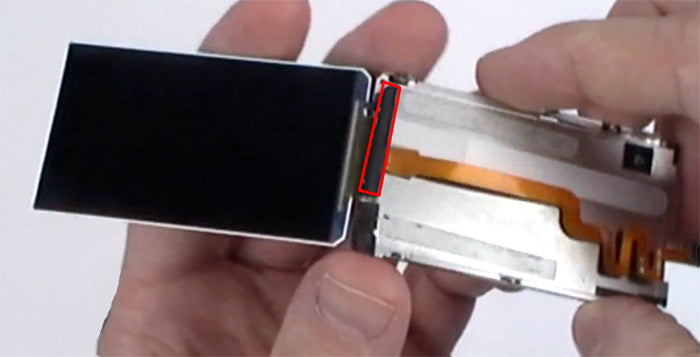
Figure 4
- Use a pry tool to lift the small plastic cover over the flex and then carefully peel the flex away from the midframe. You can now replace your LCD screen.
You can replace the damaged screen(s) with new ones. Reverse the instructions above to reassemble your iPod.
Applying Adhesive to the Touch Screen Digitizer:
Notice:
Repairs Universe's guides are for informational purposes only. Please click here for details.
Learn about restrictions on reproduction and re-use of Repairs Universe's repair/take-apart/installation guides, and about creating hyperlinks to our guides.