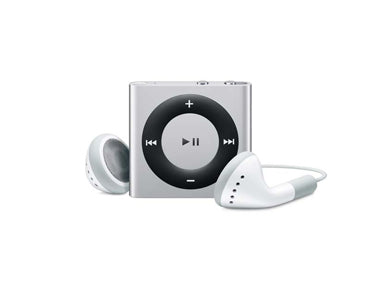
iPod Shuffle 4th Generation Take Apart Repair Guide
June 4, 2018 | 0 Comments

This guide will help you take apart the Shuffle 4th Generation which unlike its predecessor is not that easy. Even though they have made this one hard to take apart by following our step by step method you should be able to replace old or broken parts fairly easily. Once you have replaced the parts you want, the guide can be used in reverse to put everything back together again.
This guide should help you replace the following parts:
- iPod Shuffle 4th Generation Battery Replacement
- iPod Shuffle 4th Generation Glass Touch Screen Digitizer Replacement
Tools:
- Small Phillips Screwdriver
- Safe Open Pry Tool
- Heat gun or hair dryer
iPod Shuffle 4th Generation Take Apart Repair Guide:
- The first step may look very simple but its probably the most difficult. Its going to take a little while of prying with the safe open pry tool and the heat gun or hot hair dryer to get the shuffle open. However you need to ensure that you use enough heat just to melt away the adhesive but not heat the aluminum casing to the extent that it becomes hard to hold.
- Once the cover is open you will be faced with the internal of the Shuffle which include the battery and the logic board.
- The Small Phillips Screwdriver can now be used to open the logic board screw which should only take a few seconds, after which you can use the safe open pry tool to slowly lift the battery out which is held in place with light adhesive.
- After you remove the battery the next step is to remove the logic board retainer using a dental pick also known as a toothpick.
- Since the battery is soldered on to the Shuffle you will need to remove both the battery and the logic board together.
- The next step is to use the small Phillips screwdriver to remove the four screws that secure the iPod Shuffle to the control pad on the front of the device, with a gentle push the control pads and the button should pop right out.
- The control pad pops out from the front of the case without much effort. At this point your shuffle is completely disassembled.
There you have it the iPod Shuffle 4th Generation is completely disassembled. You can now replace old or faulty parts prior to putting everything back together following this guide in reverse.
Notice:
Repairs Universe's guides are for informational purposes only. Please click here for details.
Learn about restrictions on reproduction and re-use of Repairs Universe's repair/take-apart/installation guides, and about creating hyperlinks to our guides.

