LG enV Touch VX11000 Take Apart Repair Guide
June 4, 2018 | 0 Comments
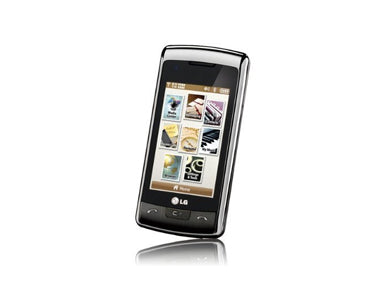
This take apart repair guide shows how to disassemble the enV Touch VX1000 cell phone quickly and safely. This guide designed by the Repairs Universe team.
Tools Required:
- Safe open pry tool
- Small Phillips Screwdriver
- Adhesive Strips (For touch screen repair)
- Hair Dryer/Heat Gun (For touch screen repair)
LG enV Touch VX11000 Screen Repair Take Apart Guide:
- In order to disassemble a LG enV Touch VX11000 phone first remove the battery.
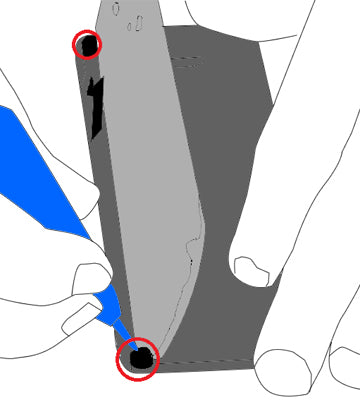
- Now begin removing five (5) screws in the back of the phone as shown in Figure 1. One screw will have a rubber screw cap. Use a safe pry tool to remove this cover to gain access to the screw.
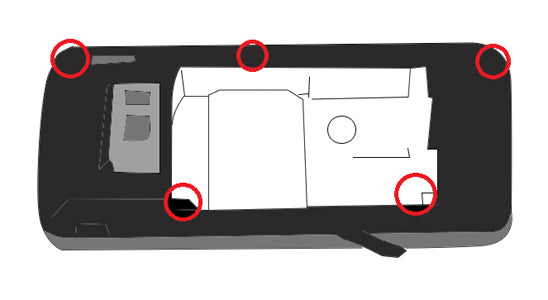
Figure 1
- Remove the screw caps covering the screws shown in Figure 2 with a safe open pry tool. Remove the two screws using small Phillip screwdriver.
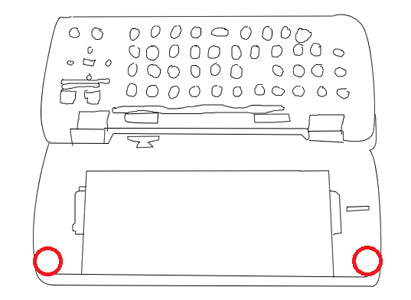
Figure 2
- Once the screws are removed you can now pry open the back housing.
- Use a safe open pry tool and run it along the plastic seam to remove the back housing from the device.
- Be cautious of the buttons that will be released when the back cover is removed. Take note as to where these strips are located and how they are seated in the case.
- There will be one connection that will need to be released, as shown in Figure 3. Remove the motherboard and the keyboard.
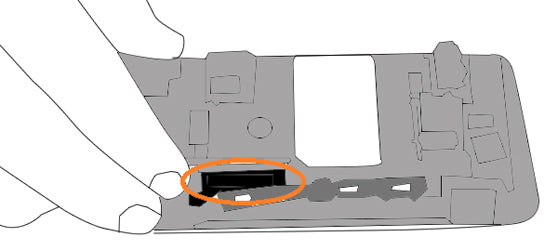
Figure 3
- Pry off the screw caps as shown in Figure 4. Once you remove the screw covers remove the two (2) screws using small Phillips screwdriver.
- Use a safe open pry tool to pry the front cover from the device. This will leave you with three sections of the phone still attached via the slide flex cable: the touch screen with front housing, the LCD assembly, and the keyboard housing. Note that the touch screen will still be connected as shown in Figure 5.
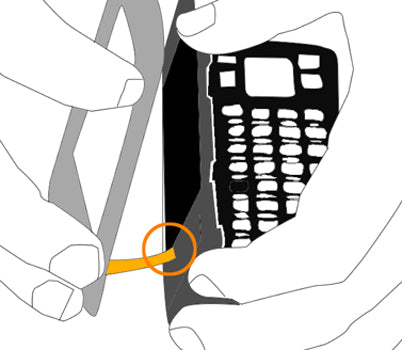
Figure 5
- Release the touch screen and front frame from the rest of the device. Use a safe open pry tool to release the back side of the connector and release the flex cable from the jaw connector.
- If replacing the LCD screen, release the LCD flex cable. Lift the LCD screen using a safe open pry tool.
- If replacing the touch screen digitizer, heat the front of the screen using a hair dryer or heat gun on medium heat to warm the adhesive and make separating the touch screen from the frame easier. Use quick movements for about 30-45 seconds. Reheat if necessary.
Simply replace the damaged parts with the new ones and reverse the order to put your phone back together again.
Notice:
Repairs Universe's guides are for informational purposes only. Please click here for details.
Learn about restrictions on reproduction and re-use of Repairs Universe's repair/take-apart/installation guides, and about creating hyper links to our guides.
leave a comment
Your email address will not be published. Required fields are marked *