Samsung Galaxy S II Take Apart Repair Guide
June 4, 2018 | 0 Comments

View the downloadable version of our how to fix your Samsung Galaxy SII screen guide.
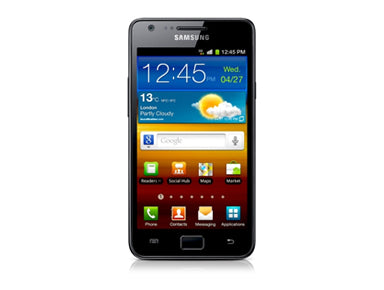
In this take apart guide we show how to disassemble the Samsung Galaxy S II cell phone quickly and safely. Following this step by step guide will enable you to install replacement parts to repair your Samsung Galaxy S II phone. This repair guide is designed and put together by the RepairsUniverse team.
This guide will help you to install the following Samsung Galaxy S II part(s):
- Samsung Galaxy S II LCD + Touch Screen Digitizer Replacement - Black
- Samsung Galaxy S II LCD + Touch Screen Digitizer Replacement - White
- Other Samsung Galaxy S II Parts
Tools Required:
- Safe Open Pry Tool
- Small Phillips Screwdriver
- Hot Air Gun / Hair Dryer (Suggested)
Samsung Galaxy S II LCD and Touch Screen Digitizer Repair Guide:
- In order to disassemble a Samsung Galaxy S II phone first remove the battery and all the cards from the phone.
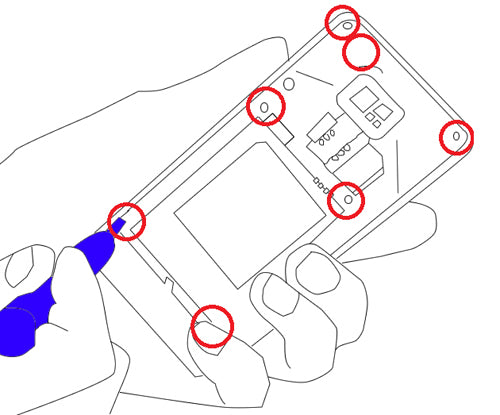
- Use the Phillips screwdriver to remove the seven (7) Screws under the battery cover, as shown in Figure 1.

Figure 1
- Now that all the screws are removed. Use a safe open pry tool around the outer edges of the back plate to release the clips holding it in place.
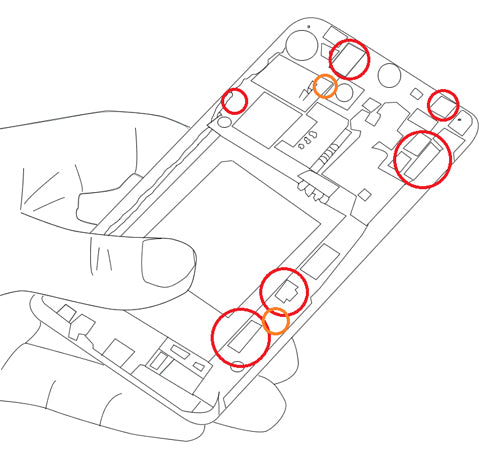
- With the backplate removed, you now have access to the motherboard. You need to disconnect 5 flex cables and the antenna wire as located in Figure 2.
- Then the two Phillips screws holding the mainboard in place.
- The side button contacts are stuck to the frame, you need to separate them before removing the board. Be careful not to tear the cables as they are very delicate. These are located in Green on Figure 2.

Figure 2
Notice:
Repairs Universe's guides are for informational purposes only. Please click here for details.
Learn about restrictions on reproduction and re-use of Repairs Universe's repair/take-apart/installation guides, and about creating hyperlinks to our guides.

