HTC Touch HD Take Apart Repair Guide
June 4, 2018 | 0 Comments
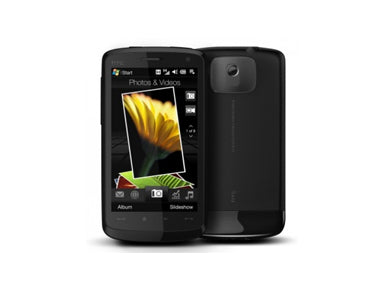
In this take apart repair guide below we show how to disassemble the HTC Touch HD cell phone quickly and safely allowing you to replace damaged or worn parts with ease. This guide designed by the Repairs Universe team.
This guide will help you to install the following HTC Touch HD part(s):
- HTC Touch HD LCD Screen Replacement
Tools Required:
- Safe Open Pry Tool
- Small Phillips Screwdriver
- T5 Torx Screwdriver
- Helpful - Hot Air Gun (alternative - Hair dryer)
HTC Touch HD Take apart guide:
- First of all take the stylus out of the phone. Then remove the battery cover of the phone and take out the battery, SIM card and any SD cards.
- Now you need to unscrew one Phillips screw using a small Phillips screwdriver.
- Remove the antenna cover from the unit using safe open pry tool. Insert the pry tool between the housing of the phone and the antenna cover and gently pry it off from the phone.
- With the antenna cover removed, you will now need to unscrew six T5 screws using a T5 Torx screwdriver.
- Once you have removed the T5 screws mentioned in the above step, you can now separate the back-frame (battery compartment) from the unit. Insert safe open pry tool between the bezel and the housing and pry up the back-frame to release the hooks.
- In this step you will need to remove one screw, two coaxial cables and one ribbon cable from their respective connectors. First remove the two coaxial cables, carefully pry these up one by one to unplug. Then remove the ribbon cable from its connector located at the lower middle portion of the unit. Note that you will have to remove the black Mylar tape before you can access and disconnect this ribbon cable. Now remove a Phillips screw, using a small Phillips screwdriver.
- Now carefully loosen up and peel off the Volume (Up and Down) keys from the side of the unit. Note that this switch is fixed with a small circuit board and you need to be careful while peeling it away from the housing to avoid incurring any damage to the circuit board. Then peel off the large brown ribbon from the unit which is held in place with a double-sided tape and is connected to a small PCB (circuit board). When you peel off the ribbon from the body of the phone this small PCB (circuit board) will also come out. You may have to peel away the On/Off button in the same way as you have done with the volume button when you remove the circuit board.
- Remove one more Phillips screw using a small Phillips screwdriver.
- Now you need to lever up the vibrating motor from its position until it is loose.
- Now gently lift up the main board but be careful as you still have to remove a ribbon cable from the connector below. Lift up the cable to unplug it from its connector..
- The last step is to remove the LCD screen from the unit, which is held in place with a double-sided tape. In order to remove it, you will first have to apply some heat with a hot air gun or a hair dryer. Then carefully pry up the screen to release it from its housing. You can do this by inserting safe open pry tool (or a guitar pick) can be slid in and then run the safe open tool all around the edges of the screen to loosen it up and release it. Once the screen is completely released, you can take it out of the assembly.
Your HTC Touch HD is now disassembled and you can replace the damaged part(s) with new ones. Reverse the instructions above to reassemble your phone.
Notice:
Repairs Universe's guides are for informational purposes only. Please click here for details.
Learn about restrictions on reproduction and re-use of Repairs Universe's repair/take-apart/installation guides, and about creating hyperlinks to our guides.
leave a comment
Your email address will not be published. Required fields are marked *