HTC Windows Phone 8S Repair Guide
June 4, 2018 | 0 Comments
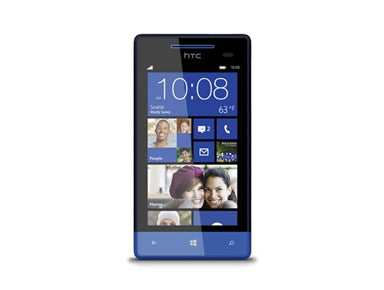
In this repair guide the helpful techs at Repairs Universe show your how to tear down the HTC Windows Phone 8S in order to perform repairs such as replacing a cracked glass digitizer or broken LCD display screen. This written repair guide will assist you when performing your DIY Windows Phone 8S repair. While fixing your device you can use this guide as a reference or follow alongside our video tutorial as well.
This repair guide will help you install the following Windows Phone 8S parts:
- Windows Phone 8S Touch Screen Digitizer Replacement
- Windows Phone 8S LCD Screen Replacement
- Windows Phone 8S LCD + Touch Screen Assembly
Recommended Repair Tools:
- Small Phillips Screwdriver
- T5 Torx Screwdriver
- Adhesive Strips
- Safe Open Pry Tool
- Spudger Opening Tool
- Heat Gun or Blow dryer
HTC Windows Phone 8S Screen Repair Guide:
How to fix a Windows Phone 8S (Step-by-Step Tutorial) :
- First you will want to make sure your device is fully powered off.
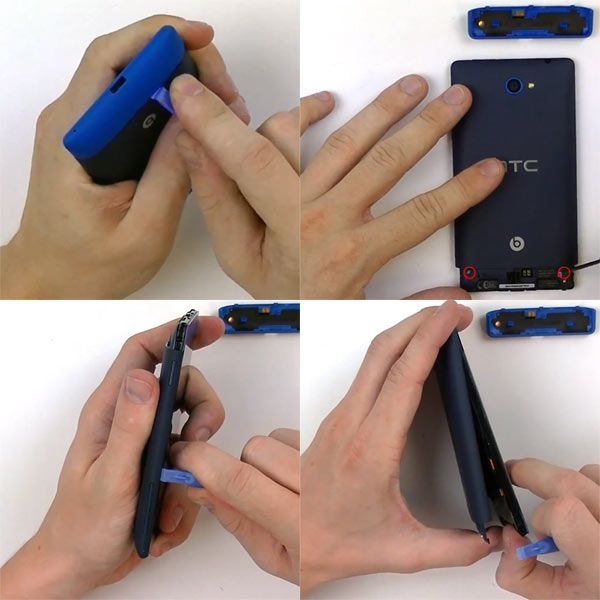
- Next you will need to take your safe open pry tool and remove the bottom back cover. At this point you can remove your sim card and micro SD card.
- With this cover removed take your Torx T5 and remove the two (2) screws circled in the figure below
- With these screws removed you will then need to take your safe open pry tool and pry off the back housing by releasing it from the clips holding it in place. (Be careful not to damaged any of these clips or insert your pry tool too deep where you could potentially damage any components on the motherboard.
See figure below for screw locations other reference points.
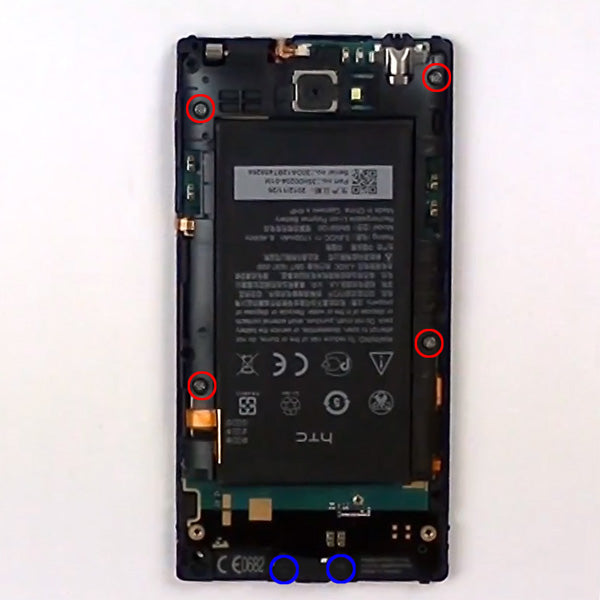
- With the back housing removed you can now take your Small Phillips Screwdriver and remove the six (6) screws circled below.
- Note: The screws circled in BLUE are different sizes and the small black plate covering the charging port can be removed with it.
See figure below for screw locations.
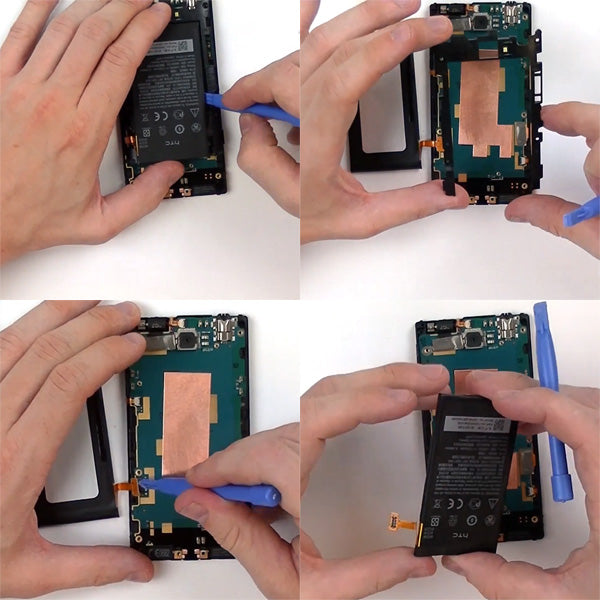
- With all these screws removed you will first want to lift up the battery and fold it over to the side of its flex cable.
- You can now remove the black housing covering its connection.
- Now taking your pry tool release the battery connection and remove it from the device.
See figure below for reference.
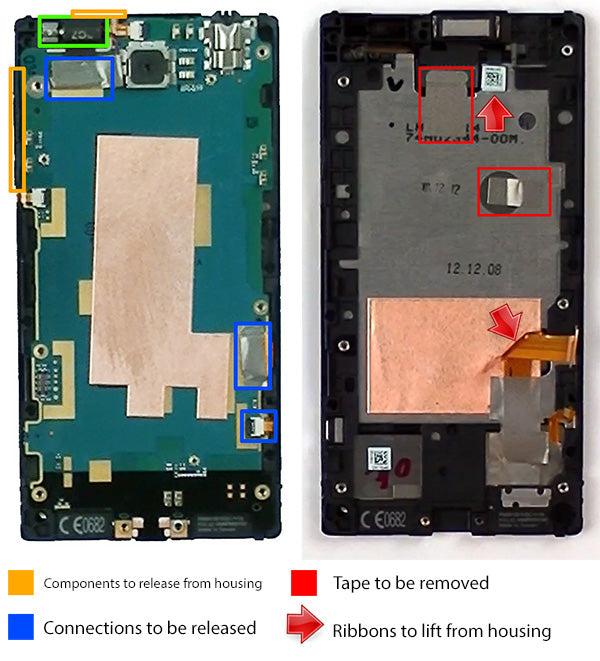
- Next taking your pry tool you will need to lift up the two components off the housing highlighted in GREEN in the figure below. Be cautious not to rip or tear their flex cables. You will only need to release them from the housing to remove the motherboard. (These components are held down with a little adhesive.)
- You will also need to remove the protective tape covering the connections highlighted in BLUE in the figure below. Use your pry tool to safely release the jaw-bone connections.
- With these components now freed from the housing you can safely pry up and lift out the motherboard. (Use proper care when handling the motherboard.)
- Next you will want to remove the protective tape covering the mid-frame and the back of the LCD screen from the slots in the housing. (Highlighted in RED in the figure below)
- After you have done that you will want to gently peel up the ribbon cable(s) pointed out with red arrows in the figure below. The arrows point in the direction to peel these cables from the housing. (Use caution not to rip or tear these flex ribbon cables.)
- You will also need to take your Spudger and gently lift up the copper colored film from the back of the LCD screen to be able to remove it from the housing without any issues.
See figure below for reference.
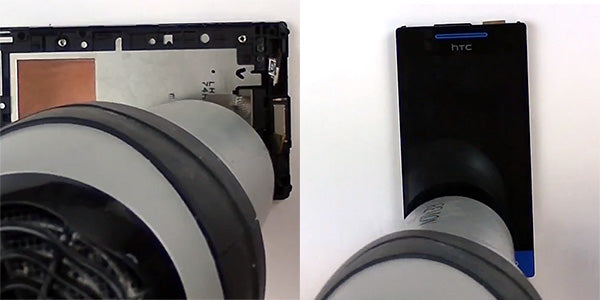
- Next you will need to take your heat source and apply an appropriate amount of heat to the front and back of the screen assembly.
- You will want to use a medium setting roughly 3-4 inches away from the device. Make sure to evenly apply heat for roughly 30-45 second intervals. (Be careful not to hover over any flex ribbon cables you may not want to damage.)
- There is adhesive holding the back of the LCD to the mid-frame. You will want to apply enough heat to the back of the mid-frame to warm and loosen this adhesive to release the screen assembly.
See figure below for reference.
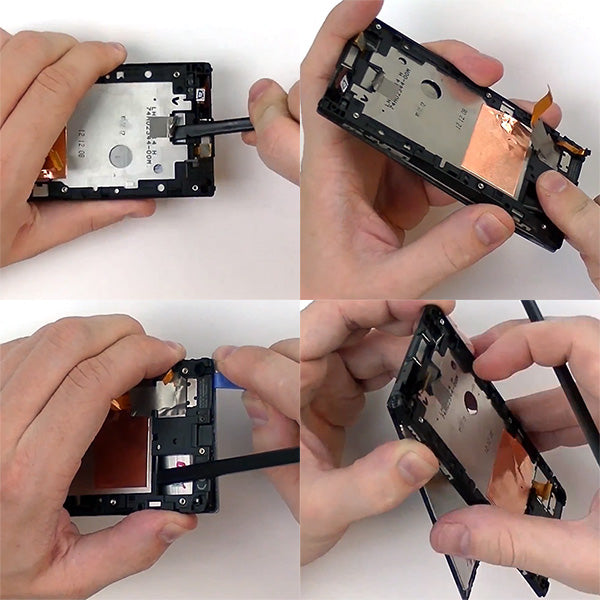
- After you have heated the screen assembly and mid-frame you will want to begin prying the LCD & Touch Screen Assembly from the back of the mid-frame.
- We found that using a Spudger is a choice tool to get between the LCD and mid-frame through the slots in the housing.
- You may find while attempting to pry the screen assembly from the frame to insert your Spudger in the slot in the housing and use a second pry tool to work around the edges of the screen for extra prying leverage.
- Once you have released enough of the adhesive you will be able to remove the screen assembly completely. Be cautious of the flex ribbon cables when sliding them through the slots in the housing.
See figure below for reference.
Notice:
Repairs Universe's guides are for informational purposes only. Please click here for details.
Learn about restrictions on reproduction and re-use of Repairs Universe's repair/take-apart/installation guides, and about creating hyperlinks to our guides
