Motorola Droid Pro Repair Guide
June 4, 2018 | 0 Comments
View the downloadable version of our how to fix your Motorola Droid Pro screen guide.
The RepairsUniverse team has put together a take apart repair guide for replacing various parts on your Motorola Droid Pro A957. In this guide, you will learn the steps to properly take your Droid Pro smartphone apart safely. Use this guide to replace a damaged or broken screen or to diagnose other problems within the internals of the phone.
This guide will help you to install the following Motorola Droid Pro A957 part(s):
- Motorola Droid Pro A957 Glass Touch Screen Digitizer Replacement
- Motorola Droid Pro A957 LCD Screen Replacement Display
Tools Required:
Motorola Droid Pro A957 LCD & Touch Screen Glass Digitizer Screen Repair Take Apart Guide:
- The first step will be to remove the battery cover and the battery from phone. Once removed, using a T5 torx screw drivers, remove the eight T5 Torx screw drivers as shown in the illustrations.

- Using a safe open tool, gently separate the back case from the phone. Use the pry tool to release the clips holding the back casing in place.
- Once you have separated the back case, you now need to remove the antenna cable as shown in the illustration. Use a safe open pry tool to lift the antenna connector up to release the cable.
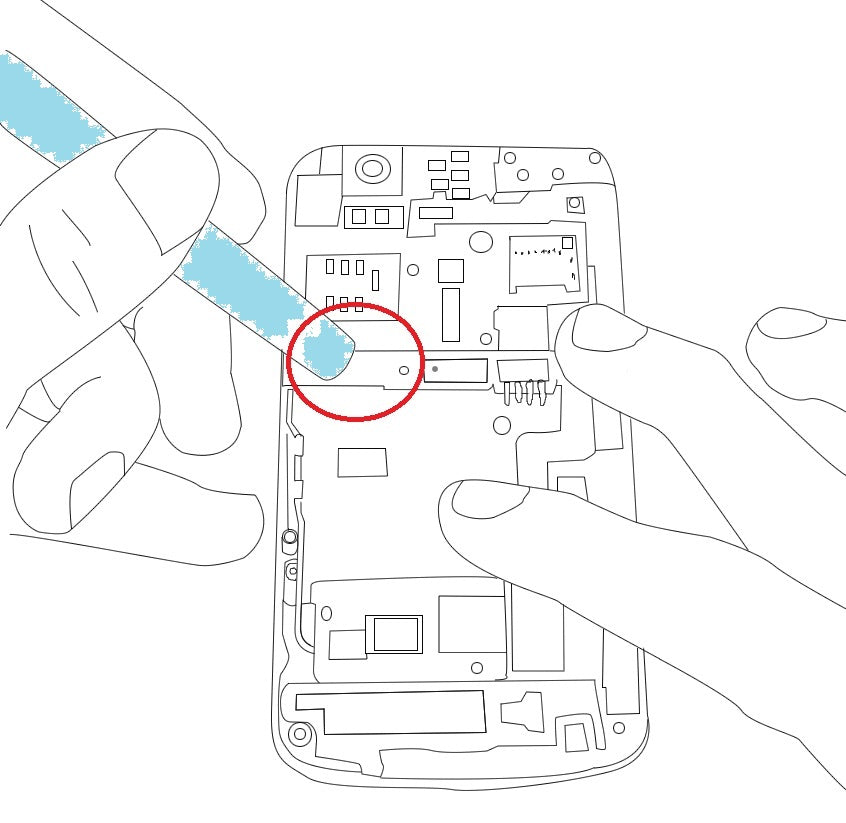
- Next, you will need to disconnect the 3 connectors using the safe open pry tool. Gently lift the pop connectors up to release the flex cables.
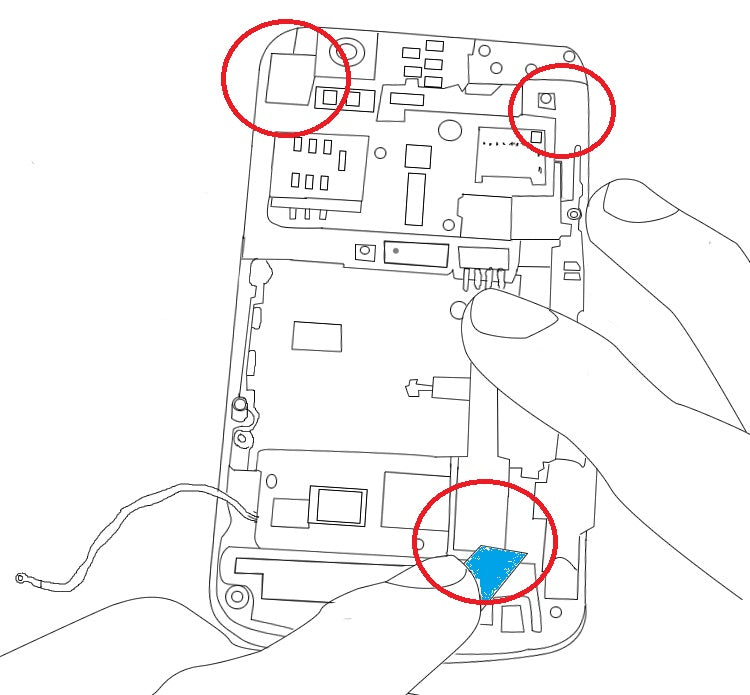
- Lift the longest connector and underneath it, there is a silver T5 Torx Screw. Remove the T5 Torx screw. After you have removed it, gently lift the motherboard from the rest of the phone.
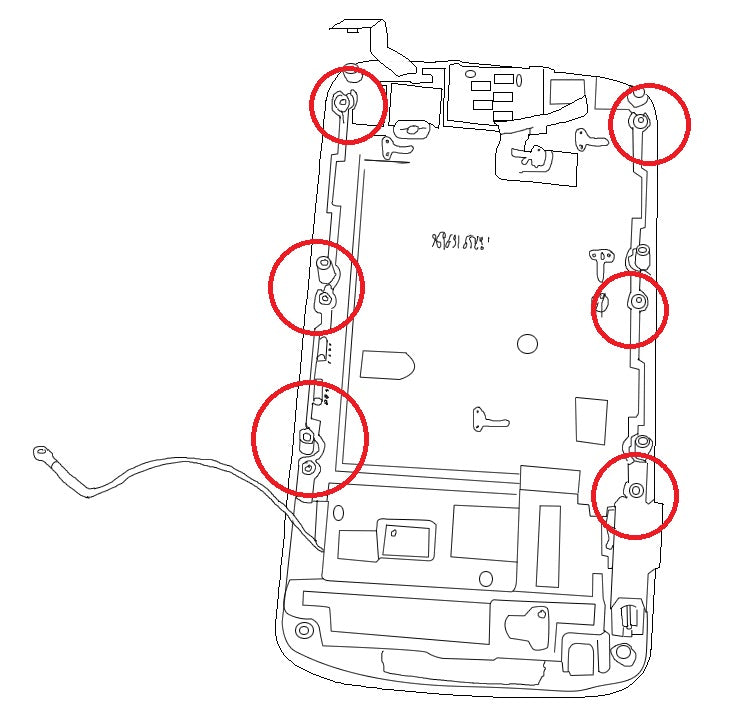
- Once the mother board has been separated, you will see 6 T3 screws holding the metal plate. Using the T3 Torx screwdriver, remove the screws and gently lift up the metal plate.
- Gently flip open the hinge of the �jaws� or �alligator� ribbon connector below the LCD in the center of the assembly and pull the LCD out. Once the LCD is out, you can now easily push button from the frame of the phone.
- You can now replace the touch screen glass digitizer or the LCD screen and reassemble your Droid Pro.
The Motorola Droid Pro A957 is now disassembled and you can replace the damaged part(s) with new ones. Reverse the instructions above to reassemble your phone.
Applying Adhesive to the Touch Screen Digitizer:
Notice:
Repairs Universe's guides are for informational purposes only. Please click here for details.
Learn about restrictions on reproduction and re-use of Repairs Universe's repair/take-apart/installation guides, and about creating hyperlinks to our guides.
Author: Curt Halford